15 Ways how to Style Short Hair guide Easy Step by Step
The right texture, part, or finishing detail can turn a basic cut into a Pinterest-worthy look.
If you are searching for a simple how to style short hair guide, you are in the right place.
This collection brings together 15 fresh ways to make short hair feel polished, playful, textured, or effortlessly chic. You’ll find ideas for sleek finishes, soft waves, lifted crowns, defined curls, modern fringes, and editorial textures that can work for different hair types and occasions. The goal is not complicated styling or endless products. It is learning how to use your haircut, natural texture, and a few practical techniques to create more variety. In my experience, short hair becomes much easier to manage once you understand where to add volume and where to keep the shape controlled. Save these ideas for your next styling day and discover a look that feels completely yours.
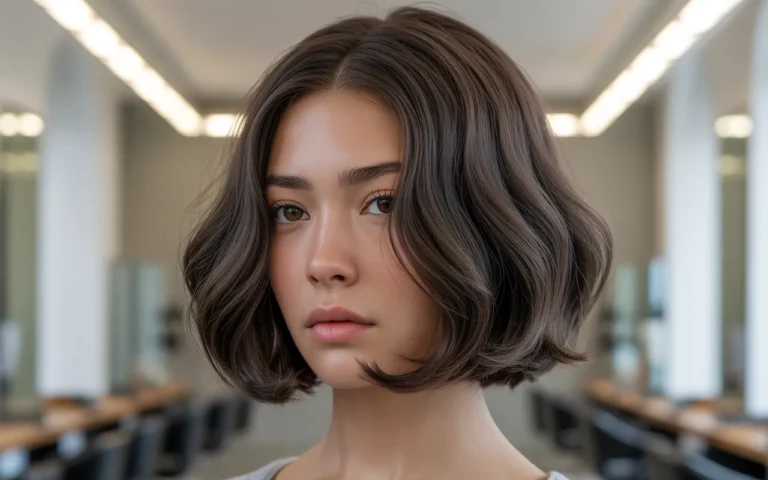
Glass Edge Bob
- Creates a mirror-like finish on blunt short lengths.
- Center part emphasizes clean symmetry and jawline structure.
- Best for straight or easily smoothed hair.
- A paddle brush keeps the surface sleek during drying.
- Minimal serum adds shine without hiding the haircut.
- Ideal for work, dinners, portraits, and polished events.
This how to style short hair guide makes a sleek glassy bob feel instantly polished. Start with clean, towel dried hair and smooth a lightweight heat protectant from roots to ends. Create a precise center part, then blow dry in narrow sections using a paddle brush. Keep the airflow downward to encourage a flat, reflective finish. Once dry, lightly pass a flat iron through the lengths, focusing on clean ends rather than repeated heat. In my experience, this technique makes even a simple cut feel editorial and expensive. Tuck both sides behind the ears for a sharper silhouette. It also photographs beautifully outdoors.
The beauty of this finish is its controlled shape, which makes styling feel almost architectural. Use a tiny amount of shine serum only over the last few inches because excess product can flatten short layers. If your hair has natural bends, straighten the underneath sections first and polish the visible surface afterward. A clean neckline helps the bob look deliberate, especially when the cut is freshly trimmed. This style suits office mornings, dinner plans, and minimalist evening outfits equally well. For next day hair, brush through the ends, add a little dry texture spray underneath, and quickly smooth areas that need attention. Easily.
Ribboned Pixie
- Separated fringe pieces create delicate movement.
- The crown stays airy instead of bulky.
- Works well on fine to medium short hair.
- A matte cream gives flexible piece definition.
- Changing the fringe direction refreshes the look quickly.
- Pairs naturally with visible earrings and open necklines.
A ribboned pixie brings delicate movement to a short cut without making it look overly styled. Work a pea sized amount of matte cream through damp hair, concentrating near the crown and fringe. Blow dry with your fingers, lifting selected sections while directing the front diagonally across the forehead. Twist two or three tiny pieces between your fingertips to create ribbon like separation. The finished texture should look airy rather than crunchy. I’ve seen this approach work especially well when a pixie needs softness around the face. It feels playful for daytime, yet refined enough for portraits or brunch. Often.
Personalize the shape by changing the direction of the fringe instead of rebuilding the whole style. A deeper sweep creates a dramatic profile, while a lighter diagonal part feels casual and youthful. Fine hair benefits from a volumizing mousse underneath the cream, whereas dense hair may need a stronger styling paste near the sides. Avoid coating every strand because the separated pieces are what create dimension. If the crown loses lift during the day, mist dry shampoo at the roots and massage gently with your fingertips. The style pairs beautifully with small earrings because the open sides keep the face visible. Beautifully.
Micro Curl Halo
- Rounded curls create a fuller visual silhouette.
- Low diffuser airflow protects the curl pattern while drying.
- Excellent for naturally curly or coily short cuts.
- Lift the crown for extra vertical balance.
- Cream defines curls while keeping the finish touchable.
- Refreshing requires water mist and fingertip reshaping.
Tiny curls can make short hair look fuller, softer, and surprisingly glamorous. Begin with damp hair and distribute a curl defining cream evenly from roots through the ends. Use a small diffuser on low airflow, gently lifting sections toward the scalp rather than brushing them outward. Once mostly dry, separate a few curls around the temples with your fingertips for a rounded halo effect. Avoid combing through the finished texture because that can turn defined curls into unnecessary frizz. In my experience, the best finish comes from patience during drying. The result feels playful and dimensional, especially for parties and date nights.
This shape works particularly well when short curls need definition without losing their natural personality. Keep the sides slightly closer to the head and encourage extra height at the crown for a flattering silhouette. If your curls are very tight, use a light gel layered beneath the cream to help individual coils hold their pattern. If they are looser, a mousse can provide airy lift instead. Refresh on following days with water mist and a tiny amount of leave in conditioner, then reshape selected curls. The style can look compact or expanded, depending on how much you lift the crown. Easily.
Polished Flip Ends
- Outward ends add playful movement to a sleek cut.
- Smooth roots keep the finish contemporary rather than retro.
- Works especially well with blunt bobs and short lobs.
- A round brush controls the direction of every flip.
- Light spray helps the bends stay flexible.
- Great for casual outfits, parties, and daytime styling.
Flipped ends give a short cut a playful Y2K inspired finish while keeping the overall shape sleek. Apply heat protectant to dry hair, then create a clean middle or slightly off center part. Use a medium round brush to dry each lower section outward, rolling the ends away from the face. Keep the crown smooth so the movement stays concentrated at the perimeter. A quick pass with a flat iron can sharpen stubborn ends, but curve them gently rather than forcing a dramatic bend. This look adds personality to blunt bobs, making ordinary weekday hair feel instantly more styled. Daily.
The trick is balancing polish with visible movement. Too much product can make the flipped ends heavy, while too little control may let them collapse quickly. A lightweight finishing spray is usually enough after the shape cools completely. For fine hair, add root mousse before blow drying to prevent the silhouette from looking flat. Thick hair may need smaller sections so every end turns consistently. I like this finish for casual denim, sleek tailoring, or simple dresses because the hair supplies the playful detail. On day two, dampen only the ends, reshape them with a round brush, and let them cool. Easily.
Textured Crown Crop
- Concentrated crown volume makes short hair look denser.
- Close sides sharpen the overall silhouette.
- Finger drying creates natural directional variation.
- Fine hair benefits from lightweight root support.
- Matte paste adds separation without greasy shine.
- Easy to revive with dry shampoo and fingertips.
A textured crown crop makes short hair feel fuller by concentrating airy volume where the head naturally curves. Start with damp roots and work in a lightweight volumizing mousse, using less product through the ends. Blow dry upward with your fingers, switching directions at the crown to prevent a flat finish. Once dry, rub a small amount of dry texture paste between your palms and pinch individual pieces into place. Keep the sides relatively close so the crown becomes the visual focus. This approach creates an effortless editorial shape that works beautifully for coffee dates and creative workplaces. Cleanly.
Texture should look separated rather than messy, so build the shape gradually. If your hair is fine, use a root lifting spray before drying and keep heavier creams away from the scalp. Coarser hair can benefit from a smoothing balm through the sides while the crown remains more tactile. A stylist can customize the crop by leaving slightly longer pieces at the top for easier movement. For maintenance, refresh the roots with dry shampoo and reshape with your hands instead of brushing the whole head. I’ve noticed this adjustment preserves the lived in finish while keeping the silhouette intentional between washes. Easily.
Mini S Wave
- A deep part gives the wave instant sophistication.
- Connected bends look more polished than separate curls.
- Best suited to straight or smoothly blow-dried textures.
- Narrow sections make the pattern easier to control.
- Flexible spray preserves movement after the hair cools.
- Especially striking with evening or minimalist styling.
A compact S wave gives short hair a polished result; this how to style short hair guide keeps the vintage reference modern. Begin with dry hair, apply heat protectant, and make a deep side part. Work in small sections with a narrow iron, creating one gentle bend toward the face and the next away from it. Do not wrap the hair into a full curl; the goal is a smooth, connected wave. Let each section cool before loosening it with your fingers. The finished pattern frames the forehead and cheekbone beautifully. It is especially striking for evening dinners, weddings, and polished portraits. With ease.
Keep the wave flatter near the roots if you prefer a modern finish, or allow slightly more height for a softer retro effect. Fine hair may hold the pattern better with a light styling mousse underneath the heat protectant. Naturally thick hair should be divided into narrow sections so the bends remain consistent. Avoid brushing aggressively after styling because that can erase the definition. Instead, use a wide tooth comb or fingertips to connect the curves. A flexible hairspray keeps the shape movable. For a fresh next day version, reshape only the front sections and leave the back relaxed. Easily.
Glossy Side Part
- The precise part creates a graphic, tailored appearance.
- Smooth surfaces emphasize the haircut’s architecture.
- Ideal for straight, relaxed, or easily straightened textures.
- Light serum creates reflective shine without stiffness.
- A spoolie can tame small hairline flyaways.
- Works beautifully with formalwear and clean accessories.
A glossy side part transforms a short cut with almost no visible complexity. Apply a smoothing leave in product to damp hair, then establish a precise side part with a fine comb. Blow dry the larger side downward and slightly backward, keeping the surface close to the head. Use a flat brush around the temples for clean control. Once dry, add a small amount of lightweight gloss serum through the lengths, avoiding the roots if they become oily quickly. The finish looks sleek, intentional, and camera ready. It suits formal dinners, professional portraits, and minimalist outfits. Beautifully.
The key is restraint because shine should emphasize the haircut rather than make it greasy. Choose a weightless serum for fine strands and a richer smoothing cream for dense or coarse textures. If flyaways appear, press them down with a clean spoolie lightly coated in finishing product. This technique keeps the hair neat without creating a stiff helmet effect. A sharp side part can also change the apparent balance of a short cut, making the cheekbone area feel more defined. For casual days, loosen the part slightly and let a few front pieces fall naturally. It refreshes quickly and easily. Easily.
Feathered Face Frame
- Outward layers soften the cheek and jaw area.
- The crown remains light so the front feels intentional.
- Small round brushes create controlled feathering.
- Suitable for straight, wavy, and lightly textured hair.
- Flexible spray keeps the pieces mobile.
- Refreshing the front alone saves styling time.
Feathered face framing gives short hair movement around the cheeks while preserving an easy, airy silhouette. Start with damp hair and apply a lightweight blow dry cream through the mid lengths and ends. Create a soft off center part, then use a small round brush to direct the front layers away from the face. Roll the brush outward and slightly upward, allowing each section to cool before releasing it. Keep the crown relatively natural so the front remains the focal point. This style feels soft and modern, especially for brunch and casual date nights. It moves beautifully. With ease.
The face framing can be adjusted according to your haircut and preferred level of drama. Shorter pieces create more visible lift near the cheekbones, while longer layers give a subtle curtain effect. Fine hair benefits from root mousse before drying, but avoid heavy oils that can collapse the feathered ends. Thick hair may need sectioning clips to keep the front layers separated during styling. Finish with a flexible mist rather than a firm spray so the pieces continue moving. I’ve found that refreshing only the front with a round brush brings back the shape faster. This saves time. Between washes.
Undone Piecey Shag
- Irregular layers create a deliberately effortless silhouette.
- Texture is concentrated around the crown and fringe.
- Works with natural bends and subtle wave patterns.
- Matte paste separates selected pieces without hardening them.
- Less precision makes daily styling faster.
- Perfect for casual, creative, and street-inspired outfits.
An undone piecey shag makes short hair look intentionally cool, textured, and full of movement. Begin with damp hair and apply a lightweight texturizing mousse from roots through the ends. Blow dry loosely with your fingers, lifting the crown and scrunching selected sections instead of smoothing everything. Once dry, use a small amount of matte paste to separate the fringe, sides, and top. Keep the pieces irregular so the finish feels effortless rather than carefully arranged. The result suits casual streetwear, concerts, creative offices, and relaxed weekends. It is a strong choice when you want personality without long styling sessions.
The shag becomes more distinctive when texture is concentrated around the crown and fringe instead of spread evenly everywhere. Fine hair can gain body from dry texture spray, while dense hair may need a smoothing cream underneath to prevent excessive bulk. Let your natural bends influence the final shape rather than forcing identical pieces. If the fringe becomes flat, twist a few sections with damp fingers and allow them to air dry. Between washes, revive the style by massaging the roots and adding paste only where separation disappears. A slightly imperfect finish is part of the appeal, so avoid overworking it. Easily.
Curved Fringe Crop
- The rounded fringe places attention around the eyes.
- Clean sides keep the graphic front balanced.
- Works with both fuller and lighter fringe densities.
- Side-to-side drying helps prevent unwanted forehead separation.
- A small balm controls individual stray pieces.
- Regular fringe trims keep the curve crisp.
A curved fringe crop creates a graphic frame around the eyes while keeping the rest of the short cut clean and wearable. Apply a lightweight styling cream to damp hair, then blow dry the fringe with a small round brush, directing both sides slightly inward. Dry the crown forward first, then lift it gently at the roots for balance. Once the fringe cools, use your fingertips to soften the center curve so it does not look rigid. This style draws attention toward the eyes and brows, making it striking for portraits, gallery nights, dinner plans, and fashion focused everyday looks. Easily.
The curve can be customized to suit your natural density and comfort level. A fuller fringe creates a stronger graphic statement, while a lighter version leaves small gaps that feel airy and contemporary. If your hair tends to separate at the forehead, dry the fringe side to side before shaping it forward. A tiny amount of styling balm can control stray pieces without creating shine. Keep the rest of the haircut less polished so the fringe remains the feature. For maintenance, trim the front regularly and refresh it with a quick blow dry rather than applying more product each morning.
Mini Pompadour Lift
- Vertical volume makes the short cut feel dramatic.
- Close sides emphasize the height at the crown.
- Root mousse provides flexible support before drying.
- Cooling the lifted section helps preserve its shape.
- Fine hair can use a small amount of root powder.
- Strong choice for evening, fashion, and celebration looks.
A mini pompadour adds dramatic height to short hair while keeping the sides controlled and sleek. Start with damp roots and apply volumizing mousse through the top section. Blow dry the hair upward and slightly backward using a small round brush, lifting from the roots before smoothing the surface. Once dry, tease only underneath the crown if extra support is needed. Lightly press the outer layer over the hidden volume and secure with flexible spray. The finished silhouette feels modern, confident, and editorial. It works particularly well for evening events, fashion gatherings, and celebrations. Easily.
Height should come from the roots rather than from excessive product, which keeps the finish lighter and more wearable. Fine hair can use a small amount of root powder after drying, while thick hair may need directional blow drying to train the crown backward. Keep the sides close to create contrast and prevent the style from becoming visually wide. I’ve noticed that cooling the lifted section completely before releasing it helps the shape last longer. For a softer interpretation, loosen the front with your fingertips and leave a few wispy pieces near the temples instead of making the structure perfectly symmetrical.
Pinched Micro Bangs
- Tiny separated points give the fringe an editorial edge.
- The rest of the crop can stay softly textured.
- Light balm prevents the small pieces from looking greasy.
- Works especially well with confident short cuts.
- Slightly longer temples can soften the transition.
- The fringe takes only minutes to refresh.
Pinched micro bangs bring a playful editorial edge to short hair by making the fringe the main visual detail. Start with damp bangs and apply a tiny amount of styling balm. Blow dry them forward using your fingers, then pinch small sections between your fingertips to create separated points. Keep the rest of the haircut softly textured so the fringe feels intentional rather than isolated. A clean center direction makes the effect graphic, while a slightly uneven arrangement feels more relaxed. This look suits creative outings, concerts, fashion events, and confident everyday styling when you want a distinctive detail that photographs beautifully.
The finish depends on keeping the tiny sections light and flexible. Heavy wax can make micro bangs look greasy or stiff, so warm a very small amount between your fingertips before touching the hair. If your fringe naturally curves, use a mini flat iron briefly after drying, moving downward rather than pulling sideways. The remaining hair can stay smooth, wavy, or textured depending on your haircut. For rounder faces, leaving slightly longer pieces near the temples can soften the transition. Refreshing the fringe usually takes less than a minute, making this a practical choice even when the rest of your routine stays minimal.
Sleek Wet Look
- Glossy product creates a sculpted futuristic surface.
- A sharp part adds definition and visual direction.
- Gel should be layered gradually rather than applied heavily.
- Thick hair may need sectioning for even coverage.
- Leaving the ends lighter creates modern movement.
- Best suited to evenings, parties, and editorial styling.
A controlled wet look gives short hair a futuristic finish that feels especially striking for evening styling. Begin with damp, towel dried hair and distribute a small amount of strong hold gel from the roots through the visible lengths. Comb the hair backward or create a sharp side part, depending on your desired silhouette. Use a fine tooth comb to establish clean lines, then smooth the surface with your palms. The goal is glossy and sculpted, not dripping or overloaded. This dramatic finish pairs beautifully with simple clothing, statement earrings, sleek makeup, parties, editorial photos, and nights when you want the hairstyle to command attention.
Because the style relies on surface shine, product placement matters more than quantity. Start with less gel and build gradually around the hairline, crown, and sides. For a softer interpretation, mix a small amount of gel with leave in conditioner before applying. Thick hair may need sectioning so the product reaches the underneath layers, while fine hair can often be styled with one thin layer. Let the shape settle naturally rather than repeatedly combing it once finished. If you want movement at the ends, stop the product slightly above them and leave those pieces loose for a modern contrast between control and softness.
Airy Side Quiff
- Lifted front volume creates a flattering vertical line.
- Diagonal direction makes the silhouette feel energetic.
- Smoother sides keep the quiff from becoming bulky.
- Root mousse supports fine hair without heavy buildup.
- A cool blast helps set the lifted shape.
- Works for workdays, dates, portraits, and celebrations.
An airy side quiff gives short hair lift, direction, and a touch of effortless luxury. Work volumizing mousse into damp roots, then create a deep side part. Blow dry the larger top section upward and diagonally backward with a small round brush, alternating the direction of the airflow to build flexible volume. Let the hair cool before shaping it with your fingers. Keep the sides smoother so the quiff has a clear focal point without becoming bulky. This silhouette feels polished yet relaxed, making it useful for workdays, dinner dates, celebrations, portraits, and occasions where you want noticeable volume without a rigid finish.
The quiff can look dramatically different depending on how high you lift the front. A lower rise feels understated and sophisticated, while a taller curve creates a stronger editorial effect. Fine hair often benefits from root powder after drying, but use it sparingly to avoid a chalky texture. Dense hair may need a smoothing cream on the sides for better contrast. Finish with flexible hairspray and avoid flattening the top with a brush afterward. On the second day, revive the roots with your fingertips and a cool blow dryer for a few seconds, then reshape only the front section. Easily.
Layered Butterfly Crop
- Feathered layers create movement without needing long hair.
- Crown lift adds visual fullness and softness.
- Face-framing pieces open around the cheekbones.
- Mousse supports fine strands during blow drying.
- Thicker hair benefits from directional smoothing.
- Best finished with fingertips rather than aggressive brushing.
A layered butterfly crop creates the illusion of movement and fullness through short, feathered sections that open around the face. Apply a lightweight blow dry lotion to damp hair and divide the top from the sides. Use a small round brush to lift the crown while directing face framing pieces outward and backward. Let each section cool before releasing it so the layers keep their shape. The result feels airy rather than bulky, with visible separation around the cheekbones and jaw. It is especially pretty for brunches, celebrations, polished daytime outfits, and photographs where layered movement adds dimension without requiring long hair. Easily.
The styling works best when each layer receives a slightly different direction. Keep crown pieces lifted, direct side layers away from the face, and allow the shortest front pieces to bend softly toward the cheek. Fine hair can use mousse for support, while thick hair may need smoothing cream through the ends. Avoid brushing after finishing because it can erase the layered separation. Instead, shake the roots gently and arrange individual pieces with your fingertips. If the shape loses volume later, use a quick warm blow dry followed by cool air to reset the lift without adding more product.
Conclusion
Short hair does not have to feel repetitive. A change in texture, direction, volume, or finish can completely refresh your everyday look. With this how to style short hair guide, you now have 15 practical ideas ranging from sleek and polished to airy, playful, and editorial. Try one that matches your natural texture, then adjust the shape to suit your features and routine. I’ve noticed that the most wearable styles are often the ones that work with the hair rather than against it. Save this article to Pinterest so you can return to your favorite looks, experiment with new techniques, and share these ideas with someone who loves short hair. Your next great hairstyle may be one styling session away.