15 Types of Hair Clips Explained for Easy Styling
Your hair clip can do far more than hold a section in place. The right one can change your entire look in minutes.
This guide to types of hair clips explained is packed with fresh, wearable ideas for anyone who wants easy styling without spending hours in front of the mirror. From sculptural claw twists and polished barrettes to playful Y2K details and elegant evening pins, you’ll discover ways to match the accessory to your hair texture, length, outfit, and occasion. Each look focuses on practical placement, movement, finish, and everyday wearability. In my experience, a hairstyle often looks more intentional simply because the clip is chosen and positioned thoughtfully. Whether your hair feels flat, messy, or difficult to manage, these ideas can turn a quick fix into a beautiful finishing detail.
Sculpted Clip Twist
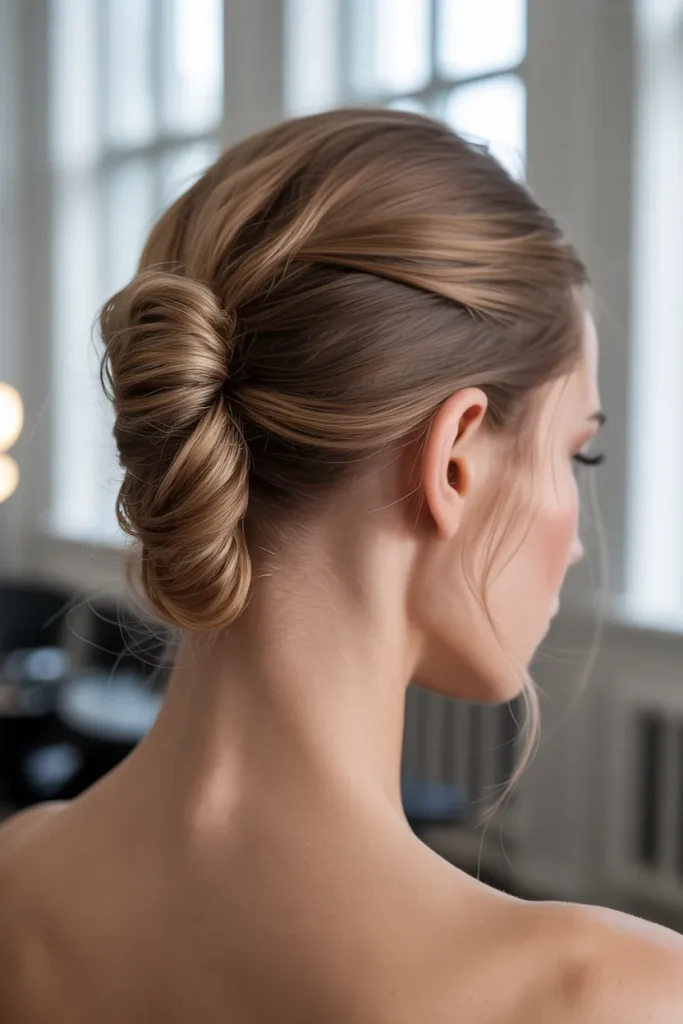
- Creates a lifted, architectural silhouette without a formal updo.
- Leaves the neckline open for earrings and higher collars.
- Light texture improves grip and keeps the twist from slipping.
- Works best on medium to long hair with enough length to fold.
- Soft temple pieces balance sharper facial angles.
- A larger clip suits dense hair; compact claws suit finer strands.
A sculpted clip twist turns an ordinary hair day into a polished statement within minutes. Gather hair low at the back, twist it upward, and secure the center with a curved claw clip. Leave two slender pieces around the temples for softness and movement. The silhouette feels architectural without looking severe, making it ideal for minimal-luxe outfits. I find types of hair clips explained by texture and purpose easier to choose from. I’ve noticed a little crown lift keeps this shape from appearing flat. It suits straight, wavy, and loosely curly textures, working for office mornings, lunches, dinners, and weekends.
For a sleeker version, smooth the surface with a lightweight cream before twisting, then loosen the finished shape slightly. That adjustment creates an editorial finish instead of a rigid one. Dense hair may need a larger clip with firm teeth, while fine hair can benefit from gentle backcombing underneath. A center part gives balanced symmetry; an offset part adds modern attitude. Tuck every end inside for a refined profile, or let a few ends escape for texture. The style also refreshes easily after commuting because you can retwist the section without heat, making it a practical choice for busy days.
Pearl Pin Sweep
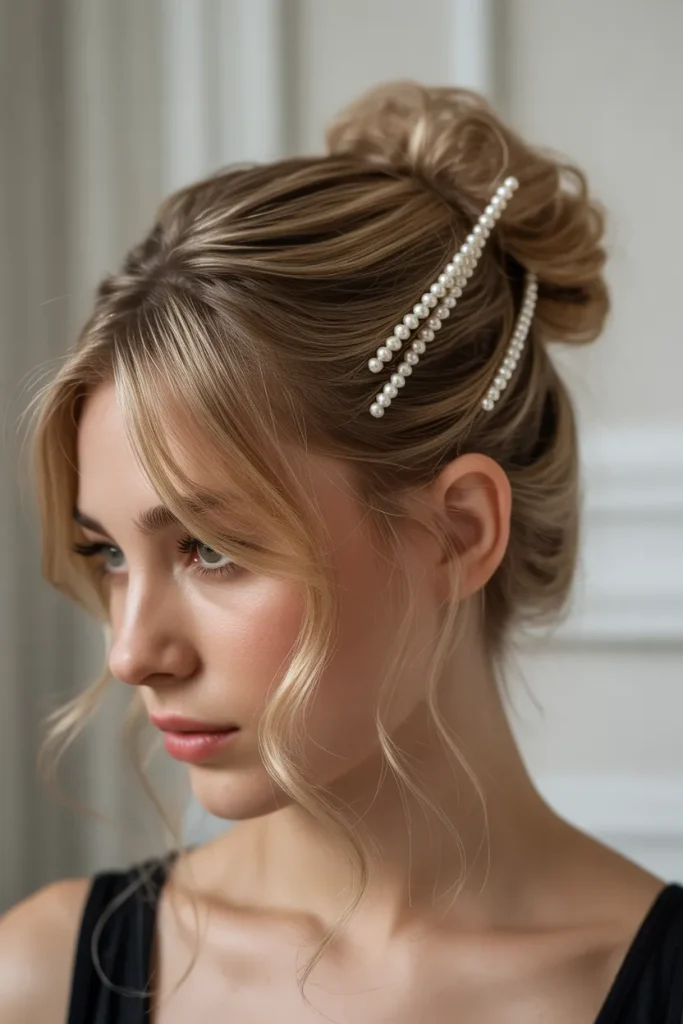
- Adds a delicate focal point while keeping most hair loose.
- Diagonal pearl placement makes the half-up shape look intentional.
- Soft waves give the accessory more dimension in photographs.
- Fine hair benefits from light texture before pinning.
- The style flatters heart and square face shapes particularly well.
- Swap pearls for crystals when a cooler evening finish is preferred.
This pearl-pin half-up sweep gives loose hair a romantic finish while keeping the front beautifully controlled. Brush only the crown and temples backward, then secure the gathered section with two decorative pearl pins placed diagonally. The rest stays down, creating contrast between polished structure and natural movement. Soft waves make the pearls stand out especially well, but straight hair gives the look a cleaner gallery-inspired mood. In my experience, pin placement matters more than perfect symmetry here. Leave a little height at the crown and avoid pulling the sides too tightly. It works for celebrations, dates, and photographs alike.
Choose pins with different sizes for a subtle dimensional effect rather than arranging identical pieces in a rigid line. Fine hair holds best when the gathered section is lightly sprayed before pinning, while thick hair may need longer pins that cross securely underneath. Keep the ends of the half-up section slightly curved for a softer silhouette. This design can also be adapted with crystal or matte metal pins when pearls feel too romantic. Because most of the hair remains loose, maintenance is simple: smooth flyaways with fingertips and reshape the waves as needed. It is flattering with square faces.
Velvet Barrette Pony
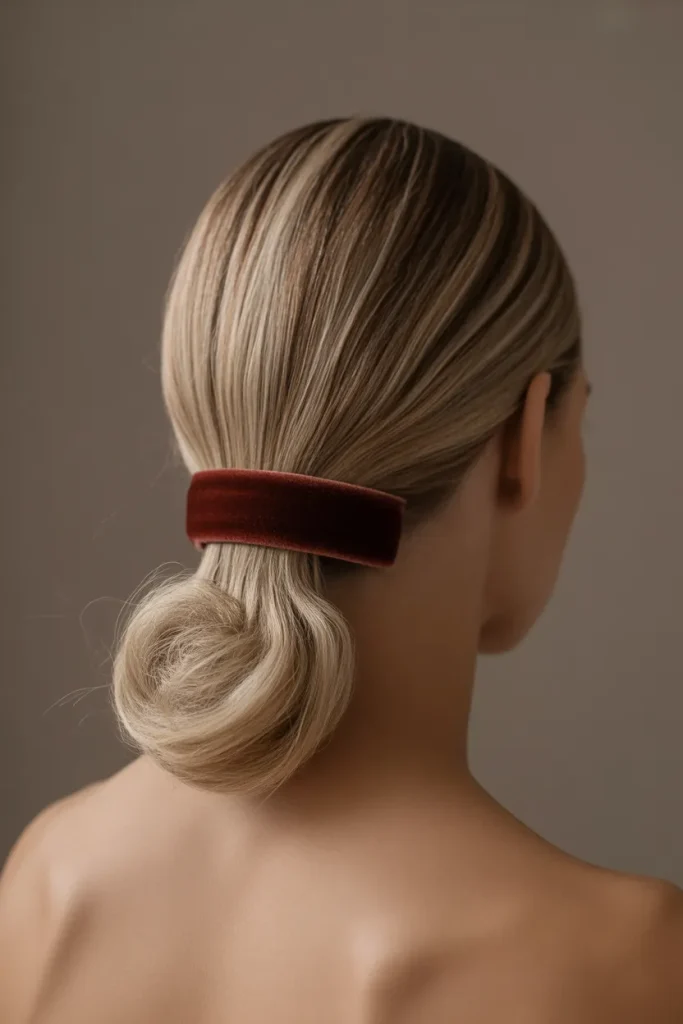
- Makes a basic ponytail look instantly more polished and tactile.
- Velvet adds visual depth without complicated styling.
- Low placement works beautifully with blazers, dresses, and knitwear.
- A slim elastic underneath carries the ponytail’s tension.
- Medium-density hair gives the barrette a balanced scale.
- Straight tails look sleek; bent ends create softer movement.
A velvet barrette pony creates a sleek, tactile finish that instantly makes a simple ponytail feel expensive. Smooth the hair into a low pony at the nape, then place a wide velvet barrette over the elastic for a clean decorative accent. Keep the tail straight for modern minimalism or add loose bends for softness. The fabric introduces visual richness without requiring complicated technique. I’ve seen this approach work particularly well on medium-density hair because the barrette adds presence without overwhelming the shape. It transitions naturally from polished workwear to evening styling and photographs beautifully from a three-quarter angle.
For reliable hold, secure the ponytail first with a slim elastic that matches the hair, then position the barrette slightly above it. This prevents the accessory from carrying all the tension and helps protect the finished shape during movement. Fine hair can gain body from dry texture spray through the lengths, while thick hair may look better with the tail divided into two softly overlapping sections. Black velvet feels dramatic, cream feels understated, and jewel tones create a festive accent. Keep the nape smooth if you want sophistication, or release a few wisps for a more relaxed, contemporary modern finish.
Butterfly Clip Cascade
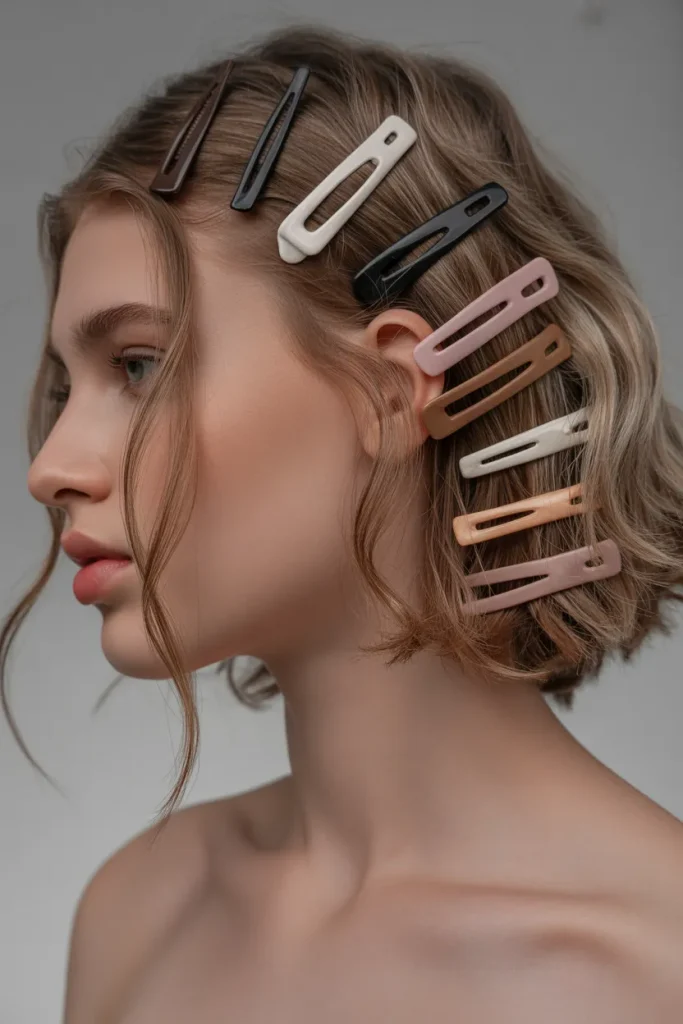
- Brings Y2K energy through accessory placement rather than a retro costume.
- Asymmetry draws attention toward the eyes and cheekbone area.
- Small clips are easier to distribute through fine sections.
- Light waves keep the overall finish playful and touchable.
- Color-coordinated butterflies look more sophisticated than random shades.
- Remove each clip by opening it first to reduce pulling.
This butterfly clip cascade transforms loose lengths into a playful Y2K-inspired composition without looking costume-like. Instead of placing one oversized accessory at the crown, distribute several small butterfly clips along one side, following the natural curve from temple toward the back. Keep the remaining hair loose and lightly waved so the clips become the visual focal point. The asymmetry feels youthful, graphic, and highly Pinterest-friendly. Straight hair creates a sharper effect, while soft waves add nostalgia and movement. I’ve noticed this arrangement looks best when the accessories share a color family but vary slightly in size or finish.
Start with dry, detangled hair and separate a narrow side section before clipping, because taking too much hair can make the accessories feel heavy. Small butterflies are ideal for fine strands, while medium clips work better when the hair has more density. Avoid placing every piece at exactly the same distance; irregular spacing makes the cascade feel styled rather than mechanically arranged. A deep side part intensifies the asymmetry, while a softer part keeps it approachable. Remove the clips carefully from the base rather than pulling downward through the hair. The look pairs easily with denim, slip dresses, or simple knits.
Chrome Claw Knot
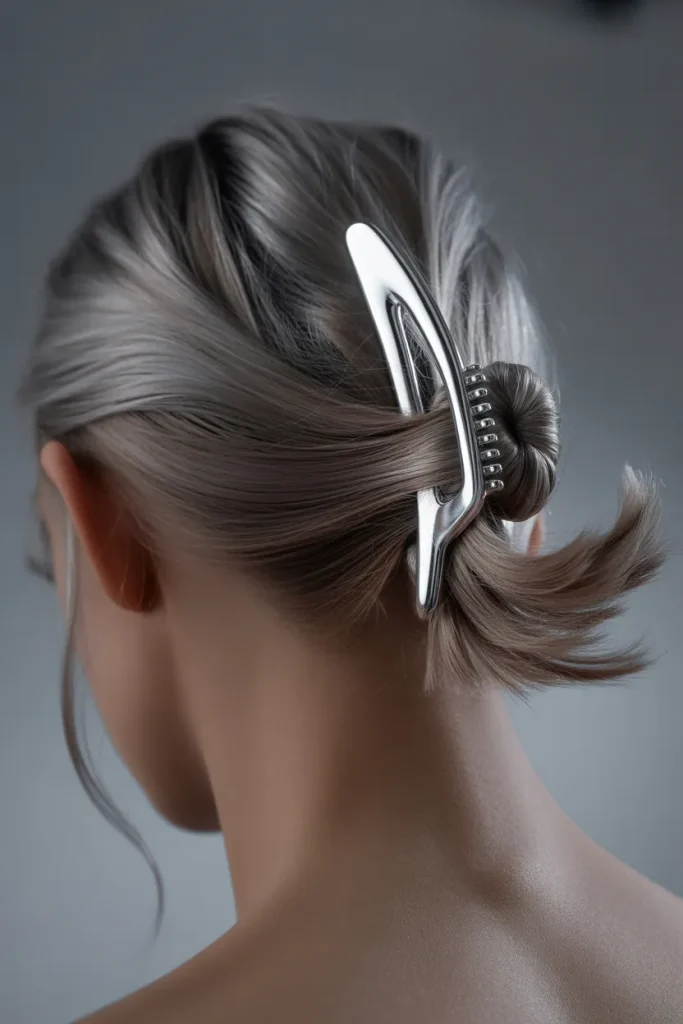
- Creates a futuristic focal point while keeping the neck uncovered.
- Reflective metal looks especially striking against dark glossy hair.
- A wide clip gives longer hair enough structural support.
- Gentle crown lift prevents the knot from appearing compressed.
- Best for straight or softly wavy textures with moderate length.
- Ideal for dinners, creative events, and monochrome outfits.
A chrome claw knot brings futuristic polish to a classic twist, using a metallic clip as the centerpiece. Gather the hair at mid-height, twist it upward, and anchor it with a reflective claw clip so the ends fan subtly above the attachment. Keep the sides smooth and the crown gently lifted for a sleek runway-inspired silhouette. The metallic finish catches light beautifully, especially against dark or glossy hair. This shape is practical when you want hair off the neck without committing to a tight bun. It suits straight and wavy textures particularly well and looks striking with monochrome outfits today.
To make the knot feel modern rather than severe, leave the smallest amount of length visible above the clip and pull two fine strands forward near the cheekbones. A smoothing serum can control surface frizz, but avoid heavy oils that may reduce grip. Longer hair may need a wide clip positioned horizontally, while shorter lengths can use a compact design placed closer to the twist. Silver and gunmetal emphasize the futuristic mood; brushed finishes feel quieter. The style works for dinners, creative workplaces, gallery events, and travel because it stays visually intentional while requiring only occasional quick fingertip adjustments daily.
Ribbon Mini Bun
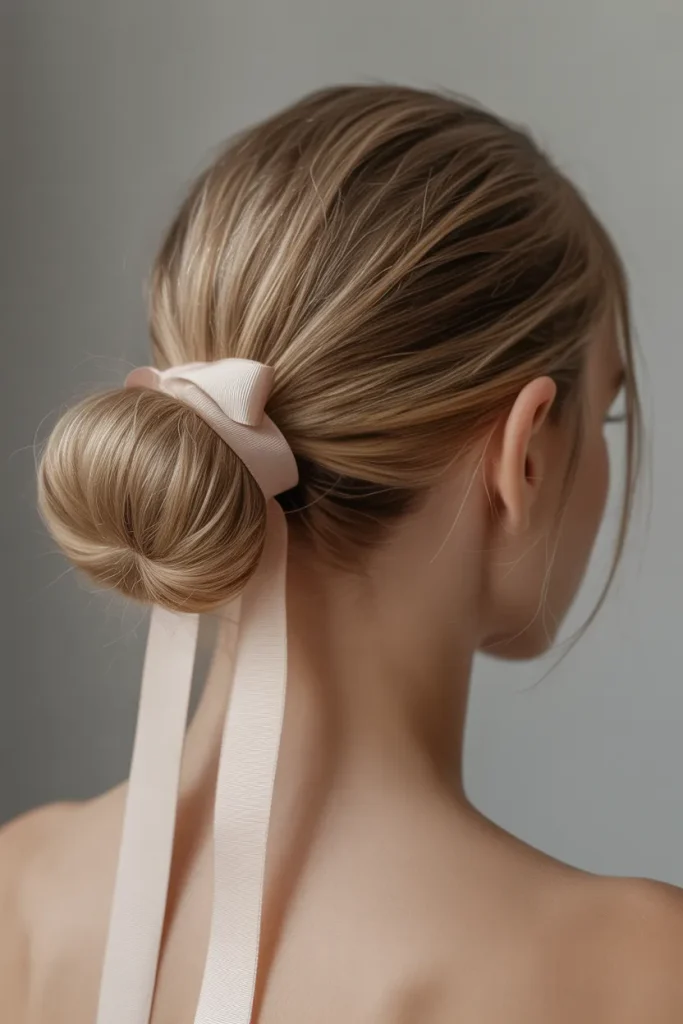
- Turns a compact bun into a soft-glam accessory moment.
- Ribbon tails introduce vertical movement around the nape.
- A hidden elastic keeps the ribbon decorative rather than structural.
- Satin feels romantic; grosgrain creates a sharper editorial mood.
- Works well on medium to long hair with manageable density.
- Easy to rebuild during travel with minimal styling tools.
This ribbon-wrapped mini bun gives a delicate accessory a modern role in the hairstyle rather than treating it as an afterthought. Create a compact low bun, secure it discreetly, and wrap a narrow ribbon around the base so the tails fall vertically. The contrast between controlled shape and flowing ribbon creates an elegant, editorial effect. A satin ribbon looks luminous, while grosgrain feels more graphic and casual. Fine to medium hair works especially well because the bun stays compact. I’ve noticed this design becomes more flattering when the front remains softly parted instead of being pulled completely away from the face.
Keep the ribbon narrow enough that it complements the bun without hiding its shape. If your hair is slippery, use a tiny hidden elastic beneath the ribbon and avoid wrapping too tightly. Wavy hair can leave a few natural bends visible, while straight hair benefits from softly curved ribbon tails for movement. Match the ribbon to your outfit for understated coordination, or choose a contrasting neutral for a fashion-editorial finish. This hairstyle suits weddings, birthday dinners, date nights, and polished holiday gatherings. It also travels well because the bun can be rebuilt with a brush, elastic, and ribbon with ease.
Tortoiseshell Side Sweep
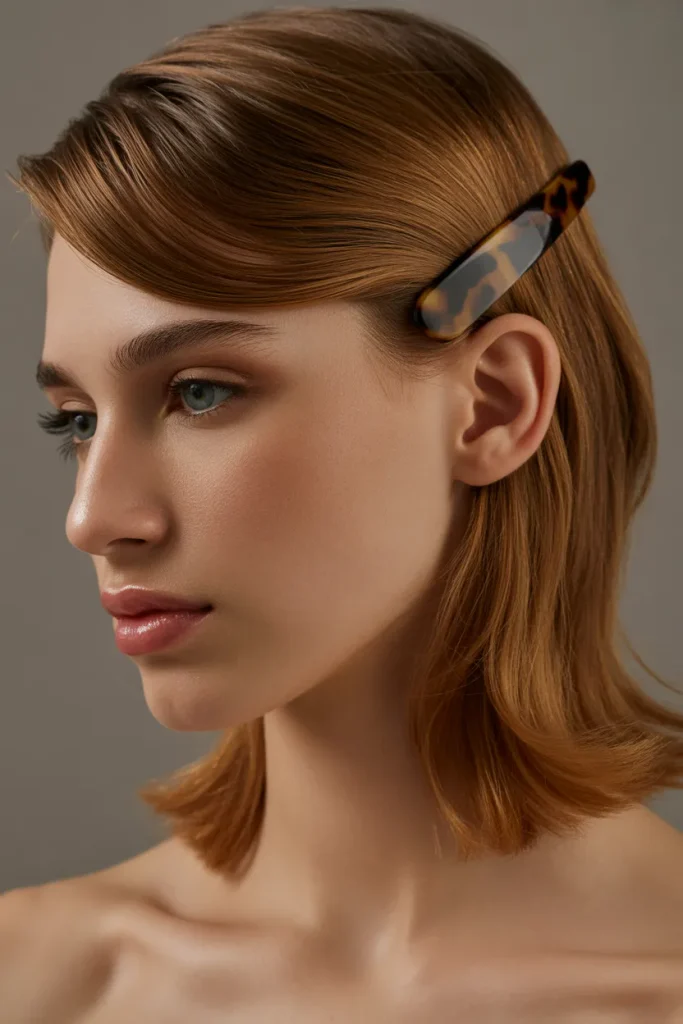
- Adds asymmetry while keeping the rest of the hairstyle completely loose.
- Warm tortoiseshell complements many brunette, blonde, and red tones.
- The visible ear creates a clean, elongated side profile.
- A medium barrette balances fine-to-medium hair particularly well.
- Natural waves can remain untouched for a relaxed finish.
- Useful when you want polish without changing your haircut.
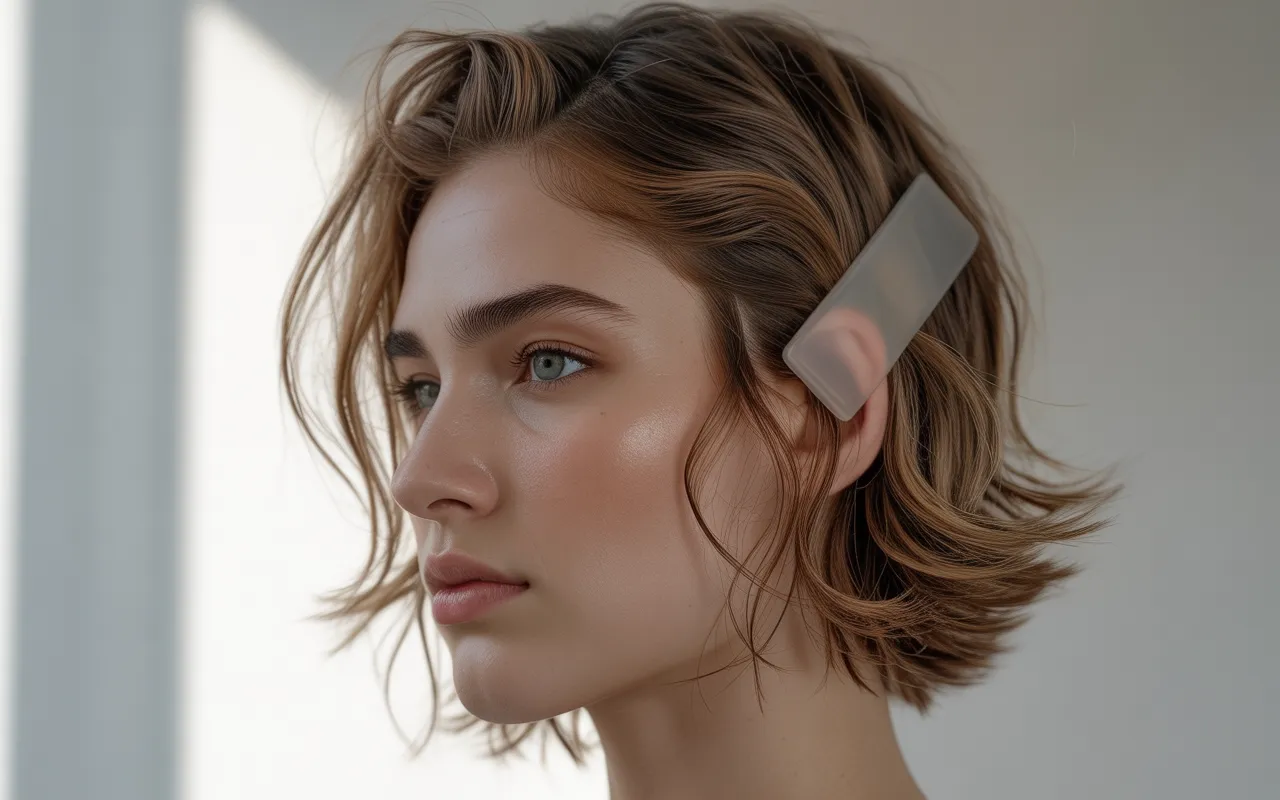
A tortoiseshell side sweep frames the face with quiet sophistication, using a medium barrette to secure one side behind the ear. Create a clean side part, sweep the heavier front section diagonally backward, and place the barrette just above the ear. Keep the remaining lengths loose so the accessory becomes a deliberate punctuation mark rather than the whole look. The warm pattern complements many hair colors and works especially well with glossy, healthy-looking texture. This is an easy option when you want asymmetry without dramatic styling. It feels appropriate for meetings, lunches, date nights, and elevated everyday outfits.
For fine hair, choose a clip with a lightly textured interior so it grips without requiring a tight pull. Thick hair can use a broader flat style positioned slightly farther back from the hairline. Keep the section narrow at the temple and wider near the crown to create a tapered shape. If your hair is naturally curly, follow the curl pattern instead of brushing it smooth; the contrast between texture and clean accessory looks intentional. This hairstyle needs little maintenance during the day. A fingertip can reset the sweep, making it convenient for commuting, desk work, shopping, or casual social plans.
Stacked Clip Pony
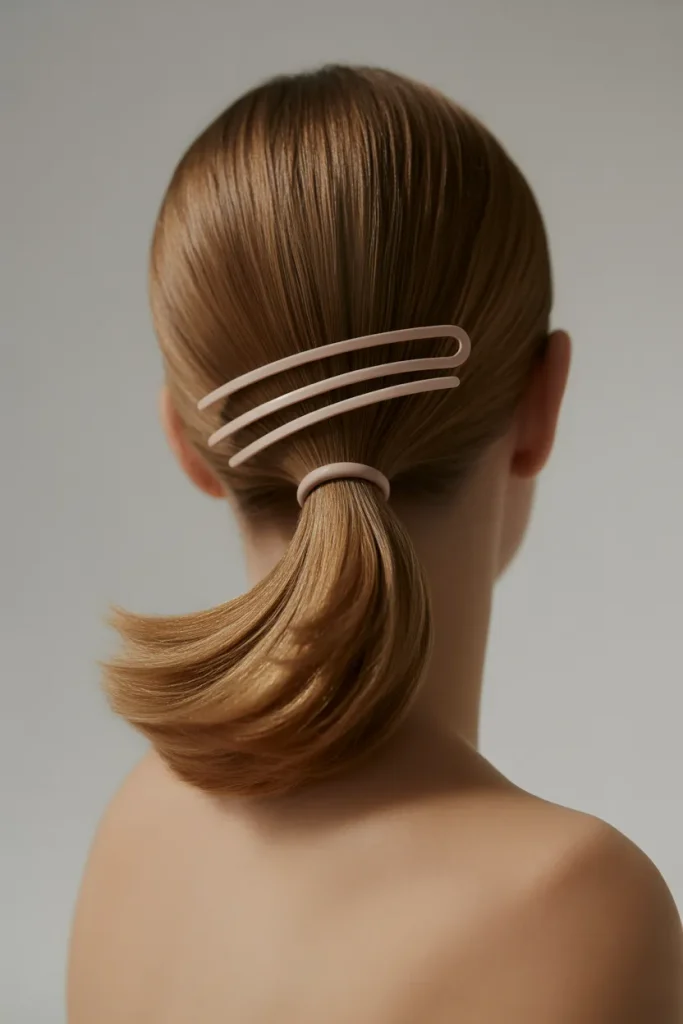
- Creates a graphic accessory column above an otherwise simple ponytail.
- Two clips provide stronger visual rhythm than one oversized piece.
- A low pony keeps the crown sleek and contemporary.
- Fine hair benefits from texture around the attachment area.
- Matching metals suit minimal-luxe wardrobes especially well.
- Practical for workdays because the pony remains easy to refresh.
This stacked clip low pony combines two slim barrettes with a clean ponytail for a graphic, contemporary finish. Pull the hair into a low pony at the nape, then place the barrettes vertically above the elastic so they create a narrow layered column. The arrangement feels deliberate and fashion-forward while remaining easy enough for everyday wear. Keep the ponytail sleek for a minimalist mood or add a slight bend through the ends for movement. Straight, fine-to-medium hair handles the structure especially well. The style gives a simple silhouette a strong accessory moment without demanding elaborate braiding or heat styling.
Placement is the key detail: leave a small gap between the two barrettes so each piece remains visible rather than blending into one block. If your hair is thick, secure the pony first and anchor each clip into the gathered base. Fine hair may need a touch of texture spray around the attachment area. Matching metal finishes create a refined look, while contrasting finishes feel more editorial. Keep the crown smooth and avoid excessive tension at the temples. This style is useful for office days, dinners, presentations, and travel because the ponytail stays controlled while the accessories provide enough visual interest.
Sculptural U Pin Twist
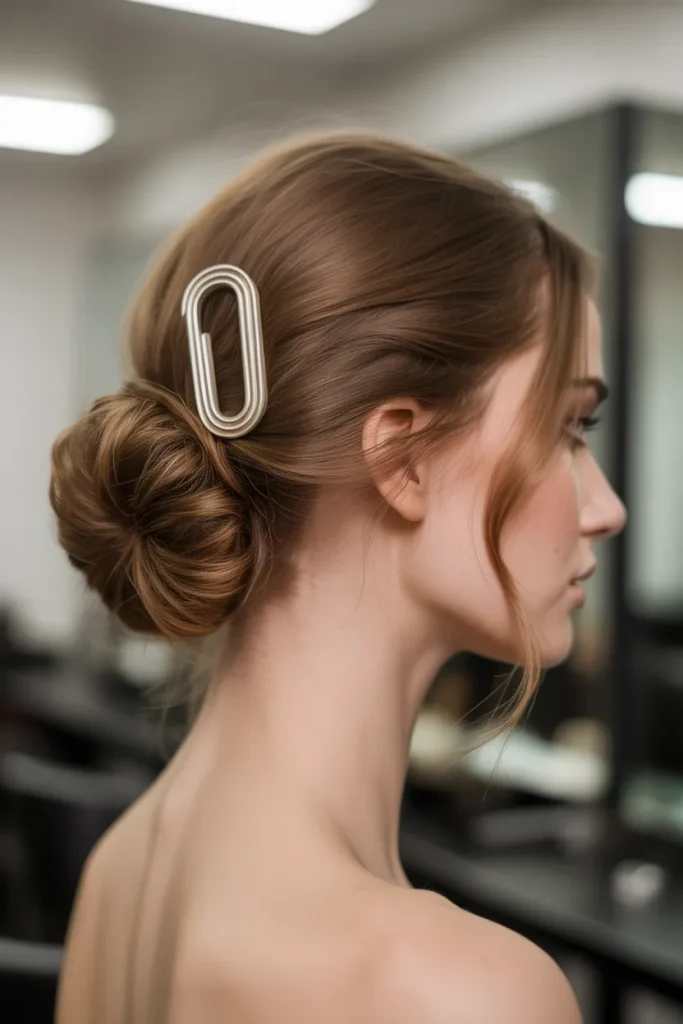
- Reveals the architecture of the updo instead of hiding it beneath a large clip.
- A U-shaped pin gives the back a clean elongated profile.
- Lightly textured hair provides useful friction for the fold.
- Longer lengths offer the most flexibility when shaping the roll.
- Face-framing pieces soften the look around the cheeks.
- Elegant for formal occasions without feeling traditionally rigid.
A sculptural U-pin twist turns a simple updo into an elegant modern silhouette. Gather the hair loosely at the back, twist it upward, and use a large U-shaped pin to anchor the fold without covering it with a bulky accessory. The result reveals the hair structure itself, giving the style an almost architectural quality. Leave the ends tucked for clean sophistication or allow a few pieces to curve outward for softness. Medium to long hair is easiest to shape, while thick hair benefits from dividing the twist before securing it. This design feels refined enough for formal evenings yet relaxed enough for creative styling.
Insert the U-pin diagonally through the outer edge of the twist, then angle it back into the gathered hair for better stability. Avoid pushing the pin straight downward, which can flatten the silhouette and make removal awkward. Light texture spray helps fine hair hold the fold, while thicker hair often needs only its natural grip. A center part emphasizes symmetry, and a loose side part makes the look more romantic. This updo is especially useful when you want an accessory-free finish that still looks considered. Add small face-framing pieces if your features feel better balanced with softness around the cheeks.
Mini Claw Half Pony
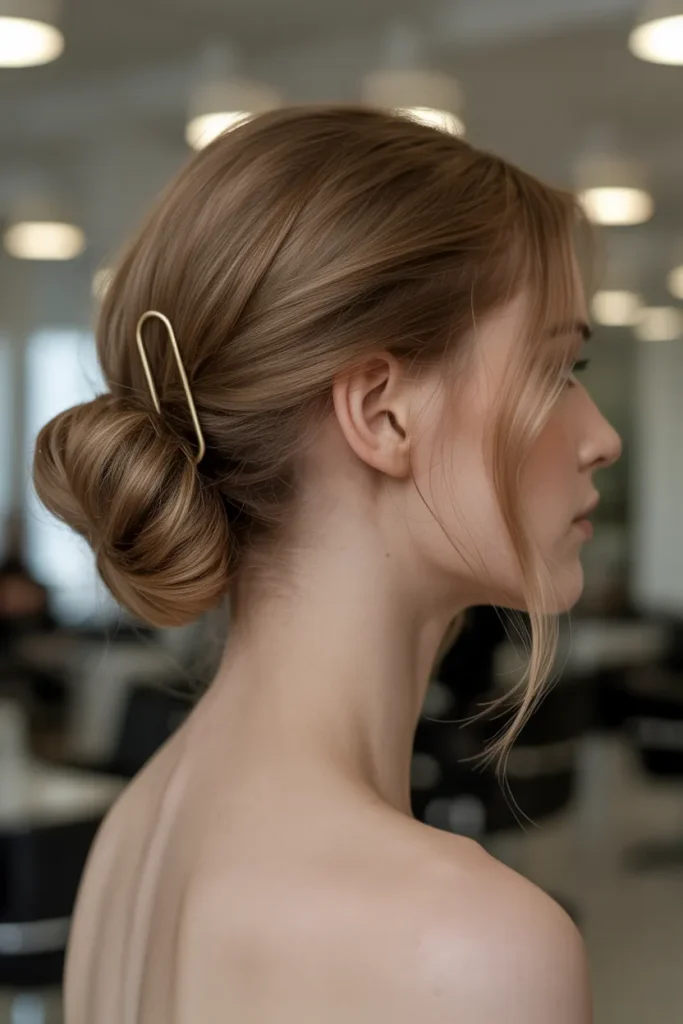
- Adds quick crown dimension while leaving the lower hair completely free.
- A tiny claw keeps the accessory proportional to the half-pony.
- Natural waves make the lifted section look fuller.
- Fine hair often benefits from dry texture spray first.
- The style works with casual outfits and playful evening looks.
- Easy to reset without disturbing the rest of the hair.
This mini claw pony uses a tiny clip to create a lifted half-pony with a distinctly playful silhouette. Gather only the upper crown section, twist it once, and secure the base with a small claw so the tail rises slightly from the head. The lower hair remains completely loose, creating two levels of movement. It is a fresh alternative to a traditional half-up tie and works beautifully with natural waves or airy bends. Straight hair can look especially crisp with the same structure. I’ve noticed this shape adds instant dimension when the crown is lightly teased before clipping.
Keep the gathered section narrow enough that the mini clip sits securely without becoming visually bulky. Fine hair can use a textured mini claw with closely spaced teeth, while thicker hair may need a slightly wider version. Let a few short pieces around the temples remain natural for an easy finish. For more volume, bend the lifted tail outward with a round brush; for a sleeker result, leave it straight. This style is excellent for casual dates, concerts, weekend errands, and relaxed parties. Because only the upper section is secured, you can refresh the look quickly without disturbing the rest of your texture.
Jeweled Comb Tuck
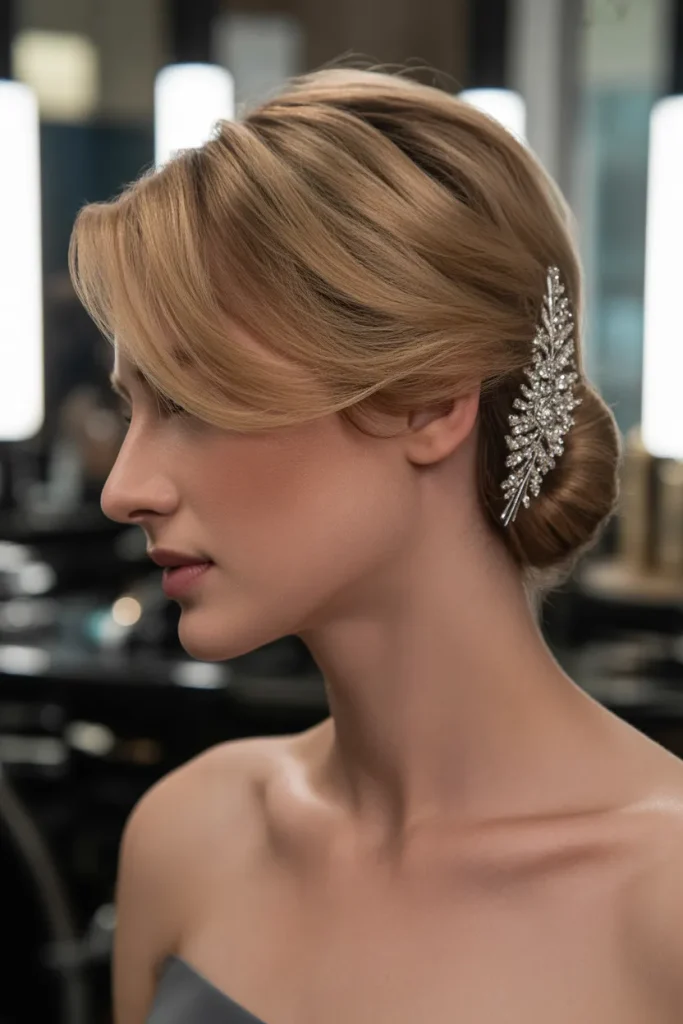
- Concentrates sparkle at the nape for a refined evening focal point.
- A softer roll lets the comb grip without creating bulk.
- Subtle teasing underneath helps fine hair support the accessory.
- Side placement changes the mood from classic to modern.
- Works especially well with medium and long hair.
- Best suited to weddings, dinners, receptions, and formal portraits.
A jeweled comb tuck creates a soft evening updo with the sparkle concentrated exactly where the hair meets the accessory. Sweep the hair toward one side, create a loose tucked roll at the nape, and slide a jeweled comb horizontally into the fold. Keep the front smooth but not tight, allowing a few delicate pieces to soften the cheek area. The contrast between understated hair and concentrated shine feels elegant rather than excessive. Medium and long hair can support the tucked structure well, when lightly textured first. This is beautiful for weddings, formal dinners, celebrations, and evening portraits.
Build the tuck gradually instead of twisting all the hair into one tight coil, because a softer fold gives the comb more hair to grip. Fine hair benefits from subtle teasing beneath the roll, while thick hair may need two hidden pins before inserting the comb. Position the accessory slightly above the nape for a lifted profile. A side part adds romance, whereas a clean center part feels more modern. Avoid heavy hairspray until the comb is secure; excessive product can make insertion difficult. Once finished, check the silhouette from both sides so the accessory looks intentional from every viewing angle.
Matte Resin Sweep
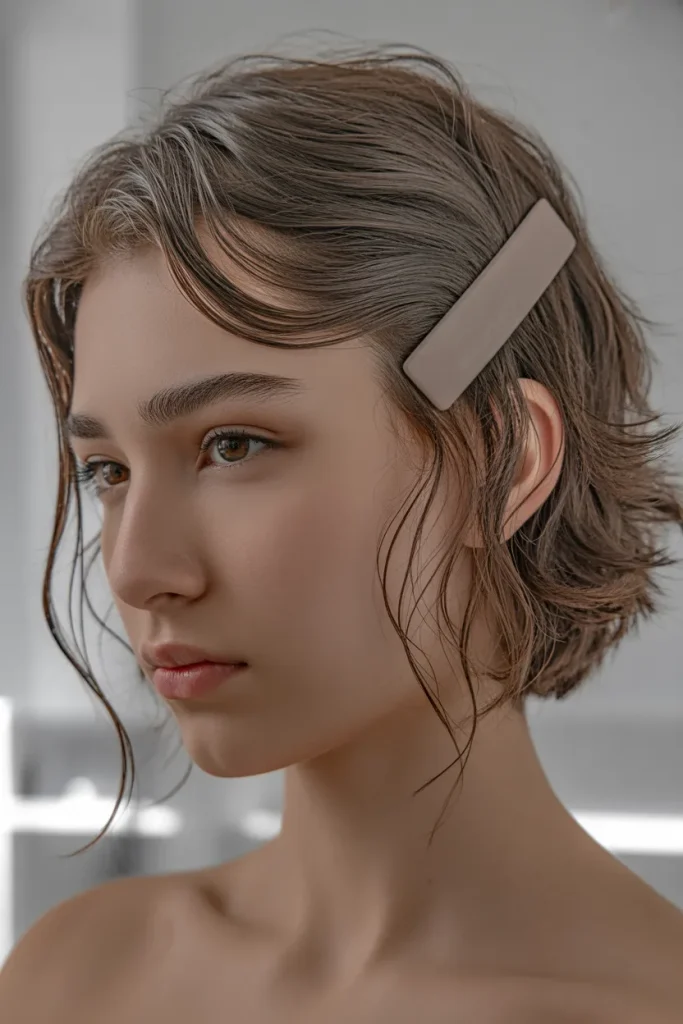
- Keeps one side controlled without hiding natural texture elsewhere.
- The matte surface feels modern and understated rather than decorative.
- A tapered section creates a flattering line from temple to crown.
- Curly hair can preserve its natural pattern for added contrast.
- Small clips work well when bulky accessories feel uncomfortable.
- Low-maintenance styling makes it useful for everyday routines.
This matte resin clip sweep brings quiet, sculptural texture to loose hair while keeping one side controlled. Create a soft middle or off-center part, gather a narrow section near one temple, and secure it backward with a flat resin clip. The matte surface gives the accessory a modern, understated character that pairs beautifully with natural hair texture. Leave the lengths loose and touchable, with gentle waves or bends creating movement around the shoulders. It is particularly useful for people who dislike bulky clips but still want a visible styling detail. The look feels polished enough for everyday minimalism and weekend outfits.
For fine hair, choose a clip with a lightly textured interior so it grips without requiring a tight pull. Thick hair can use a broader flat style positioned slightly farther back from the hairline. Keep the section narrow at the temple and wider near the crown to create a tapered shape. If your hair is naturally curly, follow the curl pattern instead of brushing it smooth; the contrast between texture and clean accessory looks intentional. This hairstyle needs little maintenance during the day. A fingertip can reset the sweep, making it convenient for commuting, desk work, shopping, or casual social plans.
Twisted Banana Pony
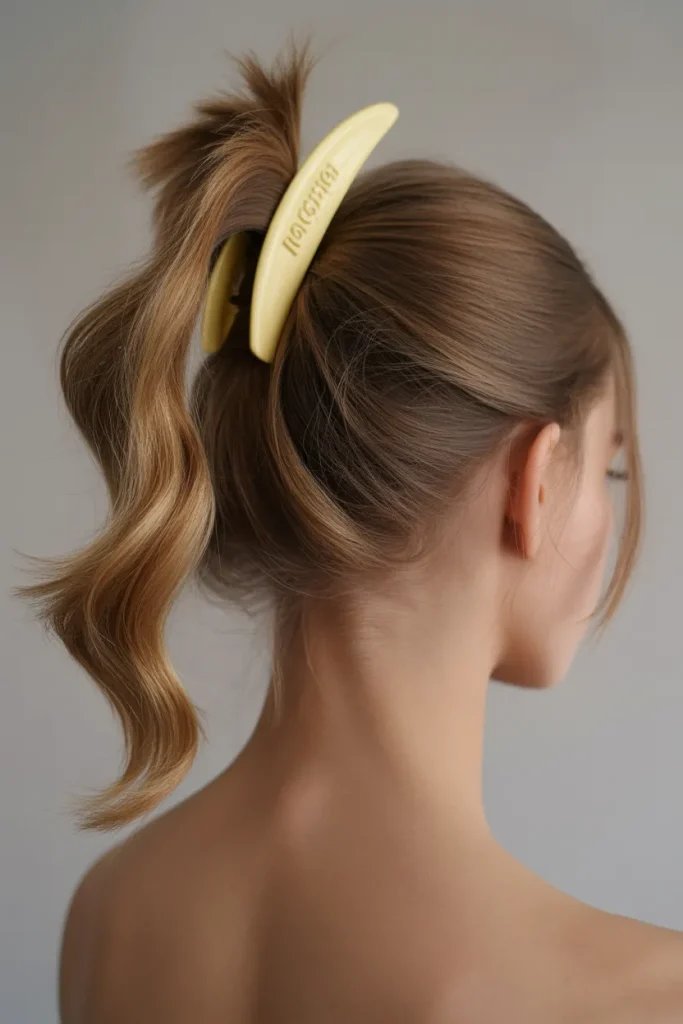
- Revives a nostalgic accessory with a cleaner, contemporary silhouette.
- The lifted base keeps the pony from looking flat or dated.
- Long hair gives the banana clip enough length to curve naturally.
- Texture spray can improve grip on very smooth strands.
- A deep side part adds stronger Y2K character.
- Useful for travel because the shape can be rebuilt quickly.
A twisted banana clip pony updates the classic elongated clip with a softer, more relaxed silhouette. Gather the hair at the back of the head, secure it with a long banana-style clip, and allow the ponytail to curve naturally downward. Rather than pulling every strand perfectly smooth, preserve subtle texture around the crown and through the tail. This creates a modern throwback effect that feels closer to current Y2K styling than a traditional retro set. Medium to long hair works best, particularly when it has some natural body. The shape opens the face while keeping the neckline visually clean.
Angle the clip slightly upward at the center before fastening so the ponytail gains gentle lift instead of hanging flat. Fine hair can benefit from dry texture spray through the roots, while thick hair may need a larger clip with a flexible hinge. Keep the front polished with a small amount of cream, then let the pony remain airy. A center part makes the look balanced, while a deep side part gives it more nostalgic drama. It is practical for errands, casual office settings, travel, and relaxed evenings. If the clip loosens, retighten from the base rather than pulling the tail.
Double Pin French Roll
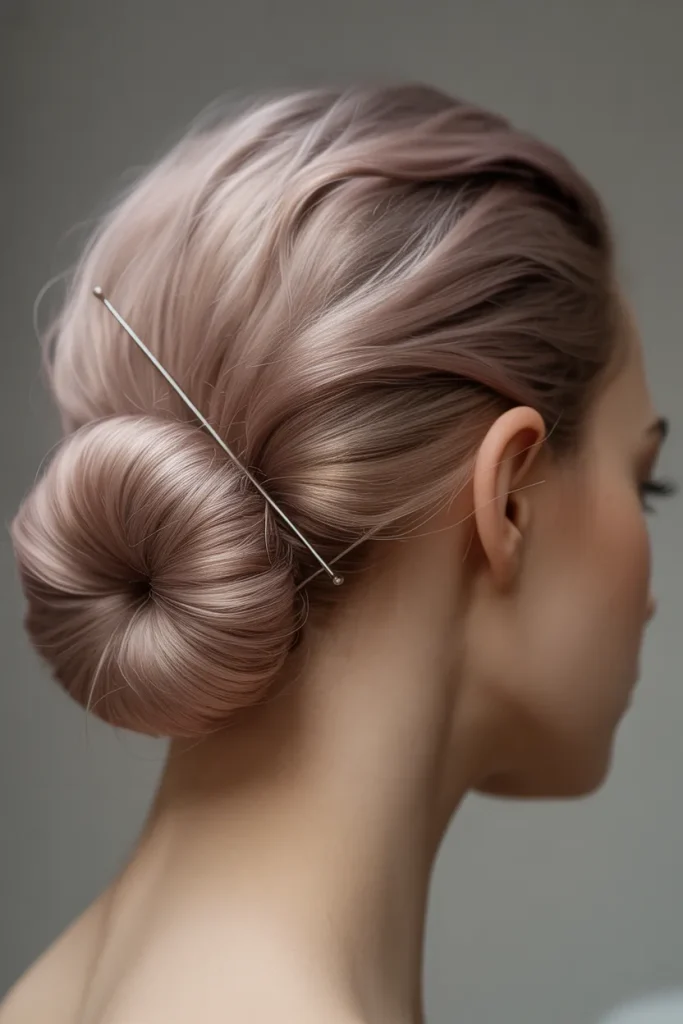
- Creates an elegant elongated profile with very little visible hardware.
- Crossed pins add structure while remaining part of the decoration.
- Light texture helps the folded roll stay secure.
- A side part introduces softness around the forehead and cheek.
- Longer medium-density hair is easiest to shape.
- Excellent for receptions, dinners, and polished professional events.
This double-pin French roll uses two matching pins to secure a softly folded side updo, creating an elongated silhouette with delicate structure. Sweep the hair diagonally across the back, roll the lengths inward, and place the pins in a subtle crossing pattern to hold the fold. The visible hardware becomes part of the design without dominating it. Keep the front smooth and allow the roll to remain slightly imperfect for a contemporary finish. Long, medium-density hair is easiest to shape, while shorter layers can be left loose around the face. The result feels refined, graceful, and distinctly salon-inspired.
Start with lightly textured hair so the roll has friction, then secure the hidden interior before placing the visible pins. If your hair is fine, gently backcomb the underside of the rolled section to create support. Thick hair may require one concealed pin before the decorative pair. Keep the crossed pins close enough to read as one detail, but not so tight that they disappear. This style works beautifully with simple earrings because the side profile remains open. It is suited to receptions, dinners, date nights, and professional events where you want an updo that looks elegant without appearing overly formal.
Ribbon Barrette Low Bun
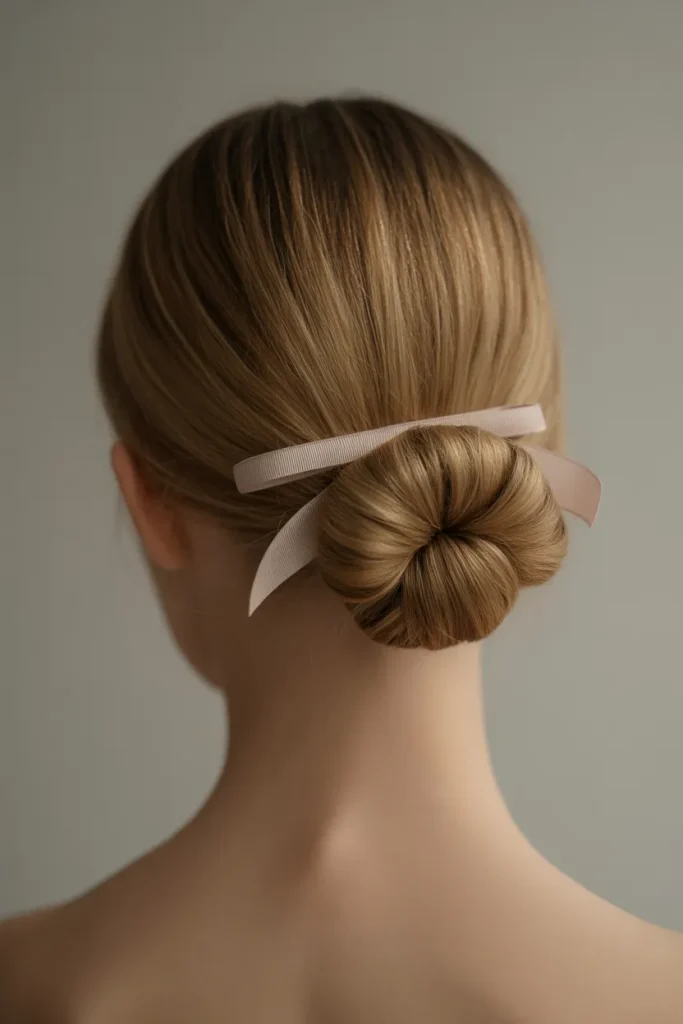
- Combines a clean low bun with a delicate horizontal accessory line.
- Slightly asymmetric ribbon tails prevent the style from feeling overly formal.
- A hidden bun structure keeps the barrette secure.
- Neutral ribbon works for everyday dressing; satin elevates evening looks.
- Medium to long hair provides enough length for a balanced bun.
- Quick fingertip reshaping can restore the silhouette after movement.
A ribbon barrette low bun blends clean structure with a soft accessory detail, creating a graceful finish at the nape. Form a low bun with a gentle twist, secure it discreetly, and place a slim barrette horizontally across its base. Let the ribbon detail fall slightly to one side rather than hanging perfectly centered. The asymmetry gives the style a current, effortless-luxury mood. Smooth the crown but keep the bun tactile instead of tightly polished. Medium to long hair is ideal, and natural waves add beautiful dimension. This design works especially well when an outfit already has delicate or flowing details.
Anchor the bun before attaching the barrette so the accessory remains decorative rather than structural. Fine hair can be wrapped into a smaller bun with a little texture spray for fullness, while thick hair may look best with a wider, flatter fold. Keep ribbon tails short if you prefer a minimalist effect, or allow longer tails for movement during evening events. A neutral ribbon keeps the style versatile, while velvet or satin creates a richer finish. I find types of hair clips explained by occasion easier to choose easily today. The look can be refreshed easily by reshaping the bun.
Conclusion
Great hair days do not always require complicated techniques. The right clip can add structure, lift, texture, or a polished finishing touch while keeping your routine simple. These looks offer inspiration for casual mornings, workdays, celebrations, dates, and dressed-up evenings, with options for different lengths and textures. The types of hair clips explained here make it easier to choose accessories based on the result you want rather than appearance alone. I’ve seen how one thoughtful styling detail can completely change the mood of an outfit. Save this guide to Pinterest, try the looks that catch your eye, and share it with anyone who loves easy, beautiful hair. Keep experimenting and make each style your own!