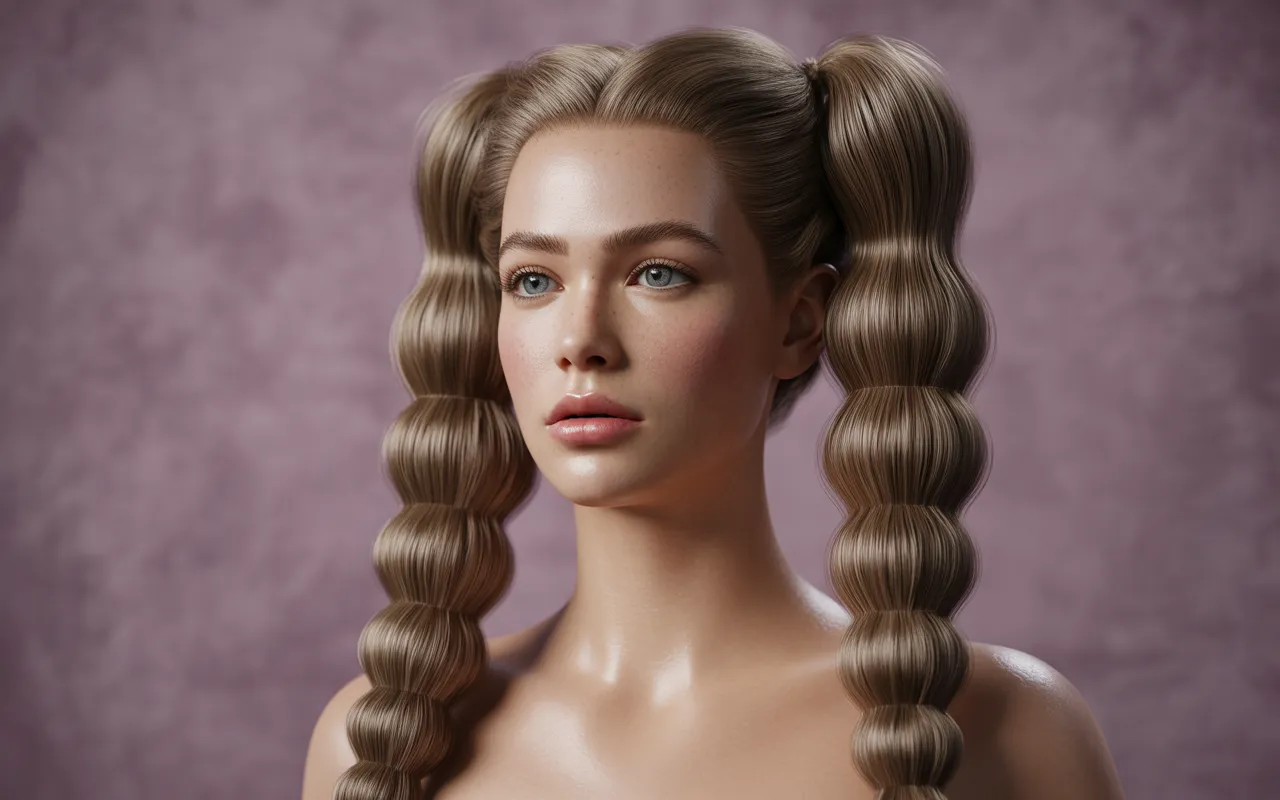
15 Medusa Hairstyles That Are Bold and Unique
These medusa hairstyles bring bold texture, sculptural shapes, and serious Pinterest-worthy energy.
If your current look feels predictable, these ideas can change the entire mood.
This collection explores 15 creative styles inspired by braids, twists, coils, waves, and dramatic silhouettes. Each look is designed to feel modern while still offering practical styling inspiration you can take to a salon or adapt at home. Whether you love futuristic beauty, soft editorial texture, or statement-making volume, there is plenty here to spark your next transformation. I’ve noticed that the most memorable hairstyles often come from changing one key element, such as height, direction, texture, or shape. These ideas use those details intentionally, helping you discover a look that feels expressive without sacrificing wearability. Save your favorites and use them as visual references before your next styling session.
Sculpted Medusa Braids
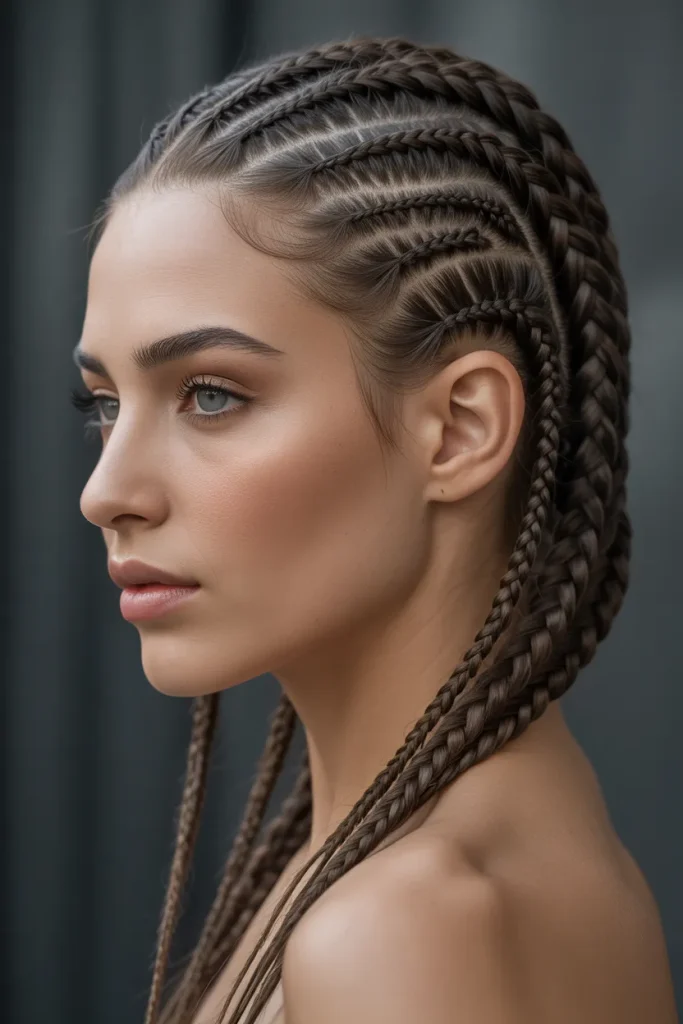
- Creates a dramatic crown silhouette without excessive length.
- Slim braids give the style a precise, architectural finish.
- Works beautifully with naturally textured or carefully stretched hair.
- Lightweight styling products help maintain clean separation.
- The lifted shape draws attention toward the eyes and cheekbones.
- Ideal for fashion events, parties, and editorial-inspired photos.
- Refresh exposed roots with a light edge product between wears.
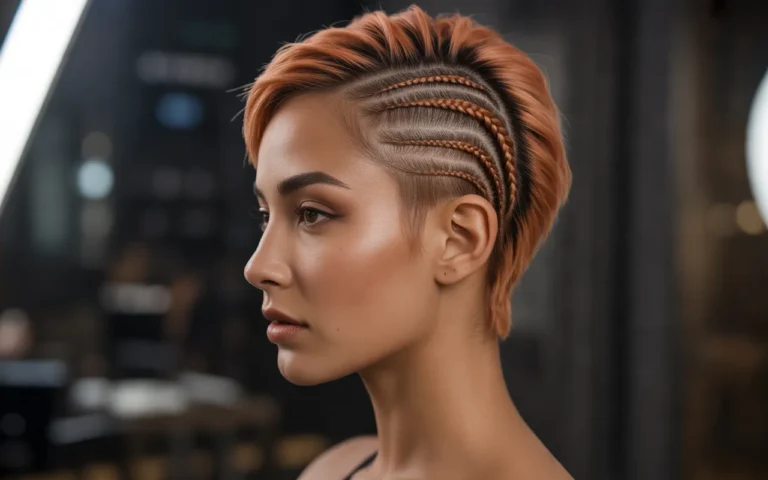
The right braided silhouette can turn an everyday look into something unforgettable. Sculpted Medusa braids create a striking crown effect by directing multiple narrow braids upward and outward, giving the hair an almost architectural shape. The contrast between sleek sections and textured braid lengths keeps the finish modern rather than costume-like. I’ve noticed that precise parting makes a major difference here, especially when the style is photographed from several angles. Keep the scalp sections clean and consistent, then soften the outer edges slightly for balance. The result feels bold enough for Pinterest while remaining wearable for dinners, concerts, and creative events.
This style becomes especially interesting when the braid thickness changes gradually from the center toward the sides. Smaller braids near the hairline can create delicate framing, while slightly fuller lengths build the dramatic outer silhouette. For installation, use controlled tension rather than pulling aggressively, particularly around fragile edges. A satin scarf at night can help preserve the smoother sections and reduce unnecessary friction. The style can also be personalized with subtle metallic cuffs, neutral extensions, or a glossy finish without changing its core shape. If your hair is shorter, tapered braided pieces can create similar height while keeping the overall design balanced and intentional.
Coiled Crown Tendrils
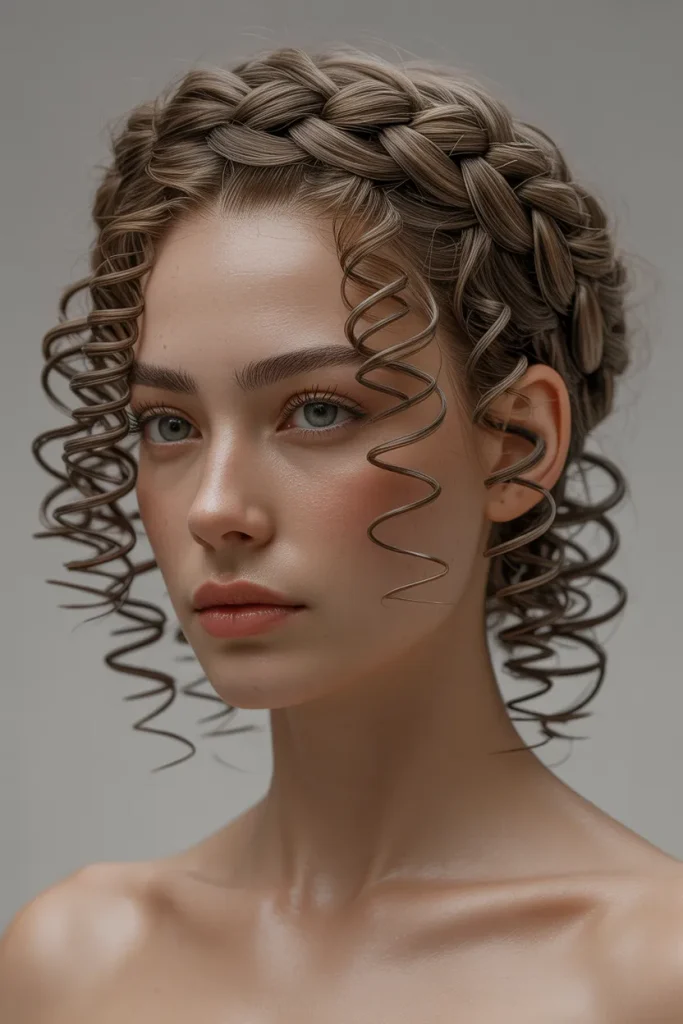
- Combines structured braiding with expressive spiral texture.
- Coils create movement around the face and crown.
- The rounded silhouette gives shorter hair noticeable visual height.
- Lightweight curl cream can keep tendrils defined.
- Particularly striking on naturally curly or coily textures.
- A few intentional tendrils soften the structured crown.
- Suitable for date nights, celebrations, and creative portraits.
A halo of defined coils gives this look its irresistible energy. The braided crown keeps the foundation controlled, while springy tendrils escape around the upper silhouette to create movement and personality. Instead of making every strand perfectly uniform, the design benefits from slight variation in coil size and direction. That controlled irregularity makes the hairstyle feel current and editorial. The rounded shape can also visually lift the face, especially when the tendrils begin near the temples. For a polished finish, smooth the crown first and define the loose pieces afterward. This prevents excessive product from weighing down the curls or making them appear stiff.
The beauty of this design is how easily its proportions can change. More tendrils create a playful, fuller outline, while fewer pieces produce a cleaner luxury finish. I’ve seen this approach work particularly well when the front is kept slightly flatter and the crown receives more volume. That arrangement prevents the hairstyle from becoming visually heavy around the forehead. Refresh individual coils with a small amount of water and curl cream rather than repeatedly brushing them. For special occasions, tiny pearl pins can accent the braided sections without overpowering the texture. A satin bonnet or scarf can also help preserve the definition overnight.
Serpentine Bubble Braids
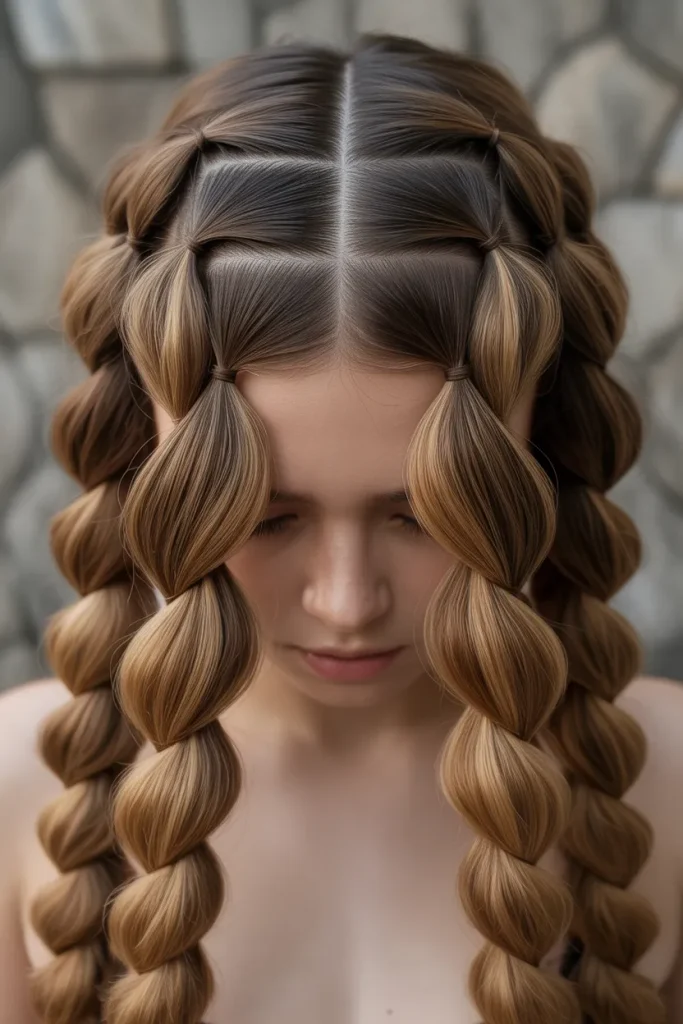
- Rounded braid segments create a distinctive serpentine rhythm.
- Alternating section sizes add dimensional movement.
- Long lengths make the silhouette especially dramatic.
- Smooth roots contrast beautifully with fuller bubble sections.
- Extensions can provide additional length and consistent volume.
- A flexible finishing spray helps maintain the shape.
- Excellent for concerts, fashion shoots, and evening occasions.
Long, rounded sections give these bubble braids a hypnotic quality that feels instantly different from ordinary plaits. The serpentine effect comes from creating controlled bubbles along the length, then gently shaping each section so the silhouette bends rather than falling completely straight. A sleek center part keeps the upper half refined and lets the exaggerated lengths become the focal point. The finish looks especially strong when the bubbles are slightly varied instead of perfectly identical. That small difference gives the hairstyle movement and makes it more believable in photographs. For Pinterest content, a side angle clearly reveals the sculptural rhythm.
The structure can be adapted to suit different hair densities without losing its signature appearance. Fine hair may benefit from lightweight extensions placed strategically through the lengths, while dense hair can create fuller bubbles naturally. Secure each segment firmly but avoid excessive tension at the roots. A smoothing serum on the top sections helps create the polished contrast that makes the shape stand out. If you want a softer interpretation, leave a few wispy strands around the temples. For a stronger editorial finish, keep the hairline exceptionally clean and use monochromatic cuffs sparingly. This version works beautifully with sleek tailoring and minimal jewelry.
Metallic Medusa Twists
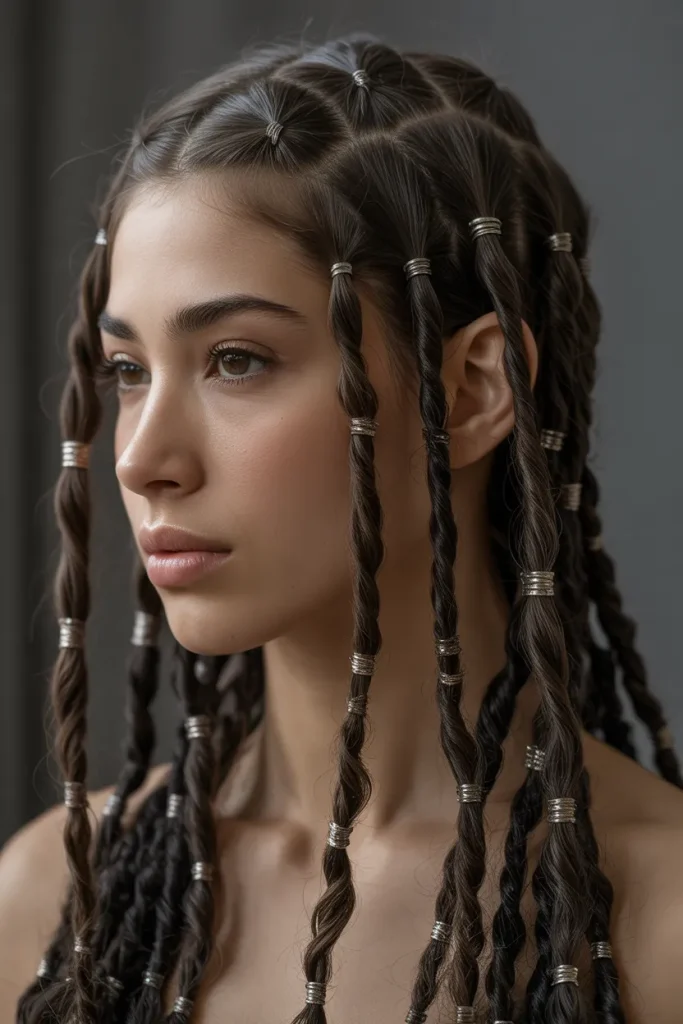
- Twists create softer dimension than tightly braided structures.
- Small metallic cuffs add controlled futuristic detail.
- The elevated crown provides an expressive silhouette.
- Works with medium, thick, or extension-enhanced hair.
- Keep accessories limited so texture remains visually dominant.
- A light shine spray emphasizes individual twist definition.
- Great for parties, gallery events, and fashion-forward occasions.
Metallic accents instantly sharpen the futuristic character of these twists without requiring an elaborate color change. Several rope-like sections are gathered around an elevated crown, allowing the ends to curve and overlap instead of hanging in a predictable line. The result feels sculptural but still soft because twists naturally retain a little surface texture. I’d keep the accessories concentrated in a few strategic places rather than decorating every section. That creates visual rhythm without making the style feel busy. A slightly glossy finish on the crown also helps the metallic details catch the light beautifully in photographs and evening settings.
The twisting technique can be adjusted according to your natural texture and desired fullness. Tighter twists create a cleaner, more graphic effect, while looser twists give the silhouette an effortless editorial quality. If your hair is fine, a small amount of volumizing mousse before twisting can improve body without creating heaviness. When working with extensions, matching the texture closely makes the transition between natural hair and added length less noticeable. At night, loosely wrapping the crown with satin can protect the finish. Remove the metallic cuffs before sleeping if they catch easily, then replace them when styling the look again.
Wet-Look Serpent Waves
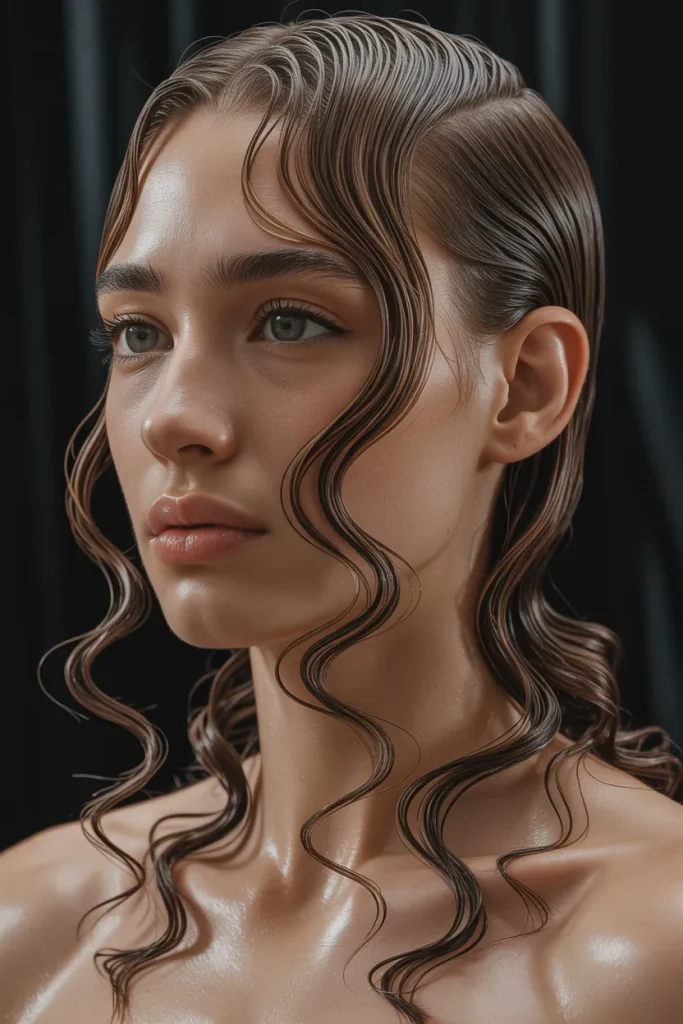
- Glossy roots create a sophisticated runway effect.
- Sculpted S-waves add fluidity without traditional curls.
- The wet-look finish photographs beautifully under directional lighting.
- Best suited to straight, stretched, or easily molded hair.
- Strong-hold gel helps preserve the defined wave pattern.
- Keep the sides controlled for a cleaner silhouette.
- Ideal for evening parties, editorials, and special occasions.
Glossy waves can make hair look almost liquid, and this version pushes that effect into a dramatic serpentine shape. The roots stay close and polished while the lengths form deliberate S-curves that move around the head instead of simply falling downward. This creates the visual impression of flowing ribbons while keeping the overall silhouette controlled. The finish is especially striking with minimal makeup and simple clothing because the hair becomes the main statement. To build the shape, apply styling gel section by section and mold each curve before allowing it to set. Patience during shaping makes the final pattern cleaner and more defined.
The main trick is controlling shine without turning the hair stiff or overly coated. A strong styling gel can establish the wave, while a small amount of lightweight glossing product adds reflective dimension afterward. If your hair naturally resists molding, stretching it first can make the curves easier to form. Keep the wave pattern slightly larger around the cheekbones to create a flattering frame. For longer hair, continue the curves down the back for a dramatic finish. This style is best preserved by avoiding unnecessary brushing after it sets. Instead, smooth isolated flyaways with fingertips and a tiny amount of product.
Double-Tail Medusa Pony
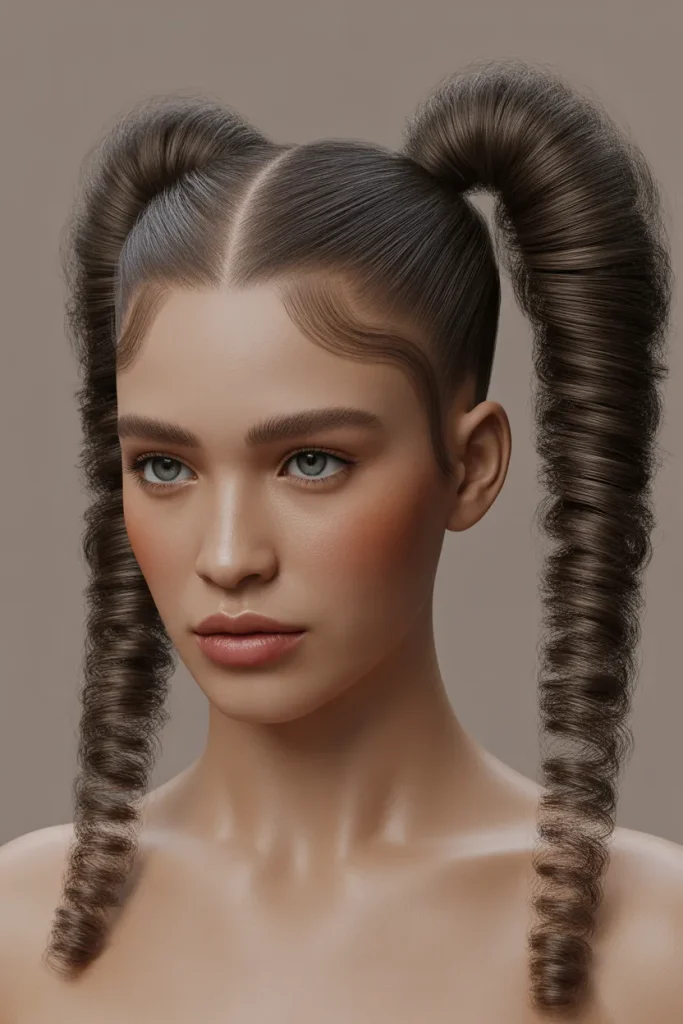
- Two elevated tails create instant visual symmetry.
- Segmented lengths add texture and sculptural interest.
- The center part keeps the look polished and balanced.
- High placement visually elongates the face and neck.
- Suitable for medium to long hair with secure extensions.
- Strong elastics help maintain the lifted structure.
- Works particularly well for energetic party styling.
Two high ponytails turn a familiar shape into something much more expressive. Instead of ordinary straight tails, each section is divided into soft rounded segments that create a sculptural, almost animated silhouette. The symmetrical placement keeps the look polished, while the curved ends prevent it from feeling overly severe. I’ve noticed that positioning the ponytails slightly behind the highest point of the head gives better balance and avoids making the forehead appear visually crowded. Keep the center part crisp, then soften only the lengths. This contrast between precision and movement gives the hairstyle its modern Pinterest-ready personality and strong photographic impact.
The segmented lengths can be made subtle for everyday wear or exaggerated for a more editorial result. Start with secure ponytail bases because the added structure creates more weight than a standard tail. If your hair is fine, extensions can add fullness while preserving the clean upper shape. A small amount of edge control around the part keeps the foundation polished without flattening everything. For a playful finish, curl the final few inches in different directions so the tails appear lively rather than rigid. This design pairs especially well with fitted outfits, statement earrings, and occasions where you want the hairstyle to lead.
Twisted Halo Mohawk
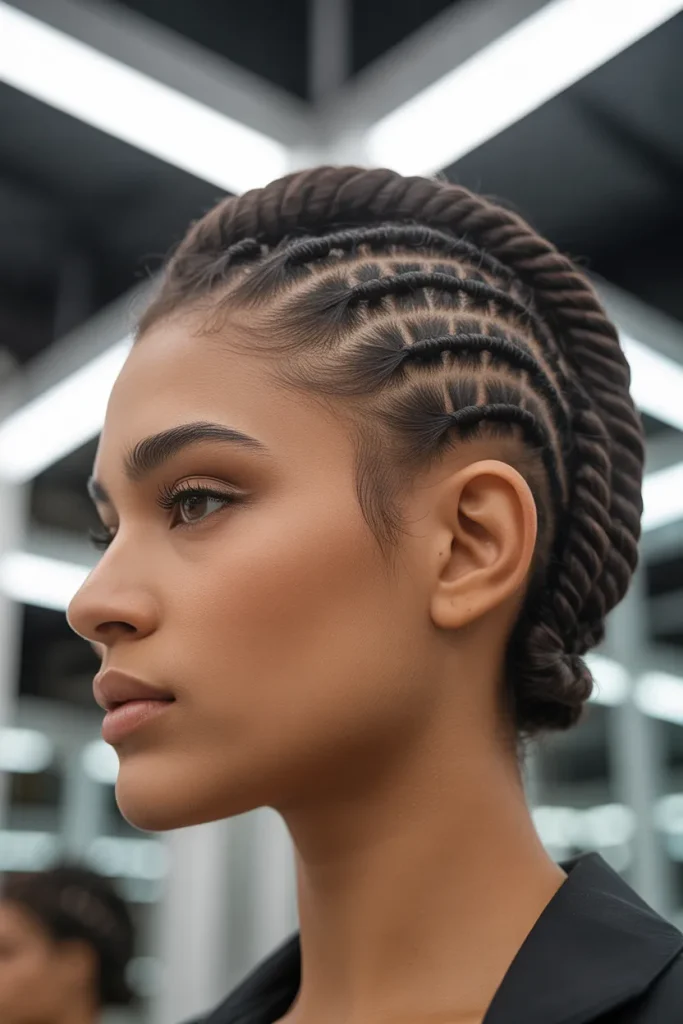
- The central ridge creates strong vertical height.
- Sleek sides emphasize the sculptural top section.
- Rope twists provide texture without requiring intricate braiding.
- Excellent for dense, textured, or extension-supported hair.
- The shape can be widened or narrowed for personalization.
- A firm styling cream helps maintain twist definition.
- Strong choice for fashion events and statement portraits.
A raised central ridge gives this twisted halo mohawk an instantly powerful silhouette. Rope twists travel along the top of the head and curve toward the back, while the sides remain smooth enough to emphasize the height. The design feels bold because the volume is concentrated instead of spread evenly across the entire hairstyle. This makes it especially useful when you want dramatic impact without extremely long hair. For a salon finish, build the ridge gradually and keep the twist direction consistent. The cleanest result comes from establishing the side sections first, then shaping the raised center so every angle looks intentional.
The proportions can change dramatically depending on how high the central twists sit. A lower ridge feels sophisticated and wearable, while greater height creates a runway-inspired statement. Dense natural hair can provide excellent structure, but lighter textures may need discreet extensions or padding for additional lift. Keep the side sections smooth with a lightweight styling cream rather than heavy wax, which can make the surface look dull. A satin wrap can help preserve the smooth sides overnight. For special occasions, one or two understated hair cuffs can highlight the twists without distracting from the architectural silhouette.
Spiral Crown Cascade
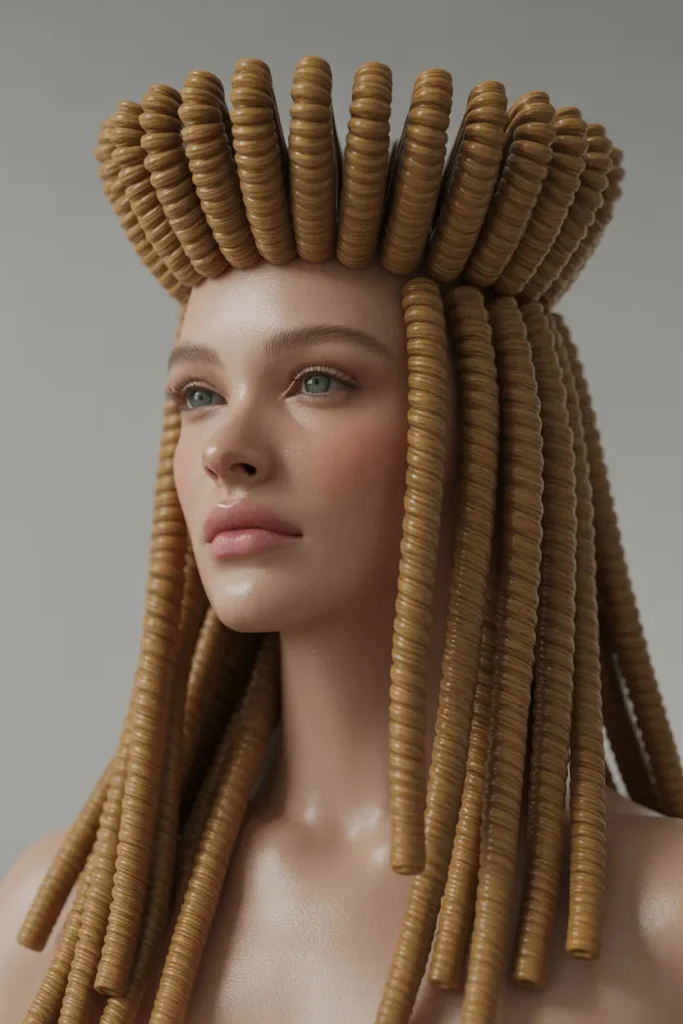
- A circular crown creates height without severe structure.
- Long spirals provide movement and visual softness.
- The cascading lengths balance the lifted top beautifully.
- Works especially well with curly and coily textures.
- Curl-defining products preserve separation between spirals.
- Longer lengths make the silhouette more dramatic.
- Suitable for weddings, dinners, and elevated celebrations.
A spiraling crown that flows into long coils creates the kind of movement that catches attention before you notice every detail. The upper section is shaped into a rounded, elevated form, while defined spirals cascade from beneath it like a controlled waterfall. This combination gives the hairstyle both height and softness, preventing the volume from looking one-dimensional. The crown should feel full but not excessively stiff, so preserve some natural texture throughout the coils. For a polished result, define the lengths individually and allow them to dry completely before separating them. That keeps the spiral pattern visible and prevents unnecessary frizz.
The cascading shape is easy to personalize by changing where the volume begins. Starting the spirals higher creates a dramatic crown, while allowing more hair to remain close at the top produces a softer profile. For naturally curly hair, work in small sections with curl cream and a light gel to encourage consistent definition. Avoid repeatedly touching the hair while it dries because that can disturb the spiral pattern. Once dry, gently separate only the coils that look too compact. This approach preserves movement while adding fullness. The finished style works beautifully with open necklines and delicate earrings.
Braided Snake Crown
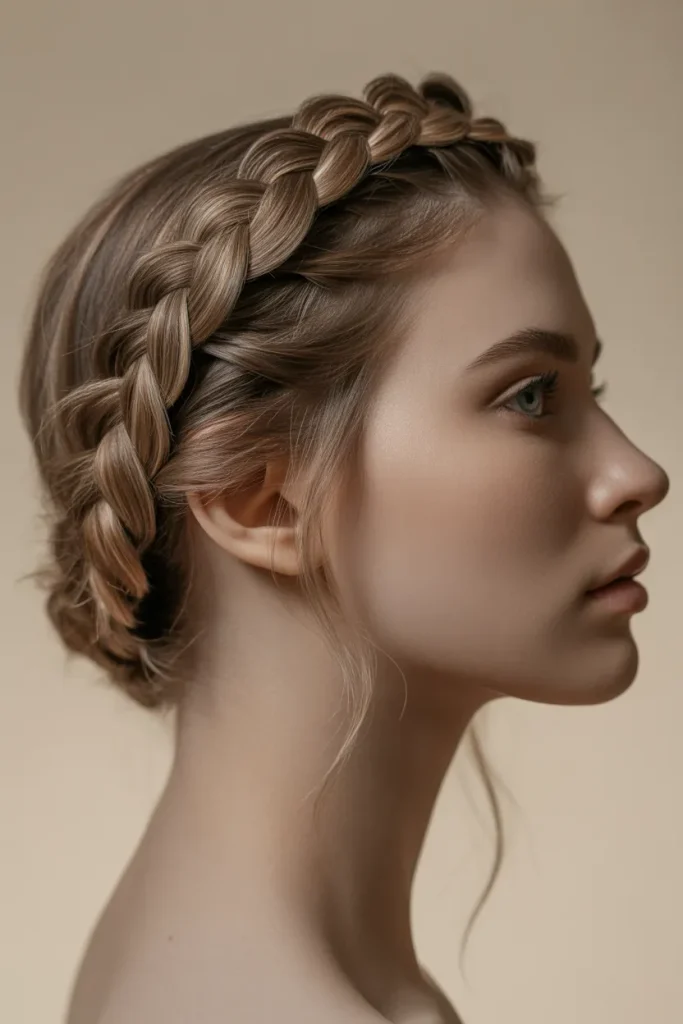
- The asymmetrical crown creates an unexpected focal point.
- A curved braid mimics a subtle serpentine pathway.
- Loose ends prevent the design from appearing overly rigid.
- Particularly effective on medium and long hair.
- Side placement frames the temple and cheekbone area.
- Fine smoothing cream keeps the braid polished.
- Beautiful for ceremonies, dinners, and editorial portraits.
A single curved braid can create more intrigue than a complicated arrangement when its placement is unexpected. This snake crown travels asymmetrically around the head, following the natural curve from one side toward the back. The design feels refined from the front but becomes more dramatic as the wearer turns, making it particularly effective for photographs and video. Keep the braid narrow enough to preserve its serpentine quality, then allow the end to loosen slightly. I’ve found that this small contrast between controlled structure and relaxed texture makes the style feel contemporary rather than overly formal.
The asymmetrical placement also gives you plenty of room to personalize the look around your face shape and hair density. Positioning the braid closer to the temple creates stronger framing, while moving it backward produces a cleaner profile. If your hair is shorter, an added braided piece can extend the design without changing its pathway. Use a flexible edge product around the starting section, but avoid saturating the entire braid with gel. A little natural texture helps the plait appear dimensional. For events, tiny pins hidden inside the braid can improve security while keeping the finished style visually effortless.
Velvet Rope Pigtails
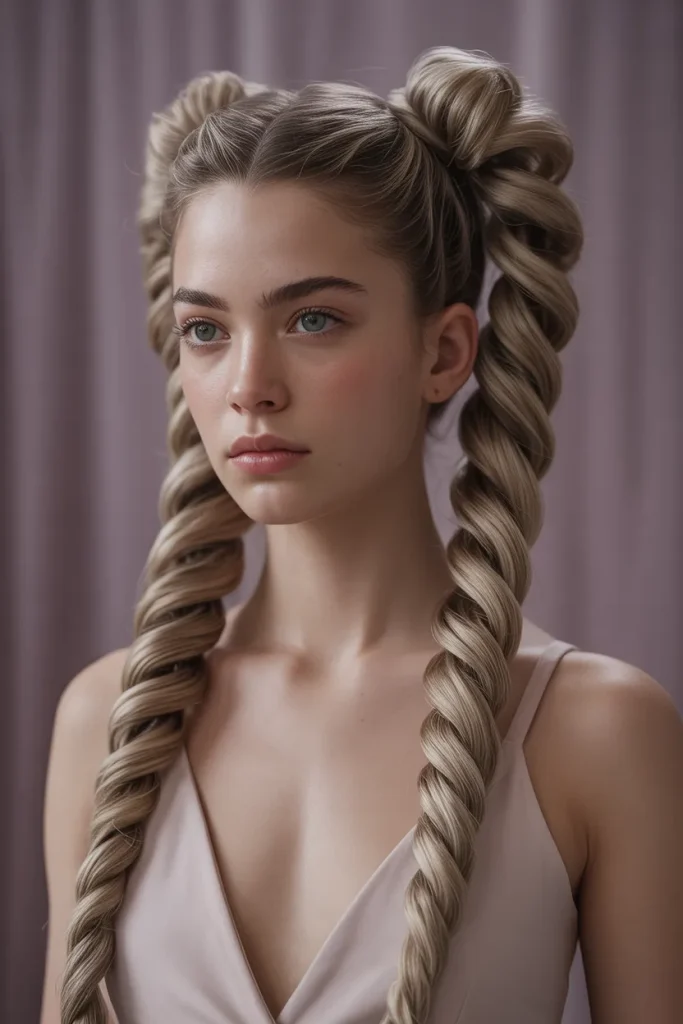
- Thick rope twists create plush visual volume.
- High placement gives the face a youthful lift.
- Soft waves keep the pigtails from looking rigid.
- Works well with dense hair or fullness-enhancing extensions.
- A smooth root section contrasts with textured lengths.
- Light serum can enhance the plush surface finish.
- Excellent for playful parties and fashion-forward daytime looks.
These plush rope pigtails bring playful energy into a polished, fashion-forward silhouette. Each tail begins high on the head and twists into a thick, softly waved rope, creating volume without relying on complicated braiding. The roots stay controlled so the overall shape feels intentional, while the lengths remain touchable and slightly relaxed. This balance makes the style youthful without becoming overly sweet. To achieve the richest effect, build fullness through the lengths before twisting. The finished pigtails should look substantial but flexible, with enough movement to sway naturally when you walk, turn, or pose for photographs.
Texture is what gives this hairstyle its distinctive softness, so avoid flattening the twists with excessive product. A lightweight serum on the finished lengths can create a subtle velvet-like sheen while preserving movement. If your hair is naturally thick, divide each tail into manageable sections before twisting to keep the structure secure. Finer hair can use extensions for extra body without changing the placement. Keep the roots smooth around the part and temples, then let the texture increase gradually toward the ends. This transition makes the hairstyle look more sophisticated and gives the silhouette a deliberate, editorial finish.
Crowned Corkscrew Updo
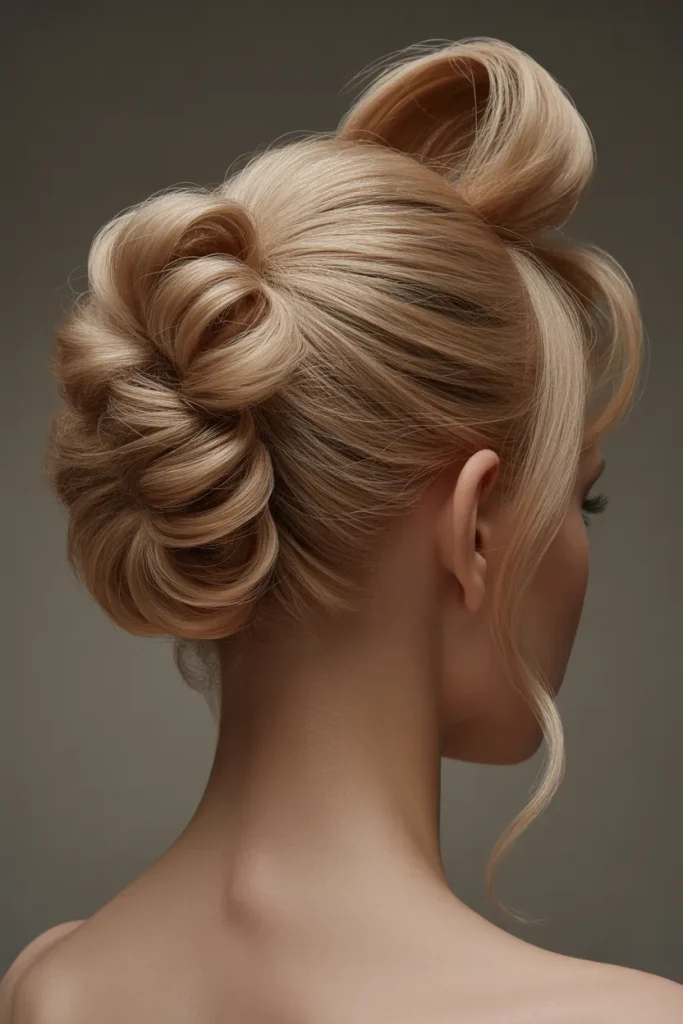
- Corkscrew sections create intricate visual depth.
- The elevated crown adds height without excessive width.
- Defined spirals make the updo especially photogenic.
- Secure pinning keeps the sculptural shape stable.
- Works beautifully with naturally curly or coily textures.
- Smaller spiral sections create greater detail and dimension.
- Suitable for formal celebrations and editorial styling.
A crown built from corkscrew spirals gives the updo a rich, dimensional finish that looks intricate from every angle. Rather than smoothing the curls into one solid mass, the design preserves individual spirals and gathers them upward into a rounded structure. This allows light to move across the texture and makes the hairstyle particularly striking in close-up photographs. Keep the edges polished, but let the crown retain visible curl definition. The contrast makes the style feel luxurious instead of overly controlled. A secure internal foundation is important because the height and layered texture need support throughout longer occasions.
The spiral size can completely change the personality of this updo. Smaller corkscrews create a detailed, jewel-like surface, while larger spirals give a softer and more romantic appearance. For natural curls, define sections before assembling the crown so the pattern remains consistent. Once the hair is dry, pin each group from underneath rather than placing too many visible pins across the surface. A light mist of flexible hold can secure the shape without creating crunch. If you want extra drama, slightly elongate a few spirals near the temples. Those pieces create delicate framing and keep the high crown from feeling too severe.
Electric Zigzag Braids
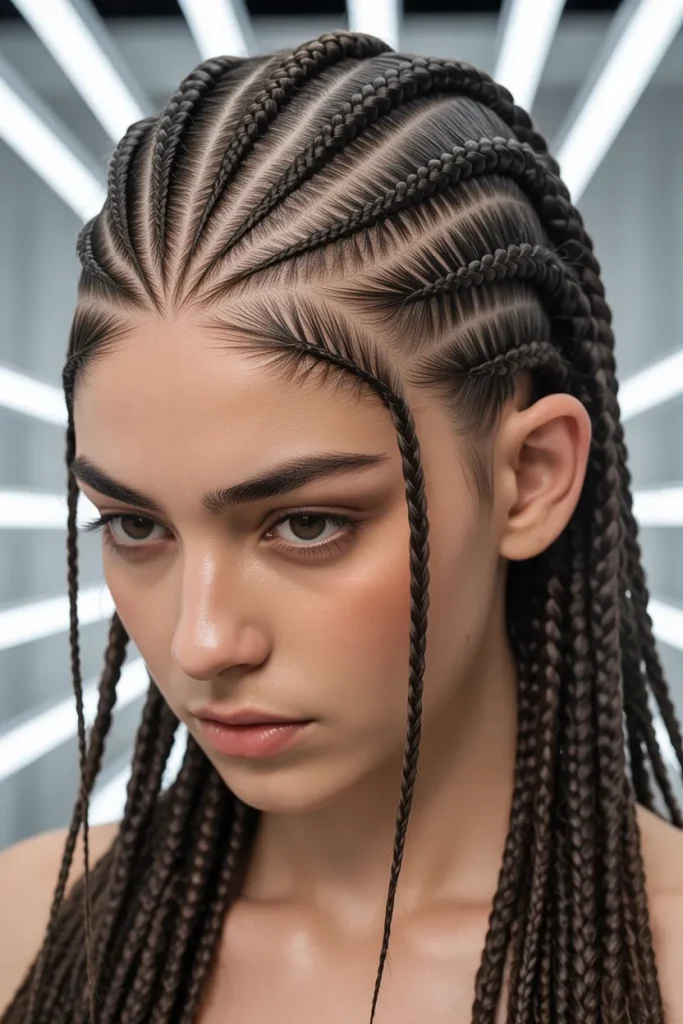
- Angular parting gives the hairstyle a futuristic character.
- Zigzag pathways create strong visual movement across the scalp.
- Textured lengths soften the geometric foundation.
- Precise sectioning is essential for a clean salon finish.
- Works especially well with medium to long hair.
- Edge control can sharpen the graphic front sections.
- Great for concerts, fashion events, and creative shoots.
Sharp geometric parting transforms these braids into a futuristic statement. Instead of following straight lines, each section moves through deliberate zigzags that guide the eye across the scalp before flowing into textured lengths. The angular foundation provides structure, while the softer ends keep the hairstyle from appearing too severe. This is a design where clean sectioning matters as much as the braiding itself. I’d recommend mapping the pattern before adding product or extensions so the lines remain balanced. Once finished, the hairstyle photographs especially well from above because the geometric pathways become immediately visible.
The zigzag pattern can be customized to create either a bold graphic effect or a more understated interpretation. Wider angles produce a dramatic runway appearance, while smaller movements create intricate detail. Keep the braid tension even throughout the sections to maintain consistent proportions. If your scalp is sensitive, avoid making the parts excessively narrow or pulling the finished braids too tightly. A lightweight sheen spray can emphasize the pattern without creating a greasy appearance. For a more futuristic finish, use one subtle accessory color throughout the hairstyle rather than mixing several shades. This keeps attention on the architecture of the braids.
Feathered Medusa Lob
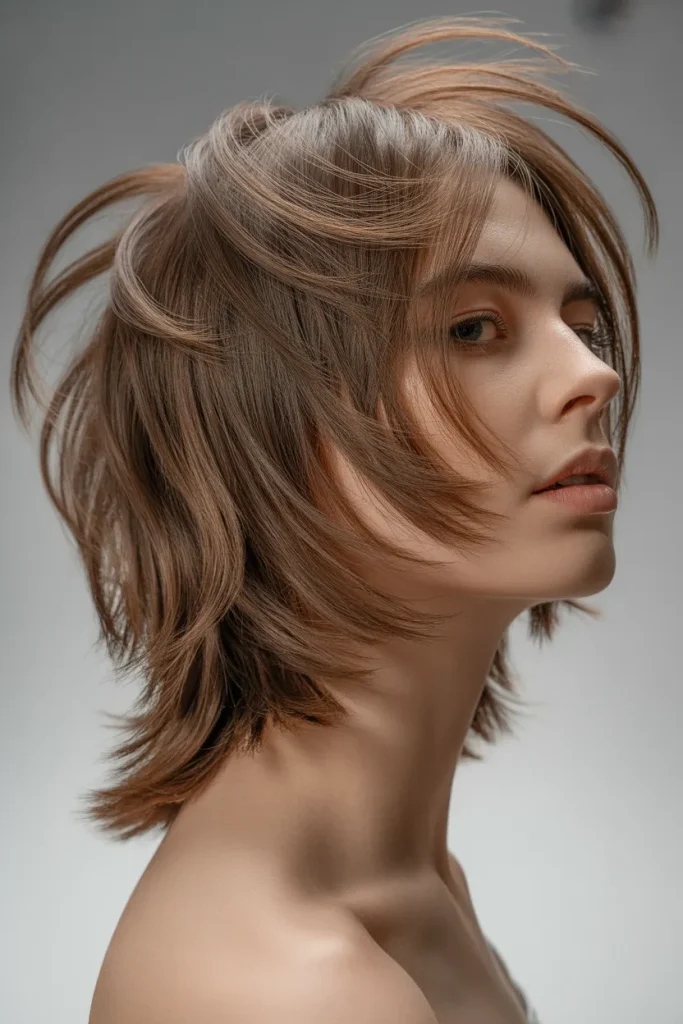
- Shoulder length makes the dramatic shape easier to wear.
- Feathered layers create airy movement around the crown.
- Wispy ends prevent the silhouette from becoming heavy.
- Works well with straight, wavy, or lightly textured hair.
- Blow-drying with a round brush enhances lift.
- Face-framing pieces can be customized around the jawline.
- Suitable for everyday styling, dinners, and creative events.
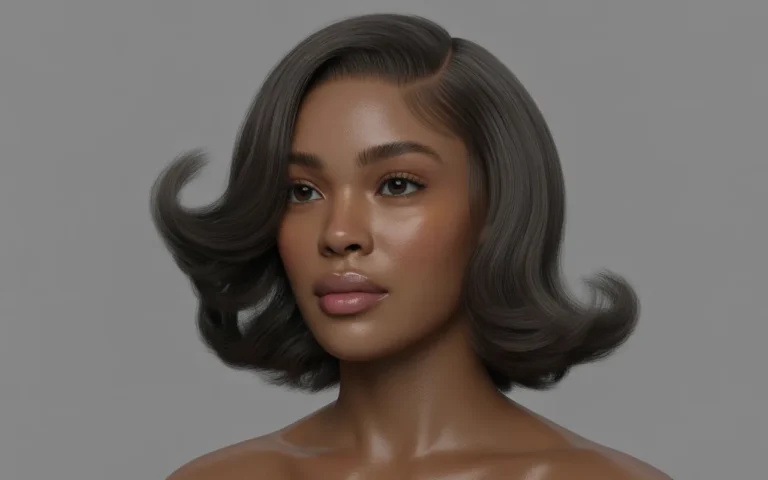
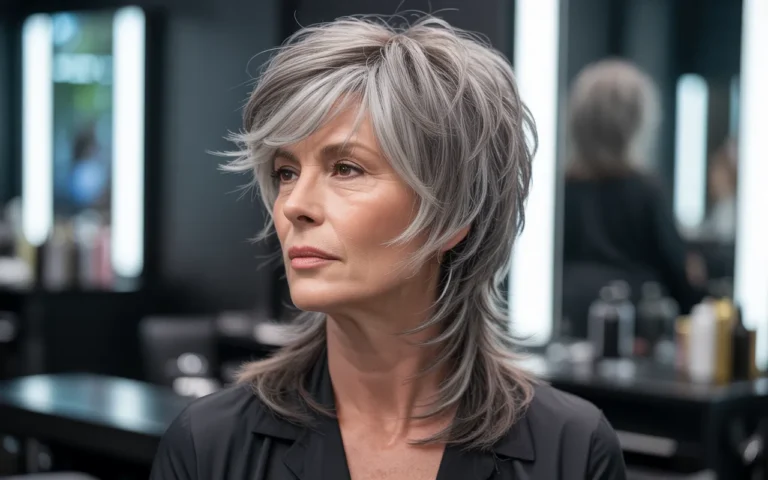
A shorter silhouette can still capture the wild energy associated with Medusa-inspired styling. This feathered lob uses airy layers that radiate around the crown, then taper into wispy ends near the shoulders. The shape feels lighter than a heavily stacked haircut because the layers are designed to move independently. It creates noticeable texture without demanding extremely long hair or elaborate extensions. For styling, lift the roots first and direct the layers away from the face with a round brush. Finish by separating selected ends with your fingers. That technique keeps the haircut soft, mobile, and intentionally imperfect rather than overly polished.
The lob length makes this design practical for people who want a statement haircut that still fits into everyday routines. Straight hair can reveal the feathered structure clearly, while naturally wavy hair adds extra movement with less styling. If your hair is thick, removing some internal weight can help the layers sit more naturally. Fine hair may benefit from keeping the lower perimeter slightly fuller while concentrating shorter pieces near the crown. I’ve noticed that this balance helps prevent the hairstyle from looking thin at the ends. A light texturizing spray can refresh the shape between washes without rebuilding the entire style.
Gilded Coil Knots
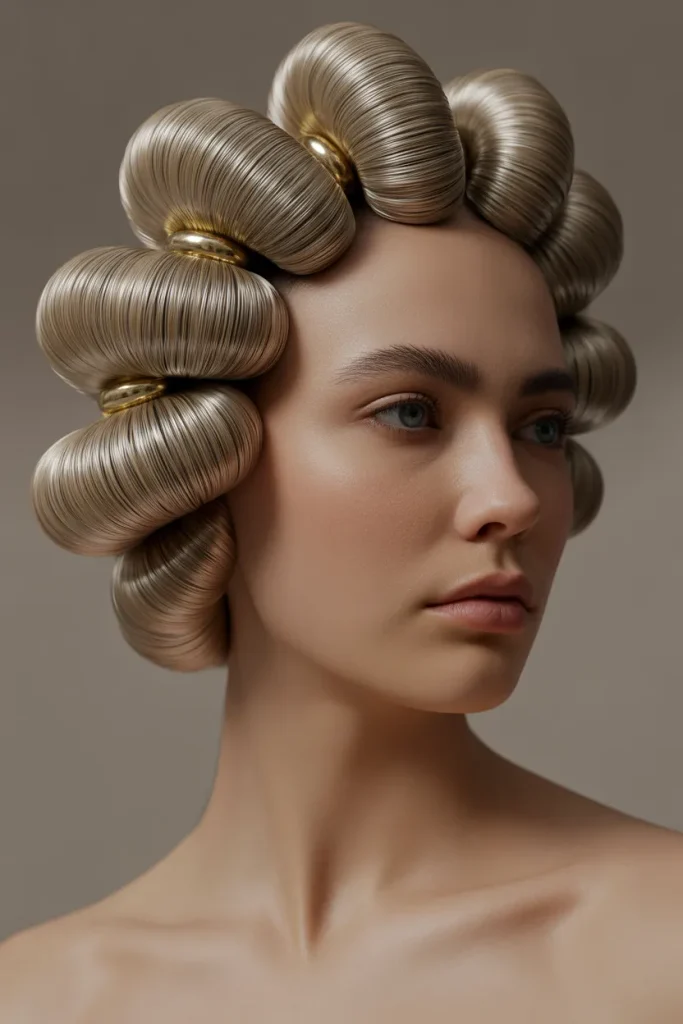
- Rounded knots create a refined sculptural texture.
- Strategic cuffs introduce subtle luxury without overwhelming the design.
- The crown arrangement provides noticeable height and dimension.
- Works particularly well with coily or tightly textured hair.
- Smaller knots can create intricate surface detail.
- Secure each knot from underneath for a cleaner finish.
- Ideal for weddings, celebrations, and evening events.
Rounded coil knots turn textured hair into a collection of sculptural details. Each section is wrapped into a compact knot, then positioned around the crown so the finished shape feels dimensional rather than flat. A few understated gold cuffs can highlight selected sections and introduce a luxurious accent without making the hairstyle overly decorative. The key is maintaining visible texture throughout the knots. Over-smoothing would remove the character that makes the design special. Build each knot individually, secure it from underneath, and then adjust the outer silhouette until the crown looks balanced from both the front and side.
This arrangement works especially well when knot sizes vary slightly across the crown. Smaller coils around the front can create delicate framing, while larger knots toward the back provide visual weight and height. For dense natural hair, stretch the sections gently before wrapping if you want a cleaner outline. For a softer finish, preserve more natural curl definition inside each knot. A small amount of moisturizing styling cream can improve manageability without making the surface greasy. If wearing the style overnight, protect the crown with satin and avoid crushing the knots against a pillow. This helps maintain their rounded structure and polished appearance.
Twisted Ribbon Cascade
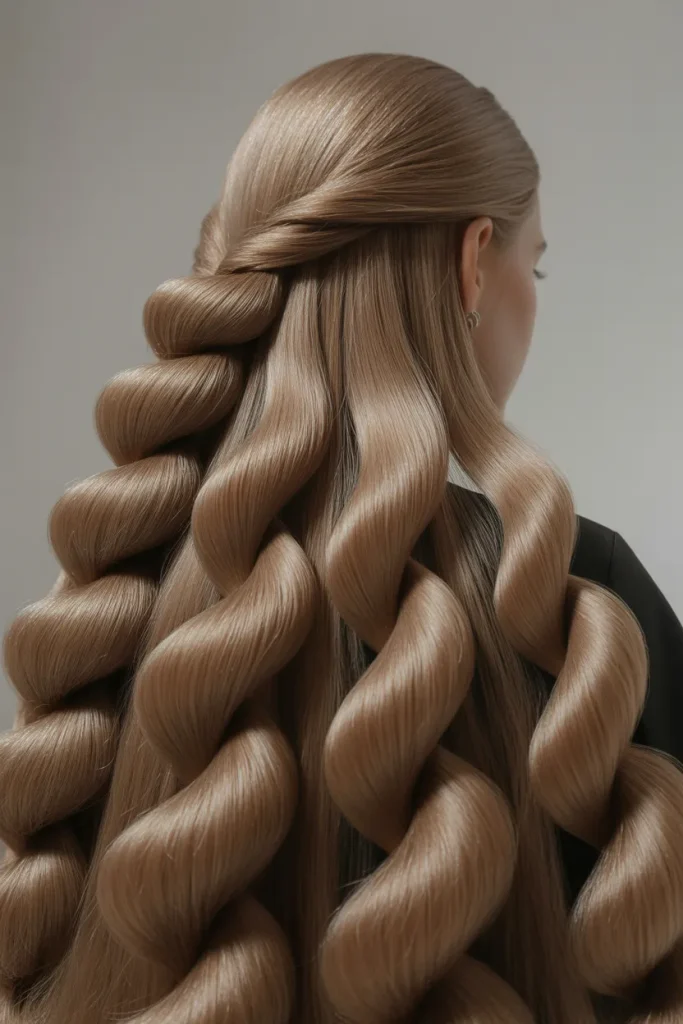
- Flat twists create a ribbon-like visual effect.
- Long cascading sections add graceful movement.
- Sleek roots provide contrast against dimensional lengths.
- The design suits medium to long hair.
- Extensions can create extra length and fullness when needed.
- Gentle twisting preserves a softer, flexible finish.
- Beautiful for weddings, dinners, and polished daytime occasions.
Long twisted sections can look surprisingly elegant when they are shaped like ribbons instead of traditional ropes. This cascade begins with a sleek crown, then releases several broad twists that curve through the lengths and overlap softly. The result has movement, dimension, and a subtle sculptural quality without appearing overly complicated. The twists should remain broad enough to catch light across their surface, which makes the hairstyle particularly beautiful in photographs. Keep the upper sections controlled and let the lower pieces move naturally. This contrast creates the effortless luxury that makes the look suitable for both events and elevated everyday styling.
The ribbon effect becomes stronger when each twist follows a slightly different path. Avoid making every section perfectly parallel because natural variation gives the cascade more depth. If your hair lacks length, extensions can provide the additional drop while the natural hair creates the foundation. Use a light cream before twisting to reduce flyaways and maintain flexibility. Heavy wax can flatten the surface and remove the airy quality. At the end, gently separate the outer edges of selected twists with your fingertips. This small step creates a softer silhouette while preserving the distinctive ribbon-like structure throughout the hairstyle.
Conclusion
Bold hair does not have to mean impractical hair. The ideas in this collection show how braids, coils, twists, waves, and sculptural shapes can create a completely fresh appearance while still allowing room for personal style. Medusa hairstyles can be adapted through length, texture, volume, accessories, and placement, making each concept your own. I’ve seen how the right hairstyle can completely change the mood of an outfit and make someone feel more confident walking into a room. Save this post on Pinterest so your favorite looks are easy to revisit, try the design that catches your eye, and share the inspiration with someone who loves adventurous hair. Your next unforgettable look could be one saved right here.