15 Clown Hairstyles That Are Bold and Creative
Ready to make your hairstyle the most unforgettable part of your look? Clown hairstyles bring bold color, playful volume, unexpected shapes, and creative texture together in ways that instantly stand out.
If ordinary hairstyles feel too predictable, these ideas offer a fresh way to experiment without losing a polished, fashion-forward finish. From sculpted puffs and spiral shapes to vivid color blocks and dramatic curls, each style is designed to create a strong visual moment. You’ll find options for different lengths, textures, and levels of styling confidence, whether you want a temporary statement for a party or a more expressive haircut to wear regularly. In my experience, the most successful creative hairstyles balance drama with structure, so the finished look feels intentional rather than chaotic. These ideas can help you discover new ways to play with volume, texture, color, and personality.
Neon Pigtail Sculpt
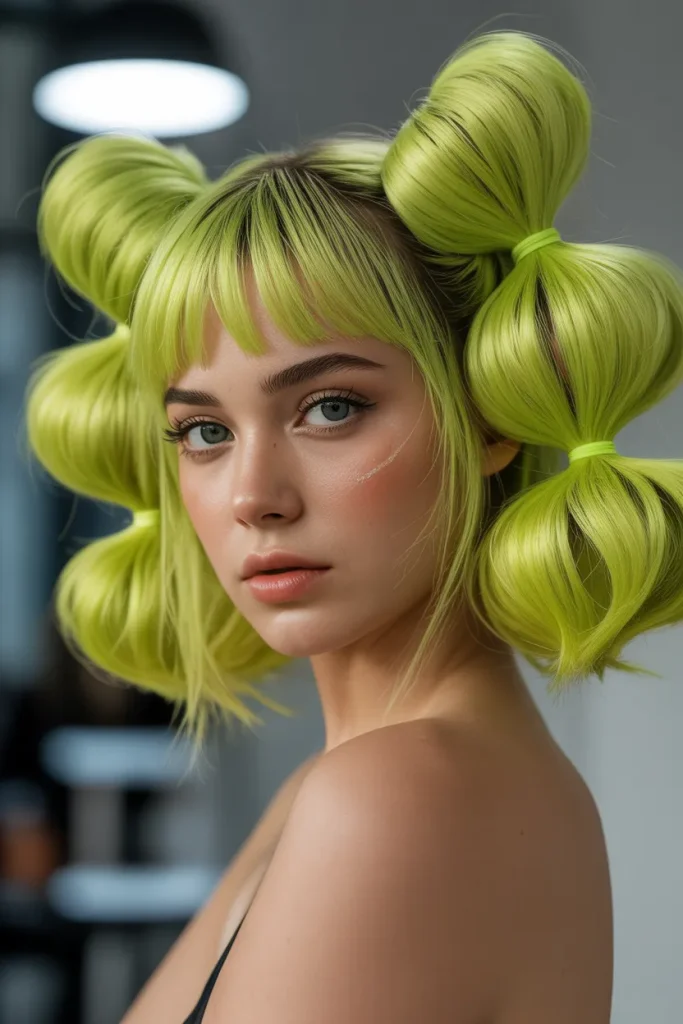
- Rounded pigtails create an instantly playful silhouette.
- Smooth roots keep the exaggerated shape polished.
- Neon color placement makes the structure photograph beautifully.
- Works especially well with medium to thick hair.
- Lightweight extensions can build extra volume without teasing heavily.
- Best suited to parties, festivals, editorials, and themed events.
These clown hairstyles turn playful volume into a polished fashion statement that feels surprisingly current. The two rounded pigtails sit high on the head, creating a balanced silhouette while leaving the face completely visible. I’ve noticed that sculptural shapes photograph especially well when the roots stay sleek and the outer sections remain softly rounded. That contrast keeps the look intentional rather than messy. Bright color makes the style even more expressive, but you can choose pastel pink, electric blue, or contrasting panels instead. The finished effect feels energetic, youthful, and editorial without requiring complicated braiding or elaborate accessories for visual impact.
For everyday preparation, begin with smooth, detangled hair and create a clean center part before securing both sides evenly. Add volume through lightweight extensions or carefully shaped padding if your natural density cannot support the rounded form. A flexible hairspray helps hold the silhouette while preserving some softness and movement. I’ve seen this approach work particularly well for medium and thick textures because the shape naturally holds its architecture. For finer hair, avoid excessive backcombing and build height gradually. Keep the ends polished, then check the profile from several angles so both sides feel equally balanced before finishing with a subtle shine spray.
Candy Coil Buns
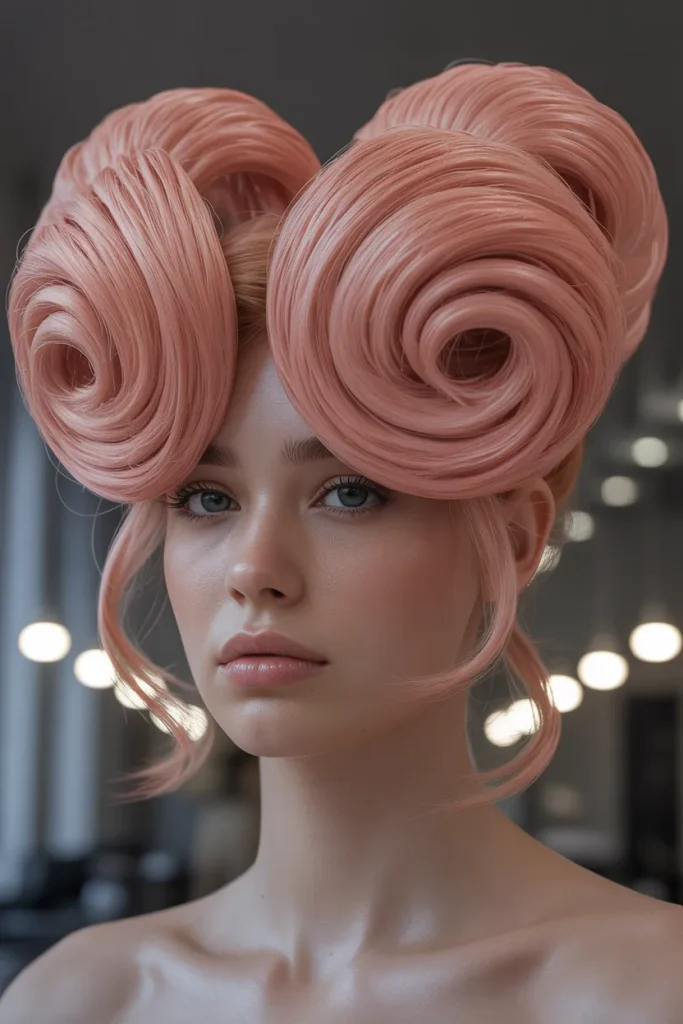
- Spiral construction gives ordinary buns an editorial twist.
- Symmetry makes the silhouette especially camera-friendly.
- Pastel shades soften the dramatic structure.
- Defined coils highlight natural texture and shine.
- Smaller buns suit short to medium lengths.
- The style transitions easily from festivals to creative photoshoots.
Candy Coil Buns make a playful silhouette feel refined enough for a fashion editorial. Two compact spiral buns sit above the ears, while carefully controlled coils create texture without overwhelming the face. The shape has a nostalgic quality, yet the cleaner finish makes it feel distinctly modern. I like this design when the center part is precise because it gives the style visual order beneath the exaggerated volume. Pastel shades can make the result softer, while saturated color creates more drama. The coils also catch light beautifully, especially when individual strands remain defined rather than coated in heavy, stiff product throughout the finished look.
Start by separating the hair into two equal sections and smooth each side before twisting. Wrap the length around itself gradually, keeping tension consistent so the coils remain rounded instead of becoming flat. If your hair is short, small extensions can provide enough length for a fuller spiral. For curly or coily textures, preserve the natural pattern rather than stretching everything completely straight. A light styling cream can control flyaways while maintaining definition. These buns are practical for creative events because the compact shape stays contained. Add a tiny amount of serum only to the surface, keeping the interior texture airy and dimensional.
Split-Color Ringlets
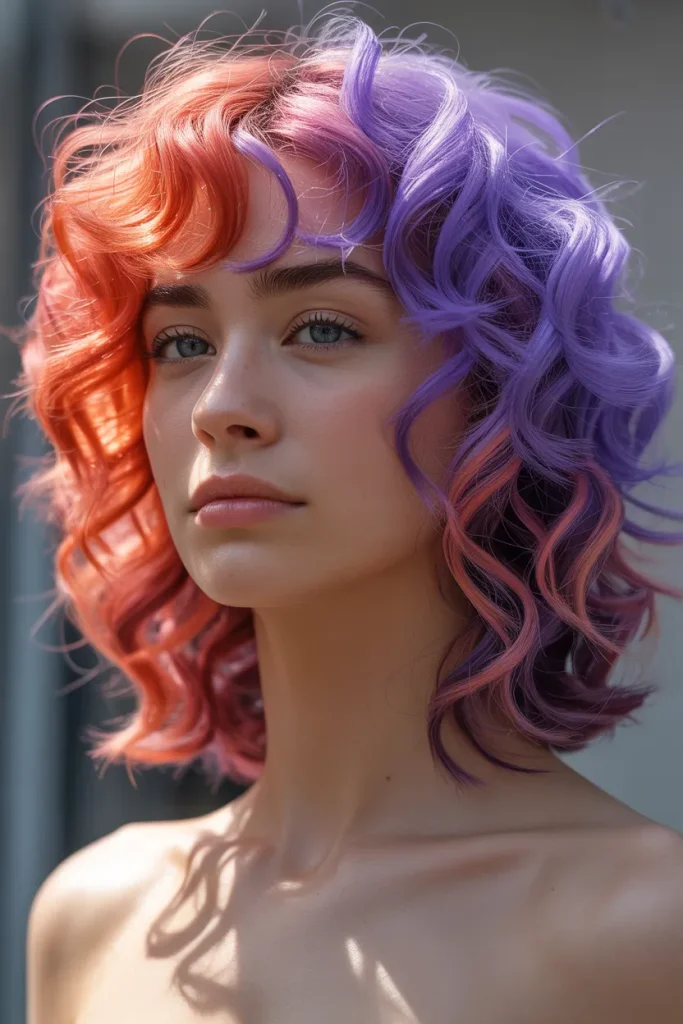
- Split coloring makes the curl pattern visually graphic.
- Shoulder length keeps the silhouette wearable.
- Springy ringlets create lively movement around the face.
- Defined ends prevent the style from looking shapeless.
- Color placement can emphasize either side of the haircut.
- A curl-refreshing mist makes next-day styling easier.
- Ideal for parties, portraits, and statement weekend looks.
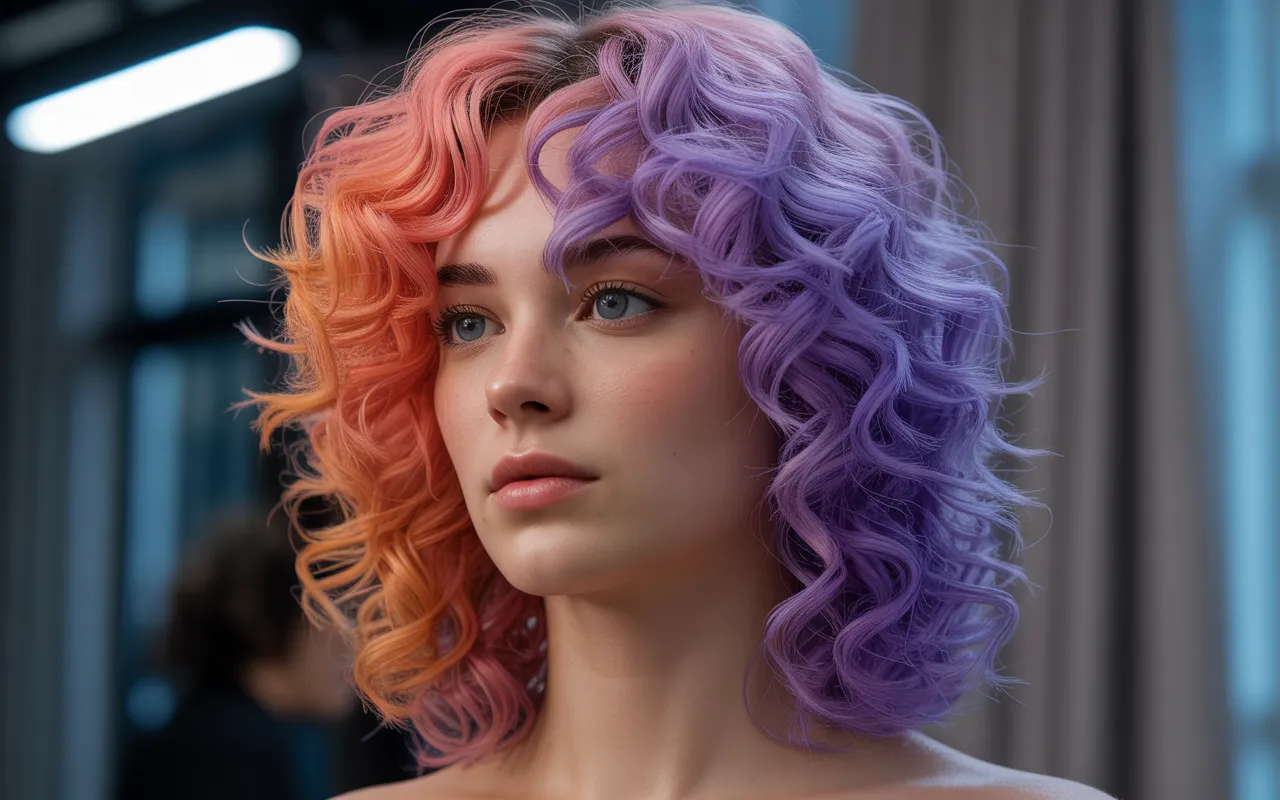
Split-color ringlets give a classic curly shape a bold, graphic identity. The clean color divide makes every curl more noticeable, especially around the cheekbones and jawline. Instead of relying on extreme height, this design uses controlled spring and contrasting tones to create visual energy. I’ve noticed that curls look more sophisticated when their natural grouping is preserved, so avoid separating every ringlet individually. Coral and violet create strong contrast, but softer combinations such as peach and lavender can make the effect gentler. The shoulder-grazing length keeps the style practical while still giving enough movement for photographs, dancing, and everyday wear.
To build the look, define curls while the hair is damp, then allow them to dry completely before shaping the silhouette. Use your fingers to separate only the sections that appear too dense, preserving larger curl families elsewhere. For color-treated hair, gentle cleansing and regular conditioning help the curls remain flexible and reflective. The two-color effect can also be customized with a vertical split, diagonal transition, or hidden underlayer depending on how dramatic you want the result. Keep the roots relatively natural if you prefer easier maintenance. This creates a softer grow-out and lets the colorful lengths remain the main attraction.
Ruffled Crown Bob
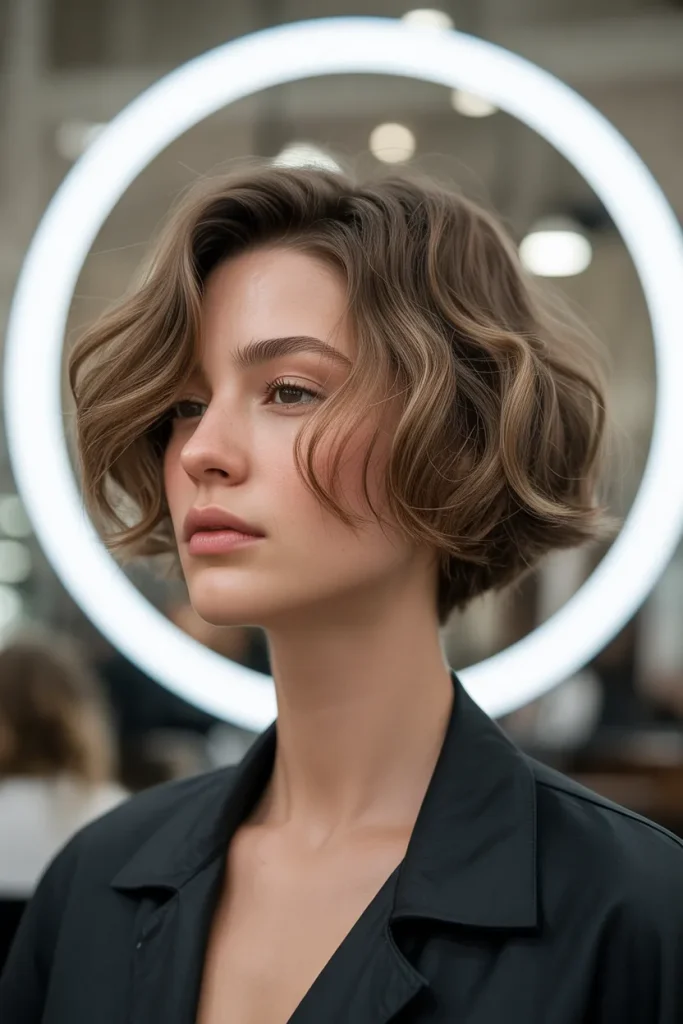
- Rounded crown volume creates a compact theatrical silhouette.
- Ruffled layers add movement without excessive length.
- Flipped ends give the bob a retro-modern finish.
- Short proportions keep the shape easy to maintain.
- Lightweight mousse helps preserve airy texture.
- Suits straight, wavy, and lightly textured hair.
- Excellent for portraits where the haircut needs strong definition.
The Ruffled Crown Bob transforms a short haircut into a compact, theatrical shape with plenty of movement. Its rounded crown rises gently above feathered layers, while the ends flick outward in different directions. This uneven finish keeps the silhouette lively instead of overly perfect. I’ve seen short styles become much more expressive when the perimeter is allowed to move rather than being pressed completely flat. The result feels inspired by vintage costume shapes but has a cleaner salon finish. It works beautifully with bold makeup, statement earrings, or a simple outfit when you want the haircut itself to become the strongest visual element.
For styling, apply a lightweight volumizing mousse near the roots before blow-drying with a small round brush. Direct the crown upward, then curve selected ends outward rather than making every section identical. A small flat iron can refine individual flips once the hair is dry, but keep the bends loose. Fine hair benefits from minimal product so the crown does not collapse under weight. Thicker hair may need internal layering to reduce bulk around the sides. Finish with flexible spray instead of a hard shell. That allows the ruffled perimeter to move naturally while keeping the rounded crown visibly structured.
Electric Side Sweep
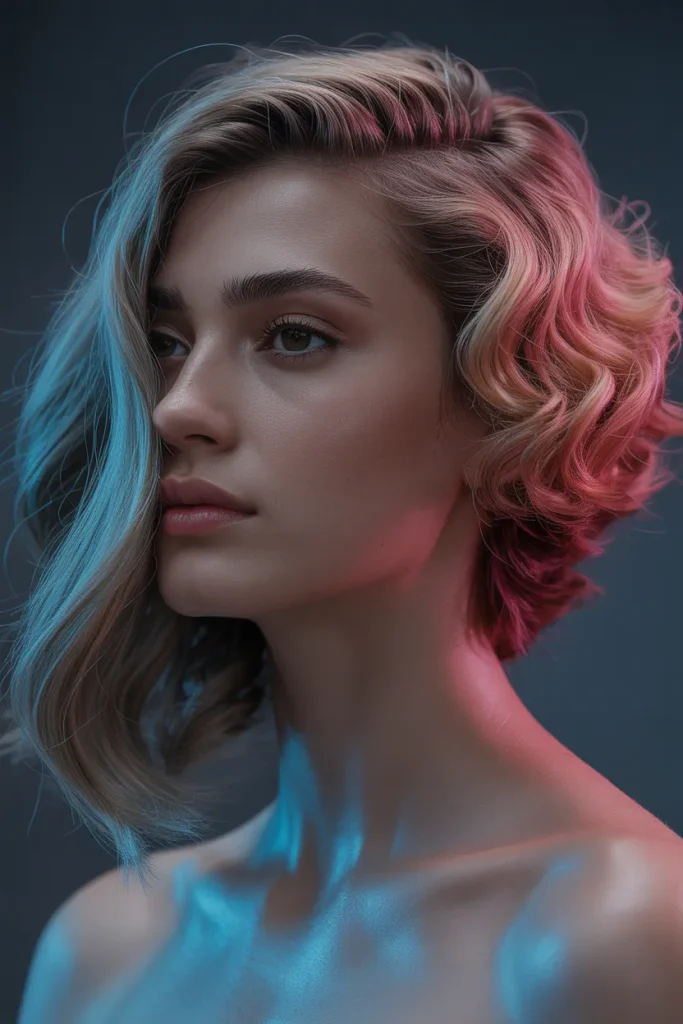
- Strong asymmetry creates immediate editorial impact.
- One sleek side balances the larger volume.
- Curled movement softens the dramatic silhouette.
- Color accents can highlight the sweeping section.
- Works with medium and long lengths.
- Side placement can visually elongate the face.
- Particularly striking for evening events and photography.
The Electric Side Sweep uses contrast rather than symmetrical volume to create its dramatic personality. One side stays sleek and close to the head, while the opposite section sweeps outward in oversized curls. This gives the face a clear focal point and makes the silhouette look dynamic from a three-quarter angle. A vivid accent color can follow the larger side, but even natural hair looks striking with this structure. In my experience, asymmetry often feels more modern when one area is deliberately restrained. The polished section provides that restraint, allowing the textured sweep to look bigger without making the entire hairstyle feel visually crowded.
Create a deep side part and smooth the smaller section firmly toward the ear. Secure it discreetly underneath the larger side so the transition remains clean. Curl the remaining hair in alternating directions, then brush through the curls lightly to create broad movement instead of separate spirals. A heat protectant is essential before using hot tools, especially on color-treated lengths. If your hair is fine, hidden clip-ins can add body without requiring aggressive teasing. Keep the ends slightly imperfect for a softer finish. This shape works especially well with statement collars because the sweeping volume remains visible above the neckline.
Bubble Halo Updo
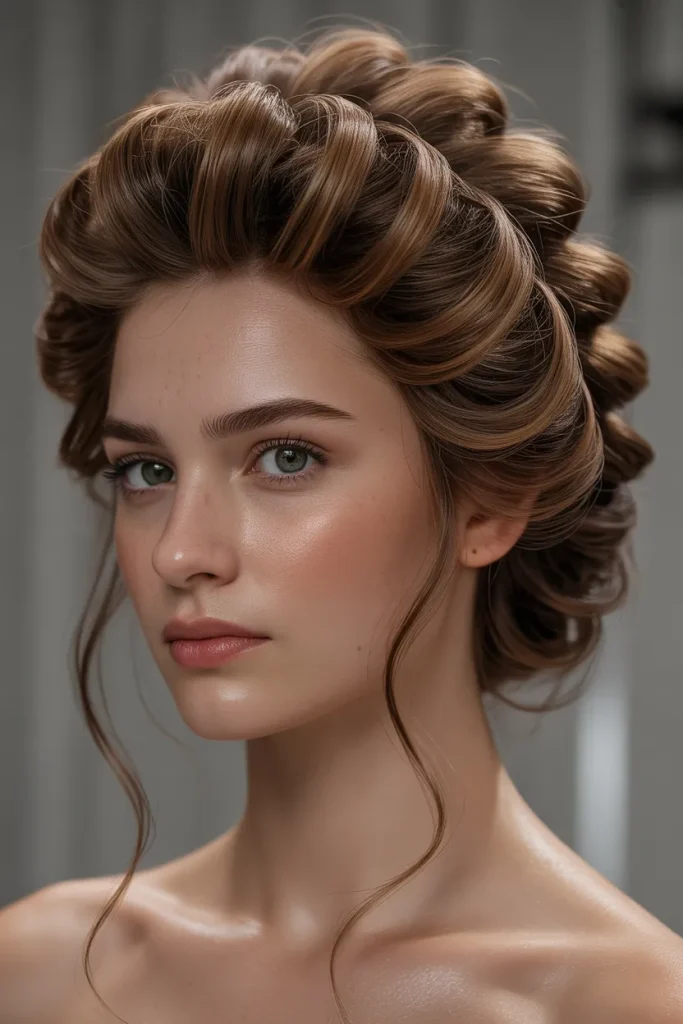
- Rounded sections create a graphic halo effect.
- Elevated placement keeps the face open and visible.
- Segmented volume adds rhythm around the crown.
- Smooth surfaces make the exaggerated form look polished.
- Extensions can increase fullness for longer-lasting structure.
- Suitable for medium to long hair.
- Works particularly well with theatrical evening styling.
The Bubble Halo Updo surrounds the crown with rounded sections that resemble soft inflated beads. Instead of placing one large bun at the back, the hair is divided into several smooth bubbles that form a continuous ring. This creates height without hiding the face. The design feels playful but surprisingly sophisticated when each section is evenly proportioned. I’ve noticed that exaggerated hairstyles look more expensive when the parting underneath is precise. That small detail gives the entire shape a deliberate foundation. Keep the surface glossy and the transitions clean, then let a few delicate flyaways soften the otherwise sculptural outline around the temples.
Begin with a secure high base, then divide the ponytail into evenly spaced sections. Use small elastics beneath each bubble and gently pull the hair outward until every segment reaches a rounded shape. Add padding or extensions if the natural length is not enough to wrap around the crown. A light wax can smooth the outer surface, but avoid heavy gel that makes the bubbles look stiff. Check the shape from the front and side before setting it. This style is best for occasions where you want a memorable silhouette, including costume parties, creative shoots, performances, or fashion-forward celebrations.
Graphic Zigzag Layers
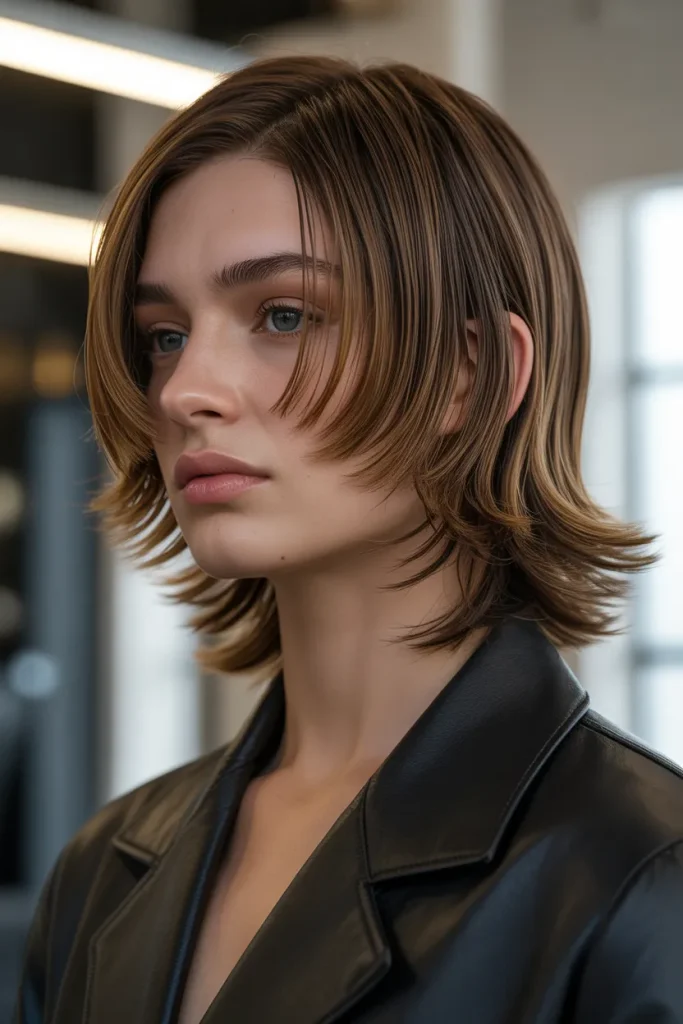
- Zigzag parting gives the haircut a strong Y2K influence.
- Staggered layers create movement at several levels.
- Medium length keeps the shape versatile.
- Graphic sections make bold color placement easy.
- Lightweight texture spray enhances separation.
- Works well with straight or softly wavy hair.
- The silhouette becomes especially striking in motion.
Graphic Zigzag Layers bring a sharper, more fashion-forward direction to playful hair. The irregular parting travels across the scalp before feeding into staggered layers that sit at different lengths. This creates a broken-up silhouette with movement around the cheeks, shoulders, and ends. The design nods toward Y2K styling without copying the flatter looks associated with that era. I’ve noticed that strong parting can completely change how layered hair photographs, particularly when light catches different planes. Keep the color dimensional rather than overly uniform if you want the layers to remain visible. The finished shape feels energetic, youthful, and intentionally unconventional.
Use a fine-tooth comb to map the zigzag section before styling the lengths, because the parting controls the entire visual rhythm. Blow-dry each layer in its natural direction, then add small bends with a flat iron if additional movement is needed. Avoid curling every section identically; varied bends make the staggered structure easier to see. For thicker hair, ask for internal weight removal so the layers do not become bulky. A dry texture spray can separate the ends without making them crunchy. Refresh the roots with a small amount of powder or mist when needed, especially after wearing hats or spending time outdoors.
Oversized Curl Puffs
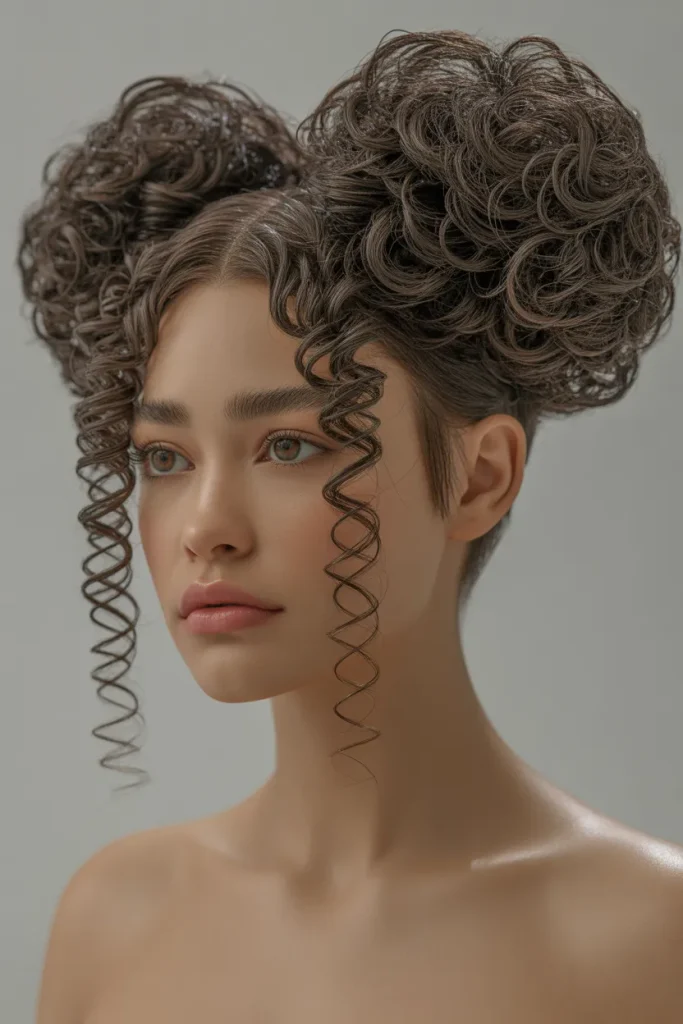
- Large puffs celebrate natural volume as the main feature.
- High placement creates a lifted facial silhouette.
- Rounded shapes feel playful without needing synthetic color.
- Natural curl definition keeps the texture visually rich.
- Moisture-focused preparation supports softer-looking volume.
- Works especially well for coily and tightly curled textures.
- Excellent for festivals, portraits, and expressive weekend styling.
Oversized Curl Puffs make natural texture the centerpiece by expanding the hair into two generous rounded shapes. The high placement lifts the overall silhouette while keeping the face open and expressive. Rather than forcing every curl into perfect definition, this version allows different curl sizes to create a rich, cloud-like surface. The result feels joyful, bold, and wonderfully tactile. I’ve noticed that natural volume often looks more intentional when the edges are controlled but the interior remains free. A clean hairline and carefully shaped puff bases provide enough structure to make the abundant texture feel polished instead of unfinished.
Prepare coily or tightly curled hair with moisture, then detangle gently using fingers or a wide-tooth comb. Create a clean center part and gather each side high enough to form balanced shapes without pulling excessively at the roots. Use a soft elastic or puff cuff, then expand the curls gradually with your fingers. If the texture needs extra definition, apply a small amount of curl cream to selected areas rather than coating everything. Mist the perimeter lightly to control frizz while preserving volume. Sleep with a satin covering and reshape the puffs gently the next day instead of completely restyling them from scratch.
Curved Fringe Flip
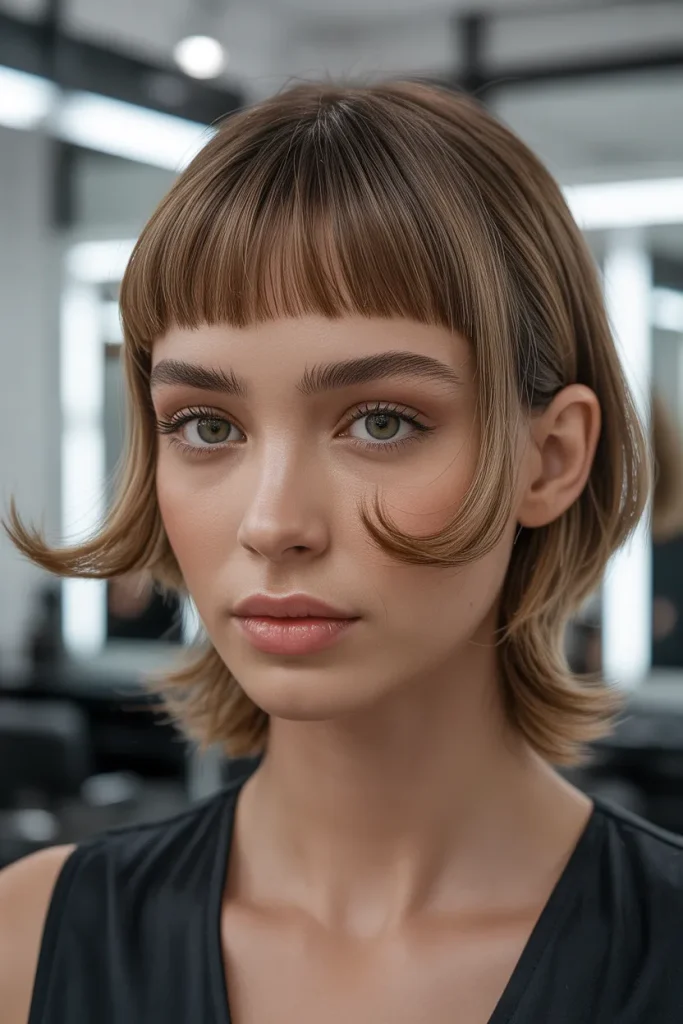
- The curved fringe creates an unusual focal point.
- Lifted ends reveal the eyebrows and eyes clearly.
- Short sides keep the overall shape crisp.
- Soft texture prevents the fringe from looking costume-heavy.
- A small round brush makes daily reshaping simple.
- Best for straight to lightly wavy textures.
- Particularly effective with strong eyeliner or statement accessories.
The Curved Fringe Flip makes the fringe the star by bending it outward instead of letting it fall across the forehead. The lifted arc reveals the brows and eyes while creating a playful graphic line above the face. Shorter surrounding layers keep the silhouette compact and modern. This approach feels theatrical without needing excessive accessories, making it an interesting choice for anyone who wants a statement haircut with a manageable footprint. In my experience, a slightly imperfect curve looks more contemporary than a perfectly rigid shape. Letting a few fine strands escape around the edges adds softness and keeps the result wearable.
Style the fringe while damp using a small round brush, directing the hair upward and slightly away from the forehead. Once dry, refine the curve with a low-temperature flat iron if necessary. Avoid overloading the area with product because weight can pull the fringe downward. A tiny amount of flexible wax can define the ends without making them greasy. If your forehead is narrow, keep the curve slightly higher and lighter. For wider foreheads, a broader arc can balance the proportions. Trim the fringe regularly because even a small amount of extra length can change the direction and personality of this sculpted shape.
Color Block Waves
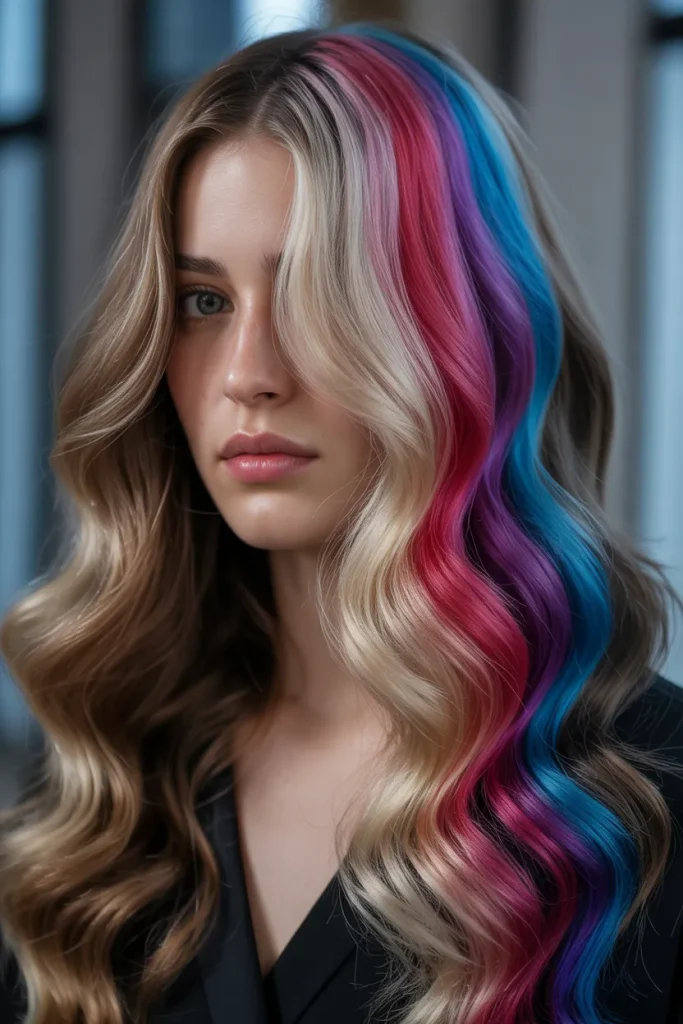
- Large color panels make flowing waves look graphic.
- Loose texture keeps the bold color approachable.
- Long length gives each block room to move.
- Contrasting shades emphasize the wave pattern.
- Root shading can make grow-out less demanding.
- Works with straight hair styled into waves.
- Ideal for parties, concerts, and creative portraits.
Color Block Waves combine a soft, glamorous texture with deliberately bold color placement. Instead of coloring tiny sections, larger panels travel through the waves so the shades appear and disappear as the hair moves. This creates a changing visual effect from different angles. The waves keep the overall style fluid, preventing the color from feeling too rigid. For a gentler interpretation, use related shades such as rose and berry; stronger combinations can include cyan and violet. The design works particularly well in photographs because the movement of the hair constantly reveals different blocks, giving each pose a slightly different composition and mood.
To style the waves, divide the hair according to the existing color placement before applying any heat. Use a large-barrel iron and alternate the curl direction so the finished texture remains relaxed. Brush through the lengths only after they have cooled completely. A lightweight oil can add shine to dry ends, but use it sparingly so the waves do not lose their bounce. If you are considering vivid color, ask your stylist about placement that complements your haircut and maintenance routine. Regular conditioning and gentle washing help preserve softness. A tinted conditioning product can also refresh fading between professional appointments.
Twisted Ear Wings
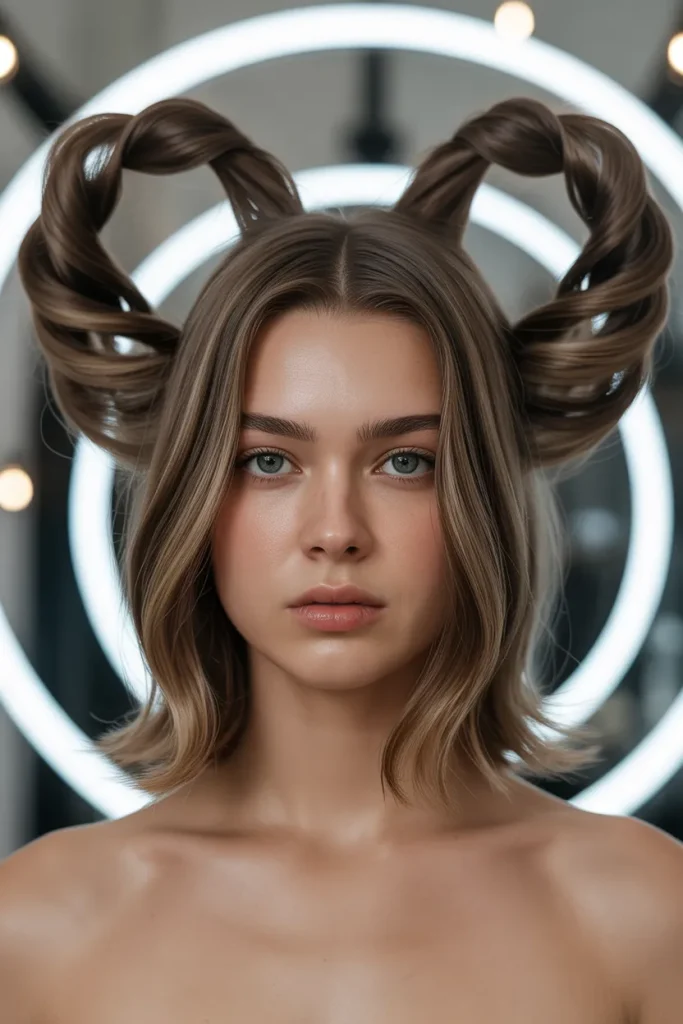
- Outward twists create a distinctive winged silhouette.
- The ears become a deliberate visual anchor.
- Smooth roots contrast beautifully with textured ends.
- Medium length provides enough structure without excess weight.
- Hidden pins keep the wings secure.
- Suitable for straight, wavy, and stretched textures.
- Strong choice for editorial portraits and evening events.
Twisted Ear Wings create an unusual silhouette by directing two sculpted sections outward from behind the ears. The shape resembles soft wings without relying on feathers or costume accessories. Sleek roots keep the design controlled, while the twists add enough texture to make the profile interesting. This style is especially effective from a three-quarter view because the extensions become visible without covering the face. I’ve noticed that unconventional silhouettes become easier to wear when the front remains clean. Keeping the forehead and cheeks open gives the exaggerated side shapes room to make their statement without competing with facial features or makeup.
Create a clean center or slightly offset part, then smooth the hair toward both ears. Take equal sections behind each ear and twist them firmly from the roots toward the ends. Pin each twist so it projects outward rather than falling backward. For longer hair, fold the ends underneath to create a rounded wing tip. A flexible styling cream can reduce stray strands while maintaining movement. Test the shape before adding strong spray because small adjustments can change the profile significantly. If the wings feel too heavy, reduce their width rather than tightening them against the scalp, preserving the intended sculptural effect.
Spiral Mohawk Lift
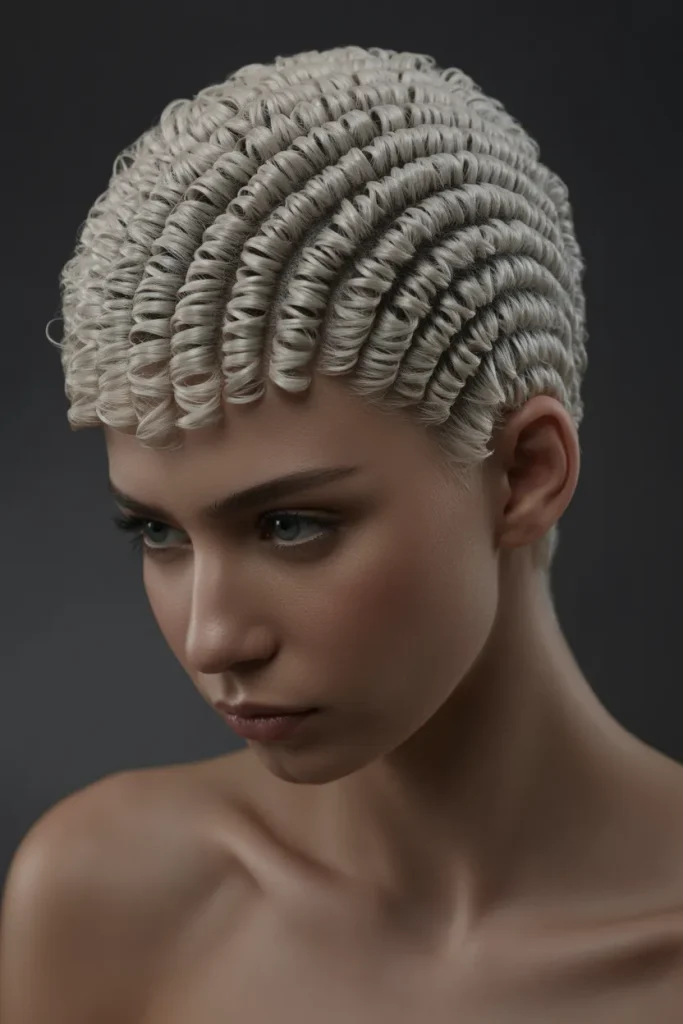
- Central volume creates a powerful vertical silhouette.
- Sleek sides make the spiral texture appear taller.
- The design suits short to medium lengths.
- Coils provide movement without loose hanging sections.
- Strong hold at the base supports longer wear.
- Can be adapted to natural curls or styled coils.
- Best for bold events and fashion photography.
The Spiral Mohawk Lift turns central texture into a dramatic vertical silhouette. A narrow line of coiled volume travels from the forehead toward the crown, while the sides remain close and controlled. This contrast makes the hairstyle look taller and more sculptural without requiring extreme length. The central section can be formed from natural curls, coils, or carefully created twists depending on the starting texture. I’ve seen this type of directional styling work particularly well when the sides are kept simple. The clean contrast gives the central texture enough visual authority to stand alone, creating an editorial finish without excessive decoration.
Begin by separating a central strip from the forehead to the crown, securing the side sections temporarily. Smooth the sides with a light styling cream or gel, then build the center using coils, twists, or defined curls. Work in small sections so the volume remains even from front to back. If your hair lacks sufficient height, discreet extensions can reinforce the center without changing the sides. Use flexible hold at the end rather than saturating the entire style. Refresh the center with a small amount of water and curl product on subsequent days, then reshape individual sections with your fingertips.
Ruffled Ribbon Pony
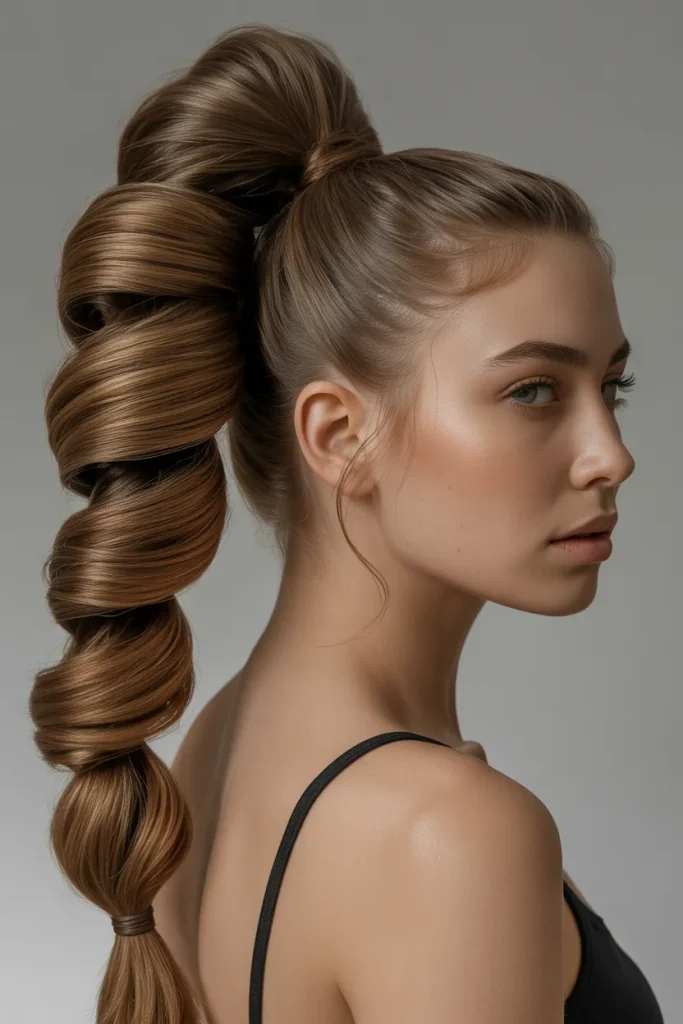
- Ribbon-like loops give the ponytail an architectural shape.
- High placement creates an instant lifted effect.
- Smooth roots contrast with the sculpted lengths.
- Long hair provides the strongest visual impact.
- Extensions can create fuller loops when needed.
- Flexible spray preserves shape without excessive stiffness.
- Works beautifully for parties, performances, and editorial shoots.
The Ruffled Ribbon Pony transforms a familiar high ponytail into a sculptural cascade of oversized loops. Instead of letting the length hang freely, selected sections curve outward and fold back like wide ribbons. The base stays sleek, creating a polished anchor for the exaggerated movement. This makes the style playful while still feeling deliberate and fashion-focused. A monochromatic hair color lets the structure take center stage, while subtle highlights can reveal each curved layer. The silhouette becomes especially striking from the side, where the loops create depth. It is an expressive option when you want drama without covering the face.
Start with a secure high ponytail and smooth the crown carefully before shaping the lengths. Divide the ponytail into several broad sections, then use a large barrel or flat iron to create controlled bends. Pin each loop at its base while it cools, allowing the shape to set before removing the temporary support. Longer hair usually creates fuller loops, while extensions can add density when necessary. Keep the bends rounded rather than sharply creased for a softer finish. Finish with flexible hairspray and inspect the back with a mirror. Small asymmetries can actually make the ribbons look more editorial and less mechanically arranged.
Metallic Texture Crop
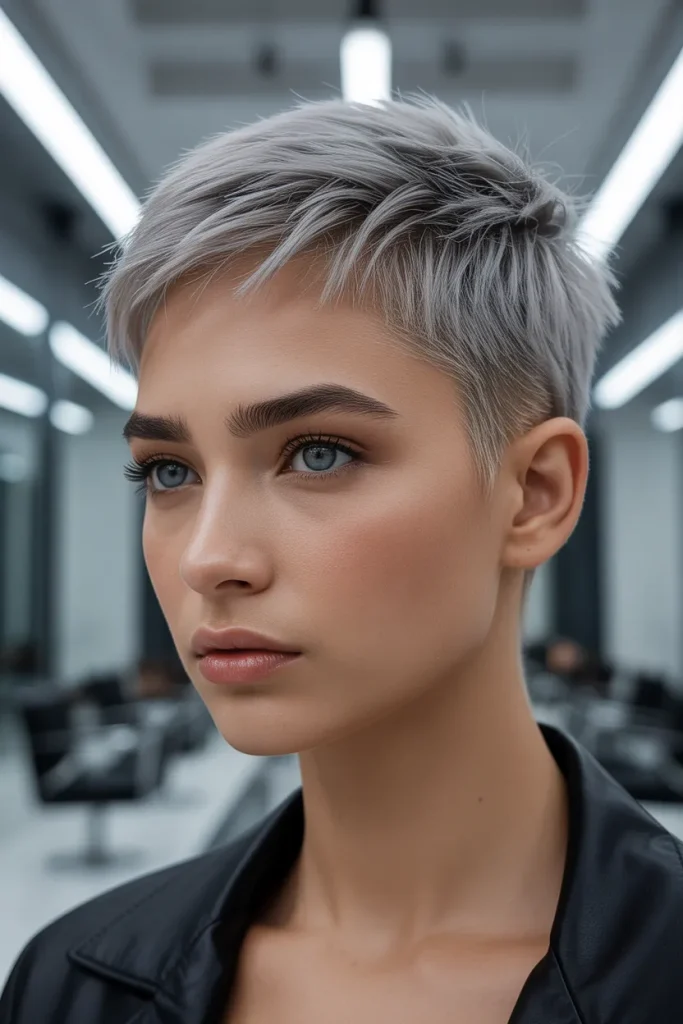
- Short layers create a sharp, lightweight silhouette.
- Metallic accents emphasize individual texture.
- Choppy ends keep the shape energetic.
- Minimal length makes daily washing and drying quicker.
- Styling paste helps separate selected sections.
- Works particularly well with straight or fine hair.
- The compact form suits futuristic editorial styling.
Metallic Texture Crop gives short hair an intentionally futuristic finish by combining separated layers with reflective surface accents. The haircut stays compact around the sides while the top gains irregular texture and direction. Instead of making the entire head shiny, place metallic product only on selected strands so the light catches movement without flattening the shape. Silver can create a cool editorial effect, while champagne or pearl tones offer a softer interpretation. The short length keeps the silhouette practical, but the uneven texture prevents it from feeling ordinary. It is especially effective when the haircut itself needs to carry the personality of the entire look.
Apply a small amount of matte styling paste through dry hair, concentrating on the crown and front. Pinch individual sections between your fingers to create separation, then use a tiny amount of reflective product on the chosen strands. Avoid coating the roots because excess shine there can reduce visible texture. Fine hair usually needs very little product, while thicker hair may require stronger paste for directional control. Refresh the shape by dampening the hands and reshaping the top rather than fully washing it each day. Regular trims are useful because short textured cuts lose their graphic definition quickly as the perimeter grows.
Velvet Clown Shag
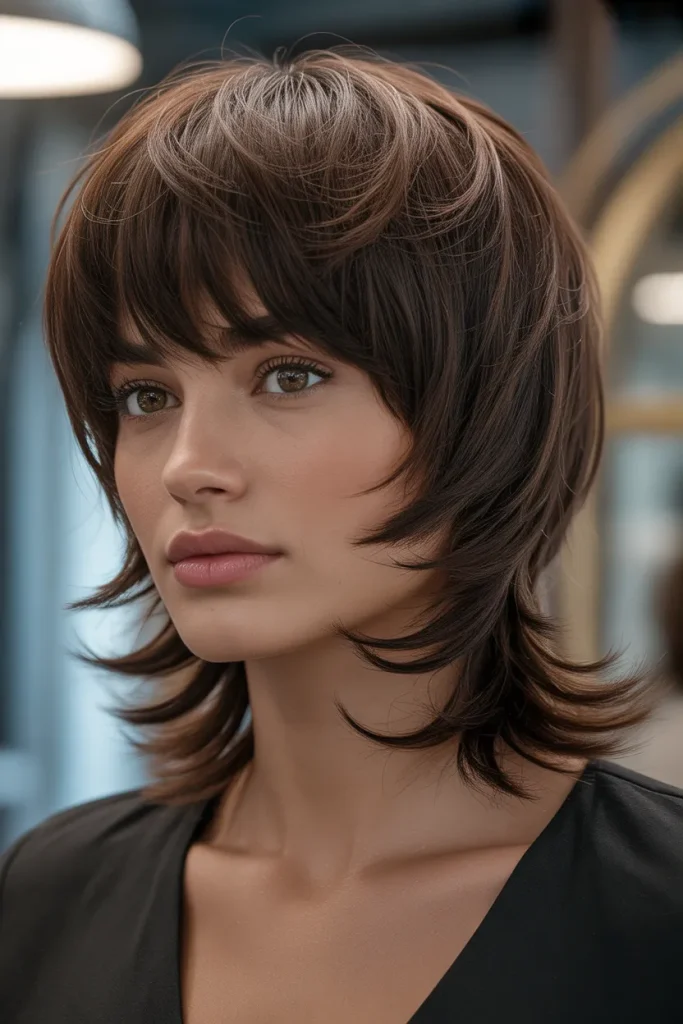
- Rounded layers create soft theatrical volume.
- Curtain fringe keeps the face framed naturally.
- Feathered ends provide movement without rigid structure.
- Plush color adds depth to the layered silhouette.
- Works especially well with medium-density hair.
- Texture spray enhances separation without heavy stiffness.
- Versatile enough for casual outfits or dressier styling.
Velvet Clown Shag blends theatrical volume with the relaxed movement of a modern shag. The crown stays rounded and full, while feathered layers taper toward the shoulders. A soft curtain fringe divides around the face, giving the exaggerated shape a more wearable entry point. The result feels dramatic without looking overly constructed because the ends move independently. I’ve noticed that shag-inspired cuts become more flattering when the crown and perimeter have clearly different weights. That contrast prevents the hairstyle from becoming one heavy mass. A deep, dimensional color can further emphasize the layers, especially under soft salon lighting or evening photography.
Style the crown with a medium round brush, lifting the roots while directing the ends slightly backward. Let the lower layers keep more natural movement so the haircut does not become too uniform. For wavy hair, enhance the existing bend with a lightweight cream instead of straightening first. Fine hair benefits from dry texture spray applied underneath the top layer, creating hidden support without visible buildup. If the fringe separates unevenly, adjust it while damp before using heat. This shag is forgiving between appointments because its layers are designed to move, making it a practical choice for people who enjoy texture but dislike highly precise daily styling.
Conclusion
Bold hair does not have to feel complicated to make a lasting impression. The ideas in this collection show how creative shapes, vivid color, exaggerated volume, and unexpected texture can transform an ordinary look into something memorable. The best clown hairstyles are not about following one formula; they are about choosing details that match your personality, hair texture, and occasion. I’ve seen how the right styling direction can completely change the energy of a look, especially when the structure is balanced with wearable details. Save this post to Pinterest for your next creative hair session, try the style that catches your eye, and share it with someone who loves expressive beauty. Your next standout look could be closer than you think.