15 Witch Hairstyles That Look Spooky and Stylish
Finding a Halloween-ready hairstyle can be tricky when you want something dramatic without looking like you are wearing a costume. This collection brings together modern ideas inspired by runway texture, glossy finishes, sculptural shapes, braids, curls, and unexpected details. You’ll find options for short cuts, long lengths, natural texture, sleek hair, and everything in between. Each look is designed to help you create a memorable silhouette while still feeling like yourself.
In my experience, the best statement hairstyles are the ones that work with your natural texture instead of fighting it. A little volume, strategic parting, or carefully placed accessory can completely change the mood. Whether you’re dressing up for Halloween, heading to a party, or simply want a darker seasonal aesthetic, these ideas make it easy to find a look worth saving and trying.
Moonlit Velvet Waves
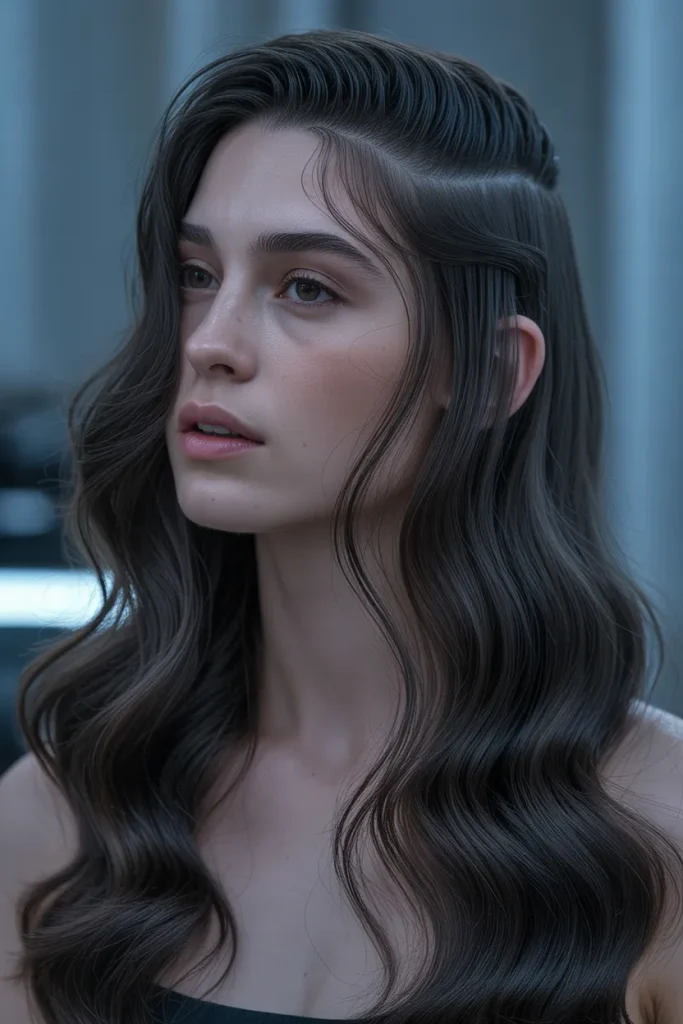
- Deep side part creates an instantly dramatic silhouette.
- Velvet waves add movement without looking overly polished.
- Subtle crown height elongates rounded or heart-shaped faces.
- Glossy bends photograph beautifully under low evening light.
- Works especially well on medium-to-long lengths.
- A flexible-hold spray keeps waves defined but touchable.
- Ideal for Halloween parties, dinners, and editorial events.
These moonlit waves turn long hair into something mysterious without making it feel costume-heavy. The deep side part shifts the silhouette dramatically, while broad bends create a soft, almost liquid finish. I’ve noticed that this shape looks especially striking when the ends remain slightly relaxed instead of curled tightly. That small change keeps the style modern and wearable. For everyday styling, create the waves with a large barrel and brush them gently after cooling. A tiny amount of lightweight shine serum can smooth flyaways without flattening the crown. The result feels polished enough for photos yet comfortable enough for several hours.
The beauty of this look is how easily its mood can change. Keep the waves glossy and controlled for an elegant evening outfit, or loosen them with your fingers for a more windswept finish. Fine hair benefits from root mousse before heat styling, while dense hair may need smaller sections to make the bends hold evenly. Avoid saturating the lengths with heavy oil because it can collapse the shape. A soft side fringe can also be added when more forehead framing is wanted. For maintenance, refresh only the front sections rather than restyling the entire head. This saves time while preserving the overall silhouette.
Thorned Crown Braid
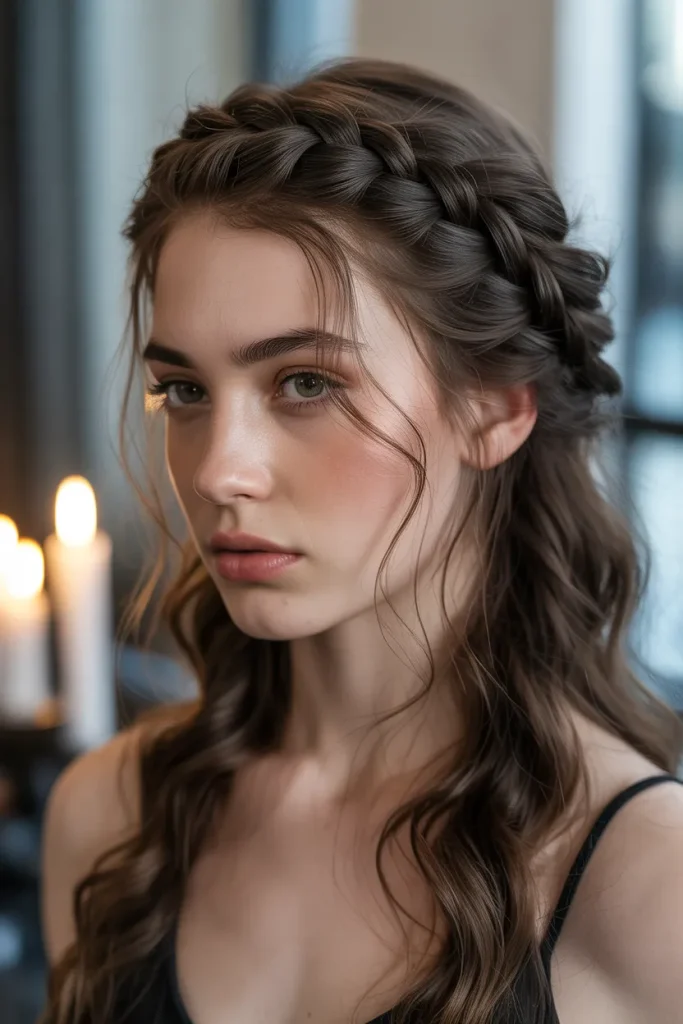
- The raised braid creates a crown-like architectural shape.
- Pancaked sections make the braid appear fuller and richer.
- Loose temple pieces soften the structured finish.
- Suits medium, thick, and extension-enhanced hair.
- Texturizing powder improves grip before braiding.
- The style stays secure during long evening events.
- Particularly effective with velvet, lace, or metallic outfits.
A crown braid becomes far more dramatic when its structure is deliberately loosened. Here, the braid sits high enough to resemble a thorned halo, but the edges remain soft and touchable. The contrast makes it one of those witch hairstyles that feels theatrical without looking like a costume-shop creation. For the fullest result, I’d prep the hair with dry texture spray before separating the sections. After braiding, gently pull the outer loops wider with your fingertips. That technique creates visual volume while keeping the braid recognizable. Small face-framing wisps prevent the crown from making the forehead area appear too severe.
This style is particularly useful when you want an elaborate look that does not require constantly checking your hair. Pinning the braid at several points distributes its weight, which helps prevent uncomfortable pulling around the scalp. If your hair is slippery, tiny clear elastics underneath the braid can provide extra security without changing the appearance. Medium-density hair can achieve the shape naturally, while finer hair may benefit from discreet extensions or a volumizing powder. For a softer interpretation, leave the braid slightly lower behind the ears. For a stronger editorial effect, place it closer to the crown and emphasize the lifted texture.
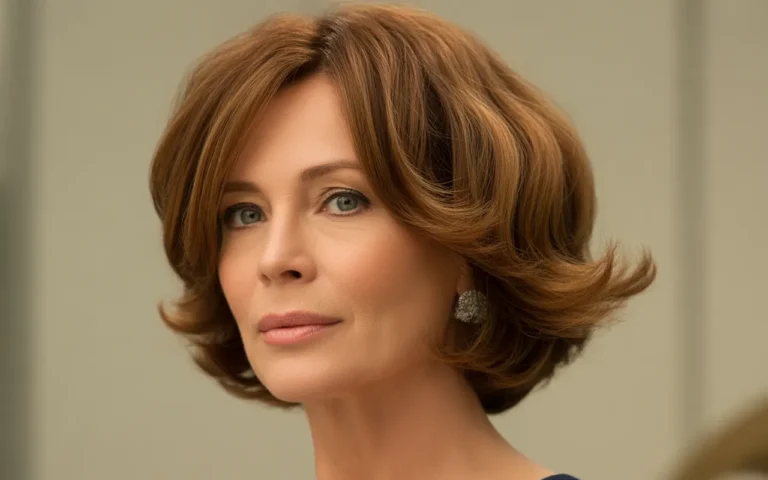
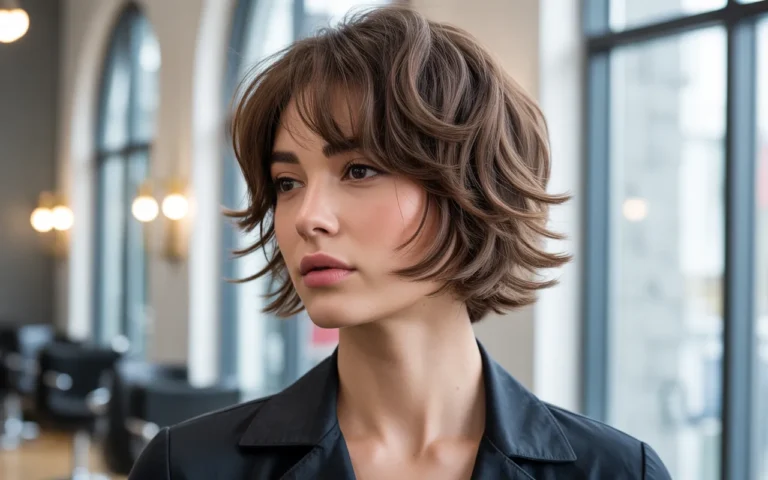
Spellbound Copper Shag
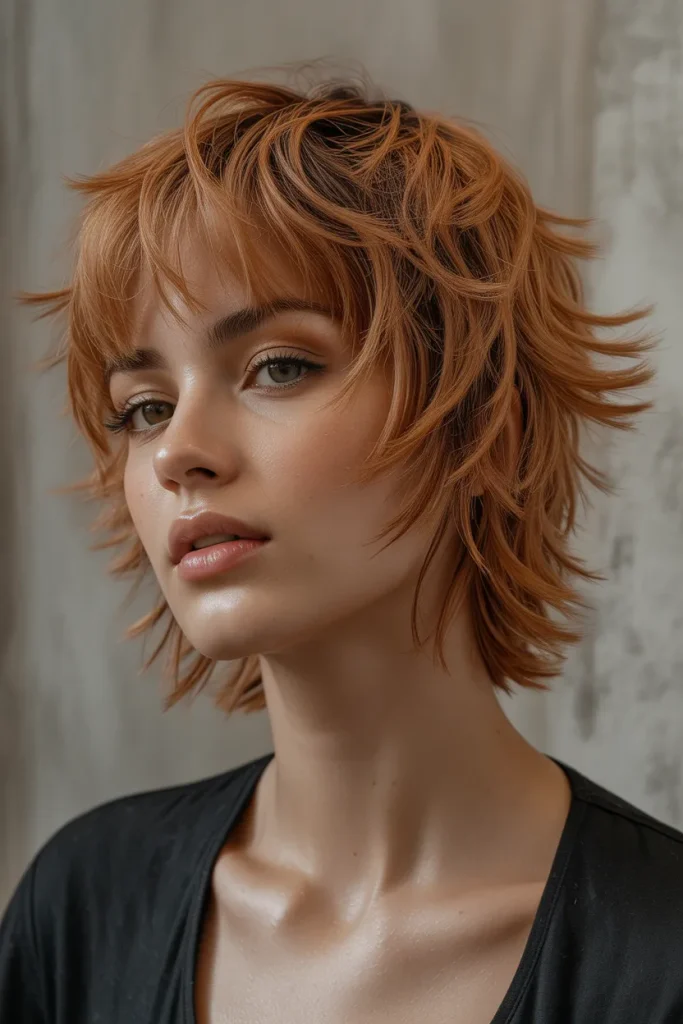
- Copper color gives the cut immediate warmth and character.
- Choppy layers create airy movement around the shoulders.
- Feathered fringe adds expressive forehead framing.
- Piecey ends prevent the shape from looking too heavy.
- Naturally wavy hair enhances the shag texture beautifully.
- Styling cream can define layers without stiffening them.
- Excellent for casual gatherings, concerts, and autumn events.
The spellbound copper shag relies on controlled messiness rather than perfect symmetry. Shorter layers around the crown create lift, while longer pieces skim the collarbone and swing when you move. The copper tone adds another dimension, especially when subtle lighter ribbons catch the light. I’ve seen shag cuts work best when the texture is encouraged instead of flattened with a brush. After washing, scrunch a lightweight curl cream through damp hair and let the layers dry naturally or diffuse them gently. Once dry, separate a few ends with your fingertips. That simple finish gives the haircut an editorial edge without making it look overworked.
The fringe can be customized considerably depending on how much forehead coverage you prefer. A shorter, feathered version feels playful, while a longer curtain-like fringe gives the haircut a more mysterious frame. Thick hair may need internal debulking so the layers do not become too dense around the cheeks. Fine hair can keep more weight through the bottom to preserve fullness. For maintenance, expect regular shaping around the fringe and crown because those areas define the haircut. Between washes, revive the texture with a small amount of water and styling cream. The copper color can then remain the visual centerpiece without excessive styling.
Midnight Bubble Pony
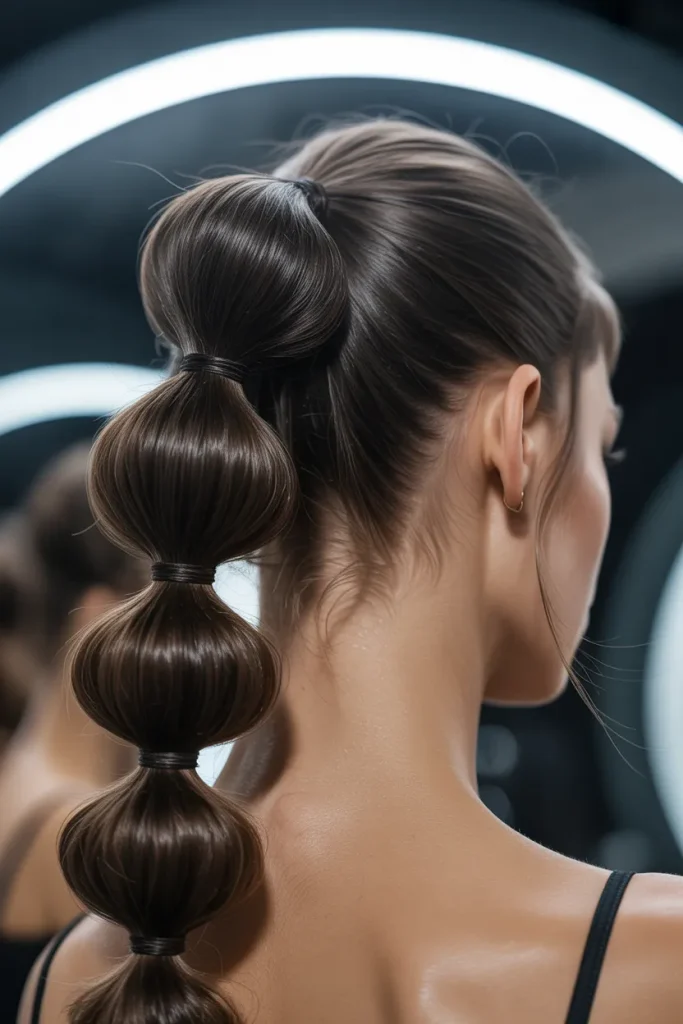
- Oversized bubbles create a futuristic silhouette.
- A clean center part keeps the design deliberately polished.
- Smooth sections contrast beautifully with soft wisps.
- Long straight or lightly waved hair suits the shape best.
- Lightweight gel controls flyaways without excessive stiffness.
- Hidden elastics can make the sections appear seamless.
- The pony works for parties, photoshoots, and night events.
The midnight bubble ponytail transforms a familiar pony into a graphic statement. Instead of several tiny bubbles, three large sections create a cleaner, more luxurious silhouette. The high placement opens the face and gives the overall shape a lifted appearance. I’ve noticed that the secret to keeping this style sophisticated is controlling the spacing between each bubble. Too many sections can make it look playful rather than editorial. Use small elastics that match the hair color, then gently expand each section from the center. A touch of serum on the lengths adds reflective shine while keeping the structure visually crisp.
This design also offers useful flexibility when your hair needs to look polished quickly. Start with a smooth blow-dry or flat-iron finish, then secure the pony at the desired height before forming the bubbles. If your hair is fine, backcomb each section very lightly before expanding it to create more fullness. Thick hair may need stronger elastics and slightly wider spacing. For a softer version, pull two narrow strands beside the ears and curl them loosely. The style holds especially well on second-day hair because natural texture improves grip. Remove the elastics gently afterward to avoid unnecessary tugging and preserve the lengths.
Raven Sculpted Pixie
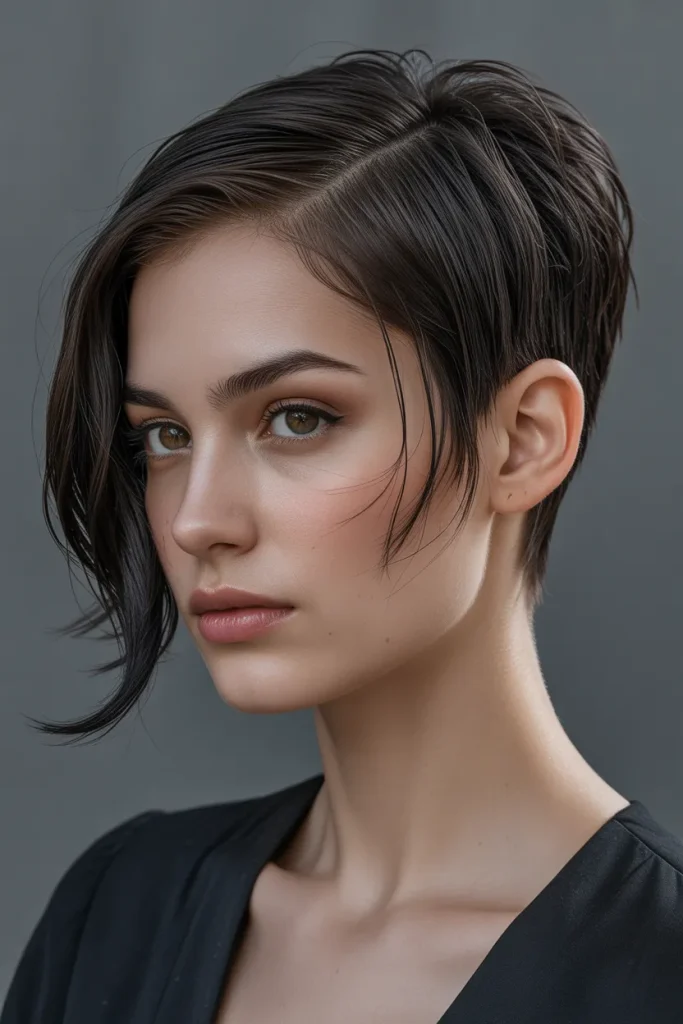
- Tapered sides make the crown appear fuller by contrast.
- Swept pieces create a sharp, directional silhouette.
- A subtle wet finish gives the cut modern drama.
- Ideal for naturally straight or relaxed short hair.
- Matte texture paste offers stronger separation than gel.
- The cut highlights cheekbones and earrings beautifully.
- Frequent shaping keeps the silhouette intentionally precise.
A sculpted pixie can feel surprisingly dramatic when the crown is given deliberate direction. This raven-black version keeps the sides neat while longer top pieces sweep diagonally across the head. The result is compact, sharp, and unmistakably editorial. Rather than coating the whole style in gel, I prefer using a small amount of styling paste through the crown. That allows individual pieces to remain visible and prevents the finish from becoming helmet-like. The dark color further emphasizes the haircut’s clean lines. It is a strong choice when you want your hairstyle itself to become the main accessory for an evening look.
The cut is also practical because its short length requires less drying time and can be reshaped quickly. After washing, direct the crown forward or sideways while blow-drying, depending on the desired movement. Fine hair can benefit from a root-lifting foam before drying, while coarse hair may respond better to a smoothing cream. The tapered sides should remain relatively clean so the crown maintains its visual impact. If you prefer softer styling, replace the sculpting paste with a lightweight cream and allow more natural separation. Statement earrings, dark lipstick, or a simple neckline can complement the silhouette without competing with it.
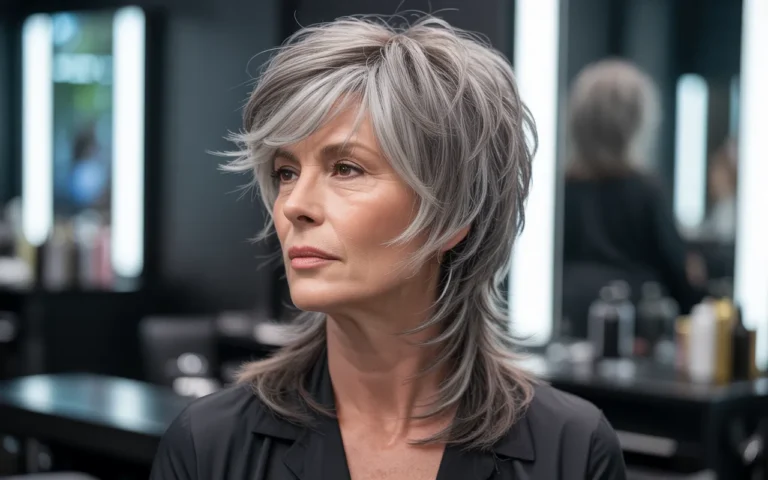
Silver Smoke Layers
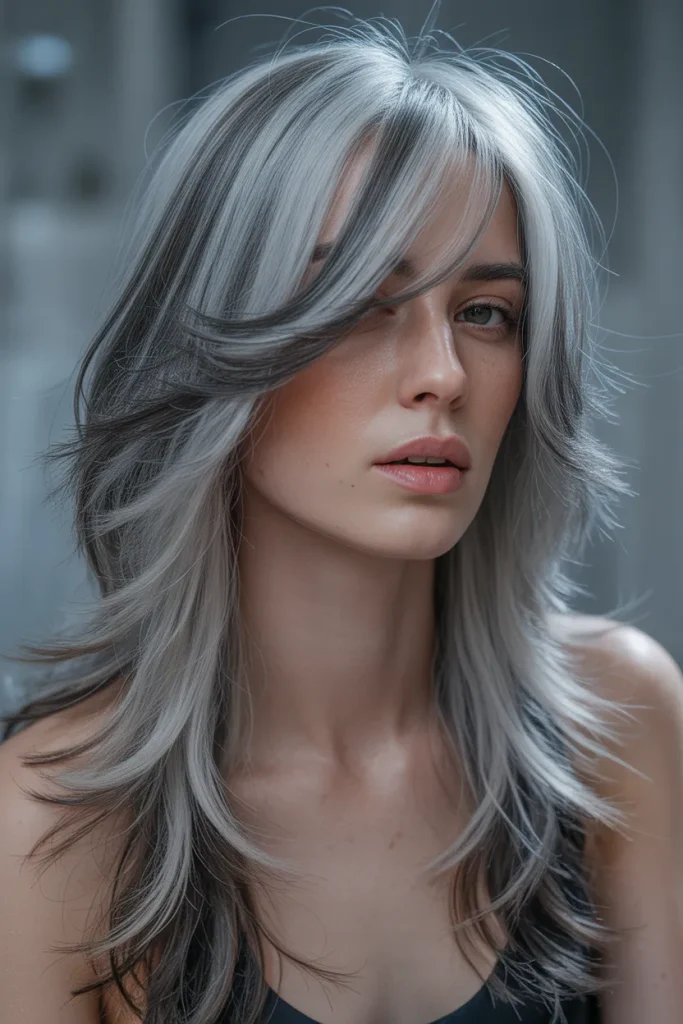
- Smoky silver tones create instant spectral dimension.
- Long layers prevent cool-toned hair from appearing flat.
- Feathered ends create movement around the shoulders.
- Curtain fringe adds balanced facial framing.
- Purple-free neutral toning keeps the shade sophisticated.
- Lightweight conditioner helps maintain soft, flexible movement.
- Beautiful for formal dinners, portraits, and winter events.
Silver layers create a softer interpretation of a mysterious aesthetic. Instead of relying on an extreme cut, the drama comes from tonal variation and feathered movement. The smoky gray shade appears deeper near the roots and gradually catches lighter reflections through the lengths. That dimensional approach helps the hair look richer in photographs. I’ve noticed that long layers are particularly useful with silver tones because they prevent a single block of color from dominating the face. A softly parted fringe also breaks up the front without hiding the eyes. The overall effect feels ethereal, polished, and surprisingly wearable outside seasonal celebrations.
Maintaining the finish requires more attention to tone than to complicated styling. Use a color-safe shampoo and avoid washing with very hot water, which can make treated hair feel rougher. A nourishing mask once a week can help the lengths remain flexible, especially when heat styling is frequent. When drying, direct the airflow downward to encourage a smoother surface. For a more dramatic evening version, create broad bends through the mid-lengths and leave the ends loose. If your natural texture is wavy, embrace it instead of forcing complete smoothness. The combination of silver dimension and movement is what gives this hairstyle its atmosphere.
Velvet Ribbon Pony
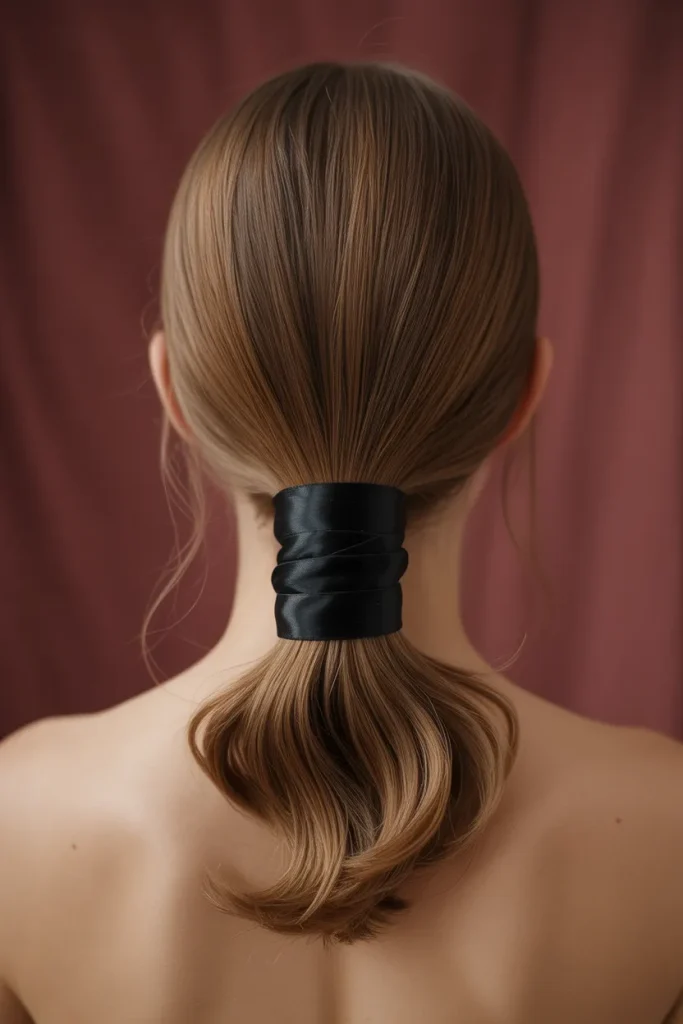
- The low placement creates understated, refined drama.
- Velvet introduces rich texture without adding visual clutter.
- A center part gives the silhouette contemporary precision.
- Curved ends soften an otherwise sleek finish.
- Works beautifully on straight and stretched hair.
- A smoothing brush helps create clean surface tension.
- Perfect for dinners, date nights, and winter celebrations.
The velvet ribbon pony proves that one carefully chosen detail can transform a simple hairstyle. The low ponytail stays smooth and understated, while the wide ribbon adds depth and a slightly gothic fashion mood. Keeping the ends gently curved prevents the style from feeling severe. I’ve found that low ponytails look especially polished when the hairline is clean but not overly lacquered. Use a fine brush and a small amount of flexible styling cream around the part and temples. Then secure the pony at the nape and wrap the ribbon firmly enough to hold without pulling. The finish is elegant, controlled, and unmistakably modern.
This hairstyle is easy to personalize because the accessory can change its entire character. A matte ribbon feels minimal and sophisticated, while a slightly sheer ribbon introduces a lighter romantic effect. If your hair is fine, tease the underside of the pony very lightly before wrapping it to add subtle fullness. For thick hair, use a strong elastic underneath so the ribbon remains decorative rather than structural. The style also works well with extensions when extra length is desired. Keep the ribbon positioned low and centered for a refined finish, or shift it slightly sideways for an asymmetrical editorial touch that photographs beautifully from behind.
Gothic Fishtail Halo
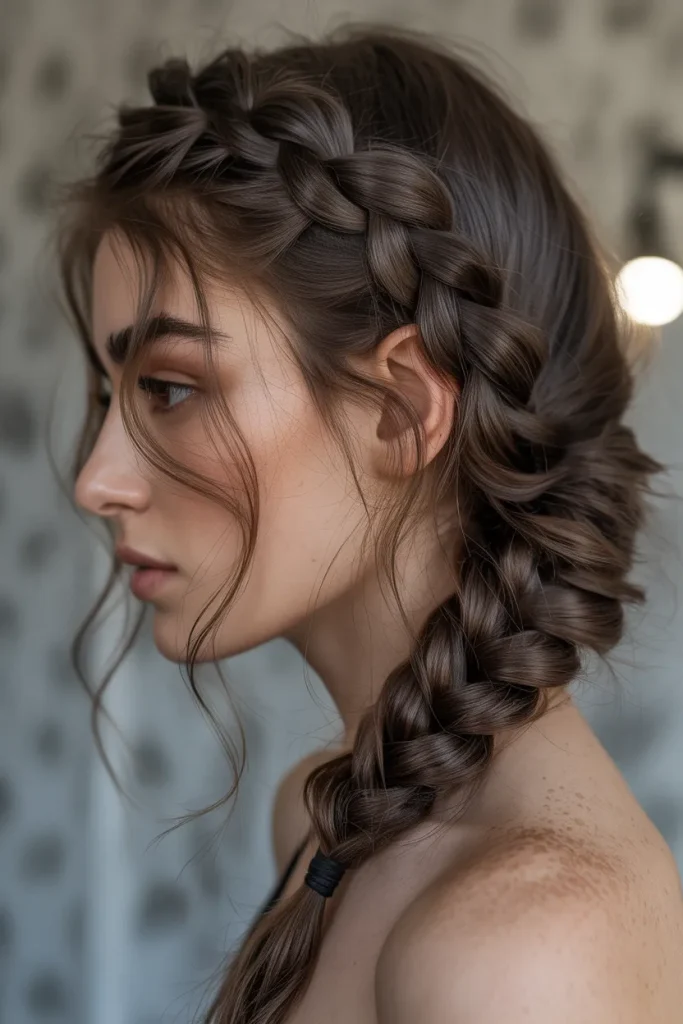
- Fishtail texture gives the halo intricate visual depth.
- The wrapped placement creates a romantic crown effect.
- Loosened edges keep the braid modern rather than formal.
- Works well with medium-to-long thick hair.
- Fine hair can use discreet extensions for fullness.
- Texturizing spray improves grip before braiding.
- Especially striking with high-neck or flowing outfits.
The gothic fishtail halo combines intricate texture with a softer silhouette. The braid is wrapped around the crown rather than pulled tightly across the forehead, leaving enough space to keep the face open. Gently loosened sections make the pattern appear fuller and more tactile. In my experience, braids photograph best when their texture is slightly exaggerated, because tiny details can disappear under studio lighting. Begin with dry texture spray, create a loose fishtail braid, then pancake the outer edges before pinning it around the head. Leave a few narrow strands near the temples for movement and a naturally imperfect finish.
The halo can also be adapted for different hair densities. Thick hair usually provides enough material to build a substantial braid, while fine hair can achieve similar visual weight by adding a matching braid extension. Secure the halo with pins placed underneath the braid so they remain hidden from most angles. If the style feels too symmetrical, gently shift the braid toward one side before pinning. For a cleaner formal finish, smooth the temple area and tuck every loose strand. For a softer party look, keep the perimeter slightly airy. A light mist of flexible hairspray should provide control without making the braid rigid.
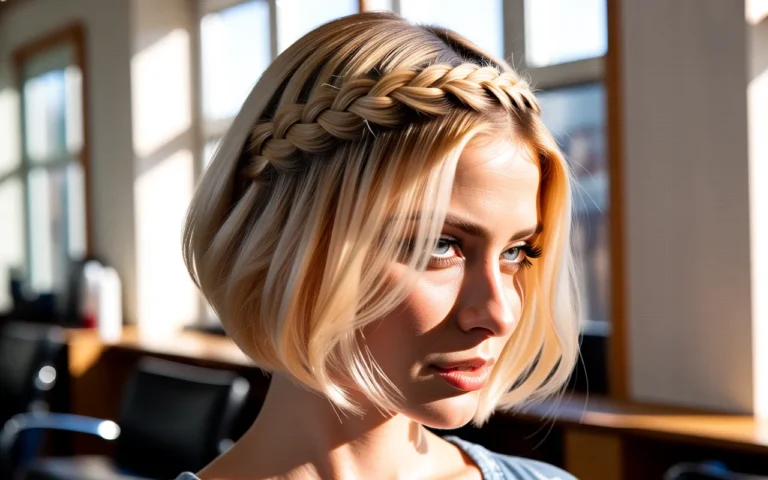
Witchy Wispy Bob
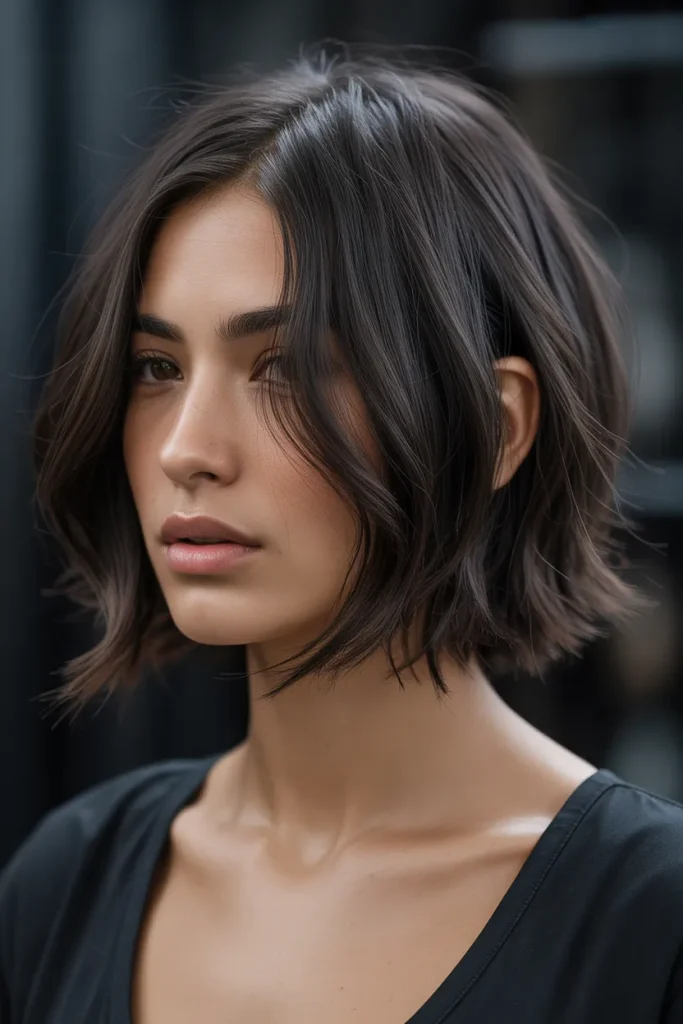
- Chin length makes the silhouette sharp and memorable.
- Wispy ends add movement without requiring heavy layering.
- A deep part creates an asymmetrical editorial mood.
- Subtle crown lift prevents the bob from looking flat.
- Suits straight, lightly wavy, and fine-to-medium hair.
- Texture spray helps separate the ends naturally.
- Easy to restyle for daytime or evening wear.
The witchy wispy bob keeps the classic bob shape but removes its polished uniformity. The chin-length perimeter stays recognizable, while uneven ends create a slightly untamed finish. A deep side part adds asymmetry and shifts attention toward the eyes and cheekbones. I’ve noticed that this type of bob looks strongest when the ends are separated rather than curled into obvious pieces. After drying, use a small amount of texture paste between your fingertips and pinch only the lower sections. That technique keeps the roots smooth while giving the perimeter enough irregular movement to feel current and editorial.
The haircut is especially practical for anyone who wants strong visual impact without a long styling routine. On straight hair, a quick pass with a flat iron can create a clean base before the ends are textured. On naturally wavy hair, air-drying can produce a more relaxed shape. If your hair is thick, subtle internal layering can reduce bulk without sacrificing the blunt impression. Fine hair should retain enough weight at the perimeter to avoid looking sparse. Refresh the style between washes with dry texture spray, then reshape the part using your fingers. The result remains intentionally imperfect instead of messy.
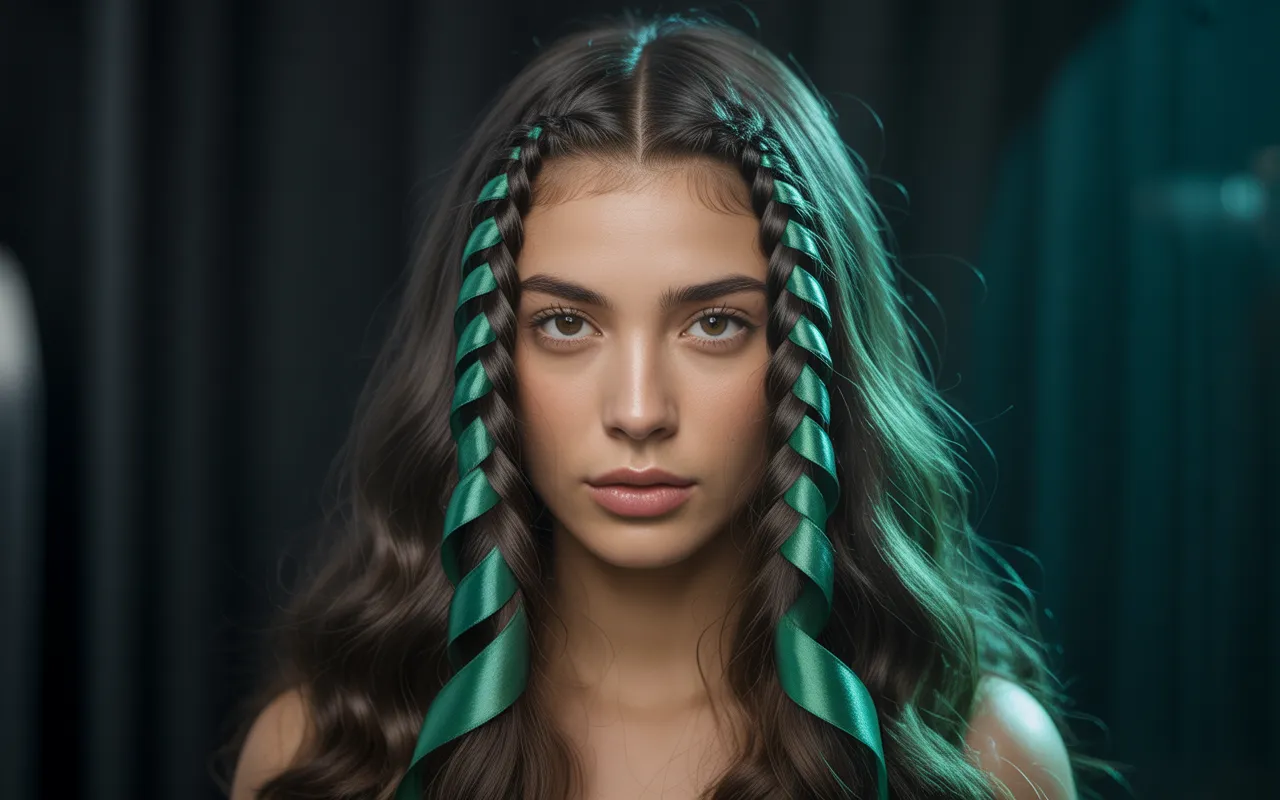
Emerald Ribbon Braids
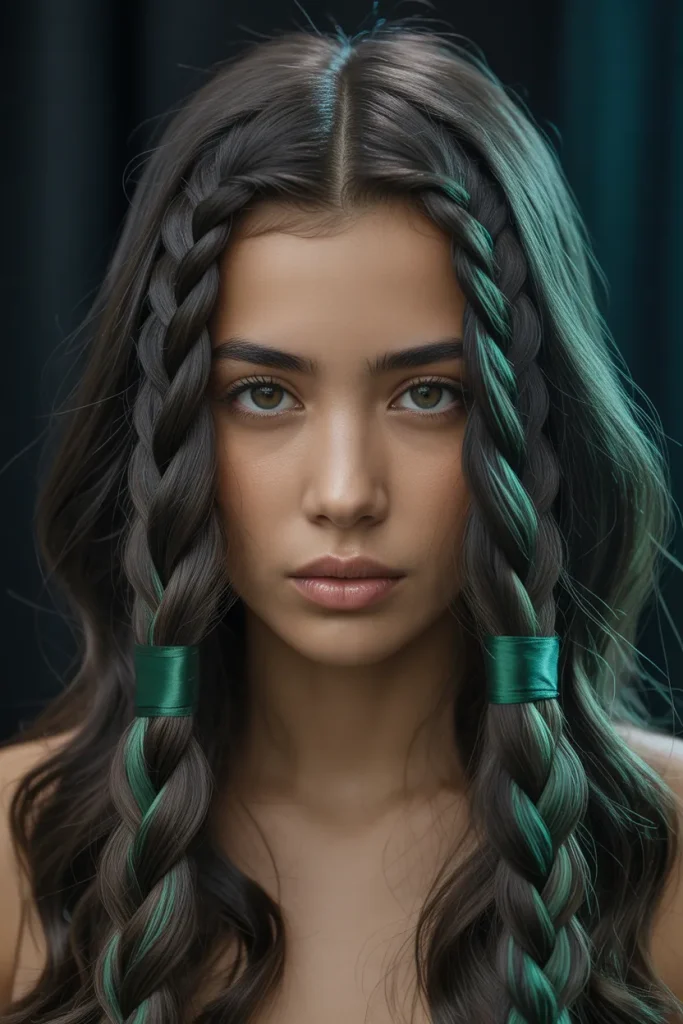
- Satin ribbon introduces controlled color without permanent dye.
- Two braids create a balanced graphic silhouette.
- Fine weaving keeps the look delicate rather than bulky.
- Dark hair provides strong contrast for jewel-toned accents.
- Works especially well with long straight hair.
- Small ribbons are easier to secure than wide strips.
- Great for concerts, parties, portraits, and themed events.
Emerald ribbon braids bring a jewel-toned detail into a dark hairstyle without requiring a permanent color change. Two narrow braids frame the face symmetrically, while thin satin ribbons are woven through selected sections. The contrast feels contemporary because the decoration remains precise instead of overwhelming the hair. For clean results, I recommend using a rat-tail comb to establish the center part before braiding. Keep the tension even from root to end, then gently loosen the braid slightly so it does not look too rigid. The ribbon should remain visible in small flashes, creating movement whenever the hair catches light.
The technique is flexible enough for different hair lengths and textures. If your hair is shoulder-length, stop the braids around the jaw or collarbone and secure them with tiny elastics. Longer hair allows the ribbons to travel farther through the lengths, creating a stronger graphic effect. Curly hair can also work beautifully if the braid sections are stretched gently beforehand. Avoid making the ribbon too thick because it can overpower the braid pattern. For an understated version, use one narrow ribbon per side. For a more editorial result, combine two closely related jewel tones while keeping the rest of the hair natural.
Crescent Claw Twist
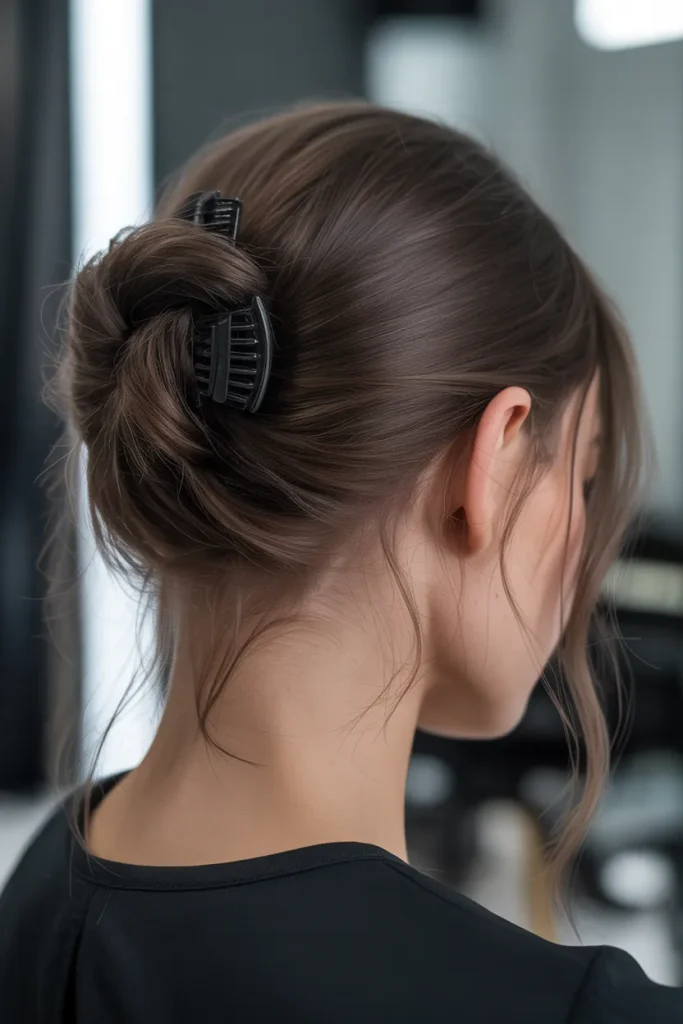
- The crescent shape gives a familiar twist a sculptural update.
- A claw clip makes the style quick to create.
- Loose front pieces keep the silhouette relaxed.
- Medium-to-long hair provides enough length for volume.
- Thick hair benefits from an oversized strong clip.
- Fine hair can use texture spray for added grip.
- Ideal for casual evenings, dinners, and creative workdays.
The crescent claw twist turns a practical updo into a sculptural statement. Instead of twisting the hair into a compact vertical roll, the length curves outward before being secured, creating a crescent silhouette at the back. This shape feels modern because it has visible architecture without requiring elaborate braiding. I’ve found that second-day hair often works particularly well here because a little natural texture prevents the twist from sliding apart. Start with a loose middle part, gather the lengths low, twist upward, then curve the ends sideways before securing them with a strong claw clip.
The clip itself becomes part of the design, so choose a shape that complements rather than hides the structure. A matte black crescent clip creates a minimalist finish, while a translucent or metallic clip can make the hairstyle feel more futuristic. If your hair is fine, roughen the inner lengths lightly with texture spray before twisting. Thick hair may need two smaller clips placed underneath for stability. Leave narrow pieces beside the cheekbones if you want a softer frame. The style can be worn slightly loose for daytime or tightened closer to the head for a cleaner evening silhouette that pairs well with statement jewelry.
Black Orchid Curls
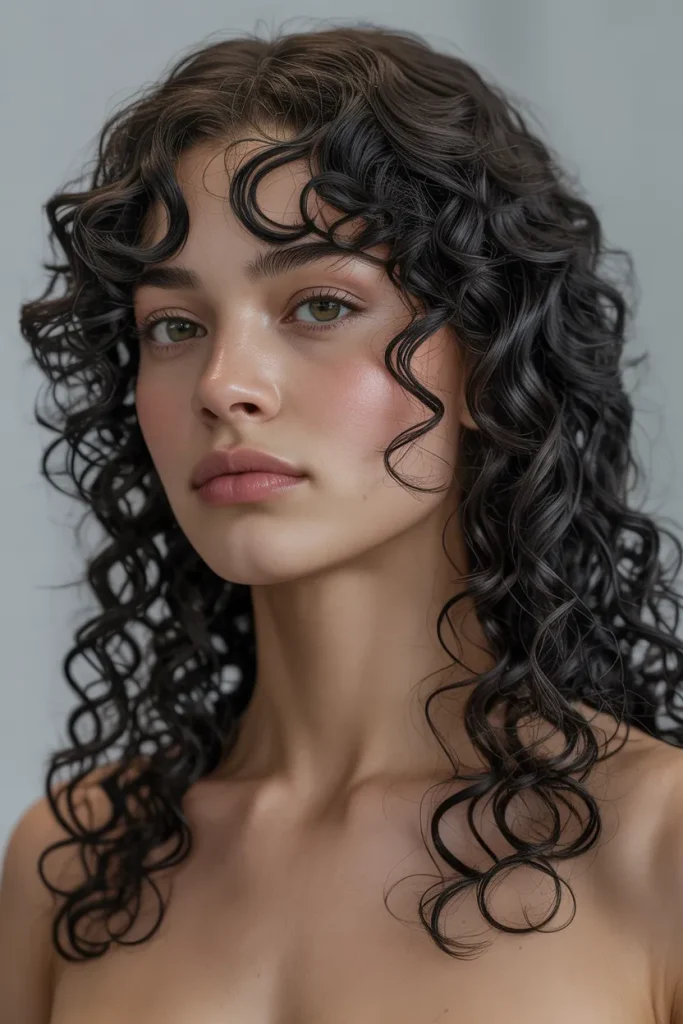
- Rounded volume creates a dramatic botanical-inspired silhouette.
- Defined curls remain soft instead of looking crunchy.
- Side volume gives the shape a romantic asymmetry.
- Works beautifully with naturally curly or coily hair.
- Curl cream plus lightweight gel supports definition.
- Satin protection helps preserve the shape overnight.
- Ideal for celebrations, portraits, and evening occasions.
Black orchid curls focus on shape as much as definition. The curls are allowed to build a rounded silhouette, while one side carries slightly more volume for an asymmetrical botanical feel. Instead of separating every curl aggressively, keep small groups together so the texture looks richer and more natural. I’ve noticed that defined curls usually look more expensive when the surface retains softness and movement. Apply curl cream to soaking-wet sections, follow with a light gel, then diffuse gently without repeatedly touching the hair. Once completely dry, lift the roots with fingertips and separate only the curls that need extra shape.
The rounded silhouette can be adjusted depending on your natural curl pattern. Tighter coils may need more stretching at the roots to create the desired height, while looser curls can achieve the shape with less manipulation. If the sides become too wide, use a few hidden pins underneath rather than brushing the surface. At night, protect the curls with a satin bonnet or loose pineapple technique, depending on length. The next morning, refresh flattened areas with a little water and curl cream. Avoid soaking the entire head again unless necessary, because targeted refreshing usually preserves definition while reducing drying time and product buildup.
Bewitched Wet Look
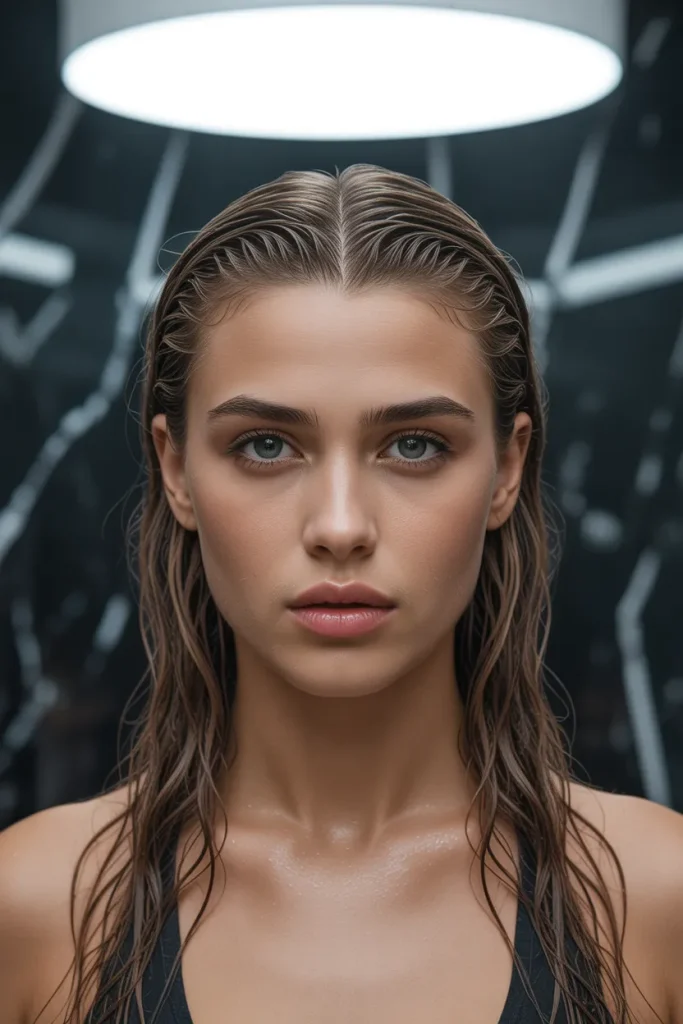
- The slick surface creates instant runway-level drama.
- A clean center part keeps the finish sophisticated.
- Loose lengths prevent the style from appearing helmet-like.
- Best suited to straight, wavy, or stretched hair.
- Strong-hold gel creates structure while serum adds shine.
- Works especially well with minimal makeup and jewelry.
- Perfect for evening events, fashion parties, and photography.
The wet-look finish creates drama through shine and direction rather than complicated construction. Hair is combed close to the head from a precise center part, while the lengths remain loose behind the shoulders. That contrast makes the style feel more editorial than simply slicked back. To avoid a greasy appearance, I recommend layering products carefully: use a small amount of smoothing cream first, then add strong-hold gel where control is needed. Comb everything backward with deliberate strokes and leave the ends natural. The result catches light beautifully while maintaining enough movement to look intentional rather than stiff.
This hairstyle is especially useful when you want to make a statement with minimal accessories. It works with a dramatic dress but also looks striking with a simple black outfit because the reflective surface becomes the focal point. Fine hair may need less product than expected, while thick hair benefits from sectioning and stronger hold near the crown. Avoid applying large amounts of gel directly at once; building the finish gradually gives better control. If you dislike a completely wet appearance, concentrate shine around the part and crown while leaving the lengths softer. This creates a modern contrast between sculpted roots and touchable ends.
Crimson Micro Fringe
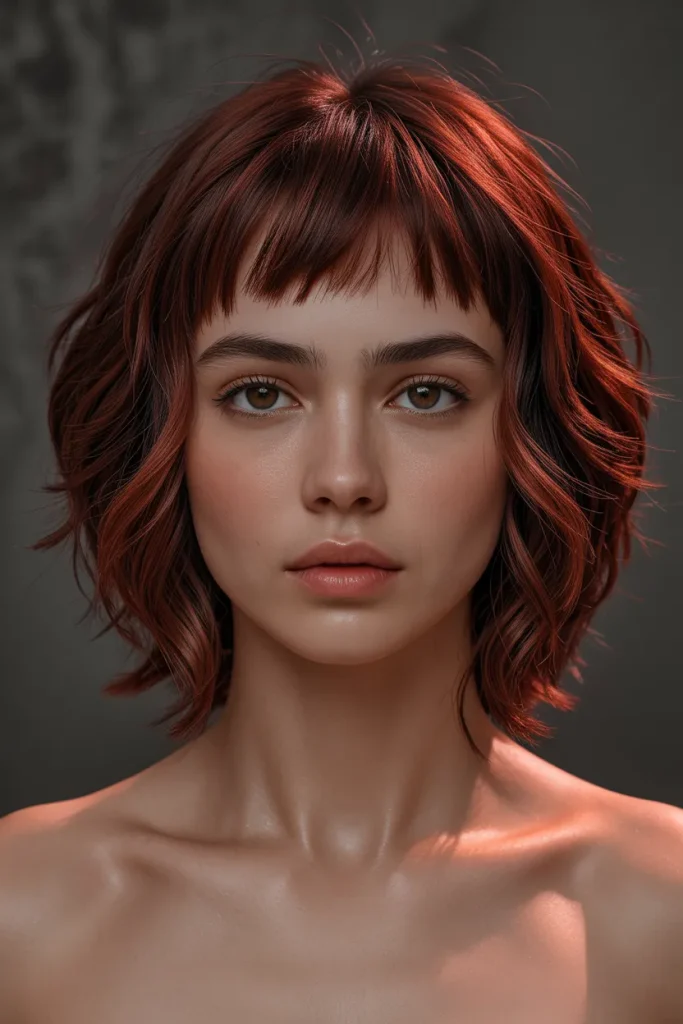
- The micro fringe creates an immediate editorial focal point.
- Dark crimson adds depth without becoming overly bright.
- Tousled layers soften the graphic forehead line.
- Shoulder length keeps the cut versatile.
- Straight or softly textured hair suits the silhouette.
- Lightweight wax can separate the ends precisely.
- Regular fringe trims preserve the defining shape.
A crimson micro fringe changes the entire personality of a shoulder-length cut. The short fringe creates a strong horizontal detail across the forehead, while softly tousled layers keep the rest of the hairstyle approachable. The dark red color adds depth that becomes more visible as the hair moves under light. I’ve noticed that micro fringes look most flattering when the surrounding haircut has enough softness to balance their precision. Style the fringe with a small round brush, directing it slightly forward, then use minimal wax through the ends. Keep the lengths loose and textured so the overall result feels fashionable rather than overly formal.
Because the fringe is the defining feature, maintenance should focus there. A small trim every few weeks can keep the length intentional, especially if your hair grows quickly. If you are unsure about committing to a very short fringe, ask for a slightly longer version that can be swept aside while you test the shape. The crimson tone can also be adjusted from deep wine to brighter ruby depending on your preferred intensity. For fine hair, preserve fullness through the ends instead of adding excessive layers. For thicker hair, subtle internal shaping can reduce weight while keeping the outer silhouette clean.
Shadow Layered Pony
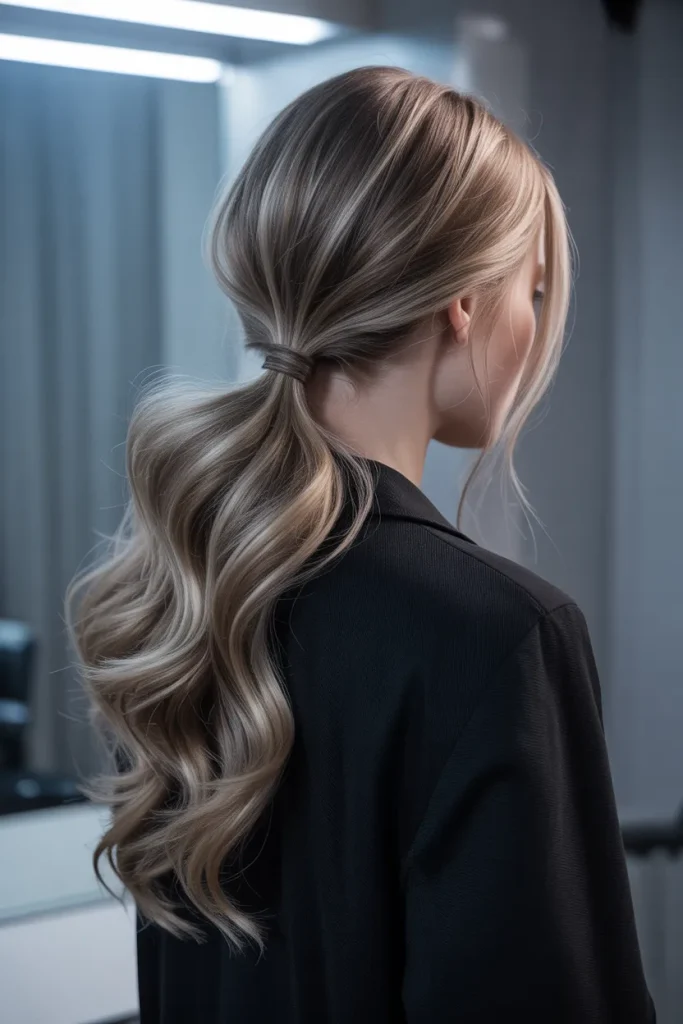
- Cascading layers create visible movement from crown to ends.
- Shadowed roots give the pony more dimensional depth.
- An off-center part creates subtle asymmetry.
- Long layers suit straight, wavy, and blow-dried textures.
- Root powder can provide extra lift without heaviness.
- Curved ends soften the dramatic vertical shape.
- Excellent for portraits, celebrations, and evening styling.
The shadow layered ponytail creates drama through length, lift, and controlled movement. A deep off-center part leads into a raised crown before the hair gathers into a long ponytail. The layered ends fall in different lengths, giving the silhouette a cascading quality instead of one solid block. I’ve noticed that this shape photographs particularly well from behind because every layer catches light differently. For styling, build root volume with a round brush, secure the pony slightly above the nape, then curl only the outer sections. Brush through the curls afterward so they become soft bends rather than obvious ringlets.
The layered construction also makes the ponytail adaptable to different textures. Naturally wavy hair can embrace its movement, while straight hair can use large rollers or a wide barrel to create gentle bends. Fine hair may benefit from discreet clip-in pieces if you want substantial length and density. Thick hair can be divided into two stacked ponytails underneath one another for better support without changing the visible shape. Keep the top smooth but avoid flattening the crown completely. A small amount of flexible spray through the layers helps control flyaways while allowing the ends to move naturally whenever you walk or turn.
Conclusion
From glossy bobs and sculpted pixies to dramatic braids, dimensional curls, and statement ponytails, these witch hairstyles offer plenty of ways to make your look feel mysterious and modern. The biggest transformation often comes from small choices: changing your part, adding texture, shaping the silhouette, or introducing one unexpected detail.
I’ve seen how the right hairstyle can completely change the mood of an outfit, especially when the hair feels comfortable as well as striking. Choose the idea that fits your length, texture, and occasion, then personalize it until it feels like your own. Save this post on Pinterest so you can revisit your favorites, try a new look when inspiration hits, and share it with someone who loves a little spooky style. Your next unforgettable hairstyle may be one save away.